


3
4
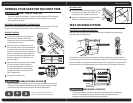
Opening Your Safe For The First Time Test Locking System
OPENING YOUR SAFE FOR THE FIRST TIME
IMPORTANT
FIRST TIME ACTIVATION
Your safe is ready for activation. To open the safe and prevent it from locking
before completing the rst-time activation, a solenoid deactivation safety
device has been installed.
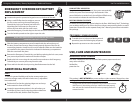
BATTERIES AND EMERGENCY OVERRIDE KEYS
Remove four (4) AA batteries and two (2) Emergency Override Keys. They are
located in the protective styrofoam insert at the top of the box.
USER ACTIVATION
Install Batteries
1
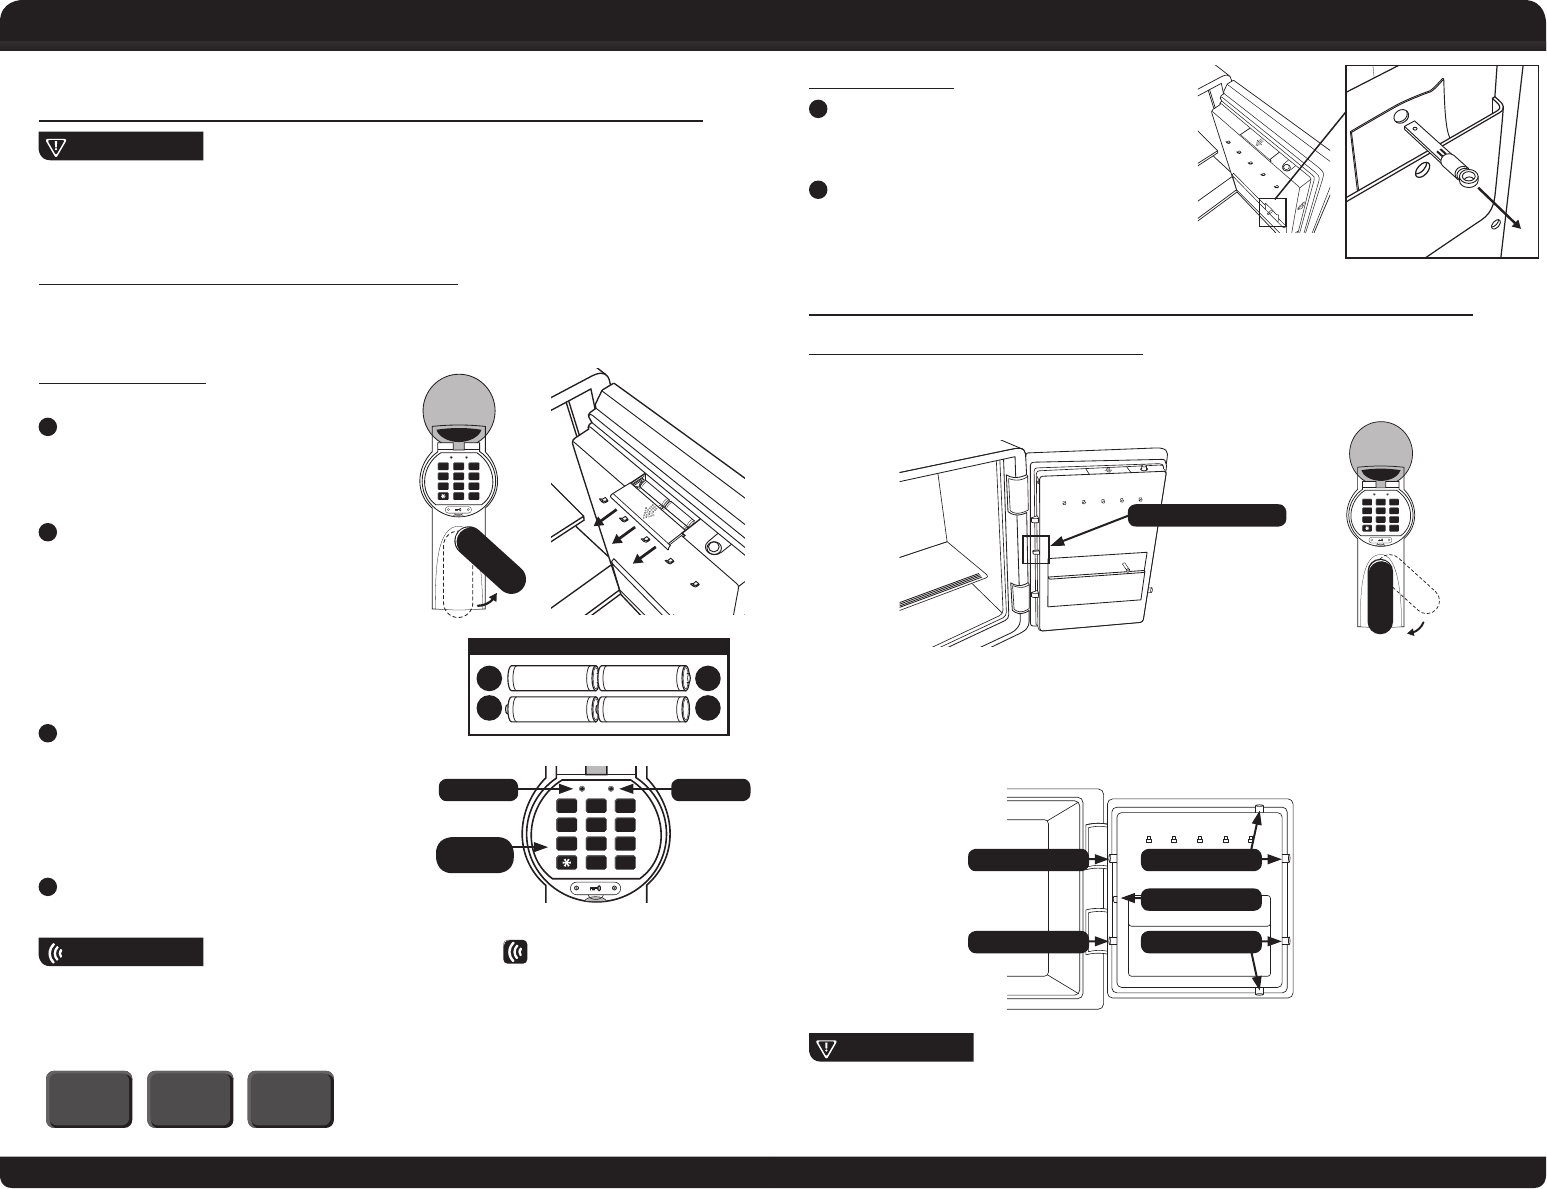
Turn handle upwards to the right and
pull open the safe door. Note: This
waterproof safe may require additional
force upon initial entry.
2
Slide the battery compartment cover
forward and remove. The compartment
is located inside the safe at the top of
the door. Install the four (4) AA batteries.
Make sure the batteries are installed in
the proper direction as indicated in the
battery compartment. Slide the cover
back into place.
3
After the batteries are correctly installed,
the red and green lights located at
the top of the keypad on the front of
the safe will blink twice, the keypad
backlight will ash once and you will
hear a single beep.
4
Proceed to Activate Lock.
IMPORTANT
ENABLE/DISABLE SOUND
Once the batteries are installed, if you do not hear a beep when entering the
factory pre-set passcode or during the personal passcode re-programming
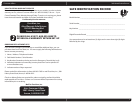
process, enter the following key sequence into the digital keypad:
#
*
#
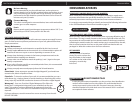
ACTIVATE LOCK
1
Locate the small plastic Locking Pin on the
inside of the safe door. Grip and pull out
completely then dispose of properly.
2
Leave the safe door open and proceed to
Electronic Locking System Test.
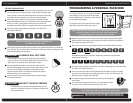
TEST LOCKING SYSTEM
ELECTRONIC LOCKING SYSTEM TEST
With the door still open, you can test the Electronic Digital Lock by manually
activating the Locking System.
To activate the Locking System, locate the locking push button on the inside of
the safe door, push it in and turn the handle to the left. This will cause the live door
bolts to extend out and into the locked position. Now with the door open and the
live door bolts in the locked position, you may proceed to Testing the Passcode.
IMPORTANT
ENGAGING LIVE BOLTS
Closing the safe door with the Live Bolts in the locked position can damage
the safe. The locking push button should only be used when testing or
programming the safe with the door remaining open.
1
4
7
2
5
8
0
3
6
9
#
1
4
7
2
5
8
0
3
6
9
#
BATTERY CONFIGURATION
–
+
+
–
1
4
7
2
5
8
0
3
6
9
#
Green Light
Keypad
Backlight
Red Light
RECORD PROTECTION EQUIPMENT
AS TO FIRE RESISTANCE RATING:
CLASS 350 - 1 HR.
NO BG-123,456
PL-12345
This will turn the sound on. Repeat the
process if you want the sound turned o.
1
4
7
2
5
8
0
3
6
9
#
1
4
7
2
5
8
0
3
6
9
#
Locking Push Button
Locking Push Button
Extended Live BoltsDead Bolt
Dead Bolt Extended Live Bolts