


3
754748-100 Rev. C
1
2
INSTALLATION PROCEDURES:
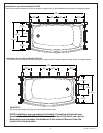
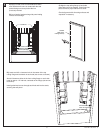
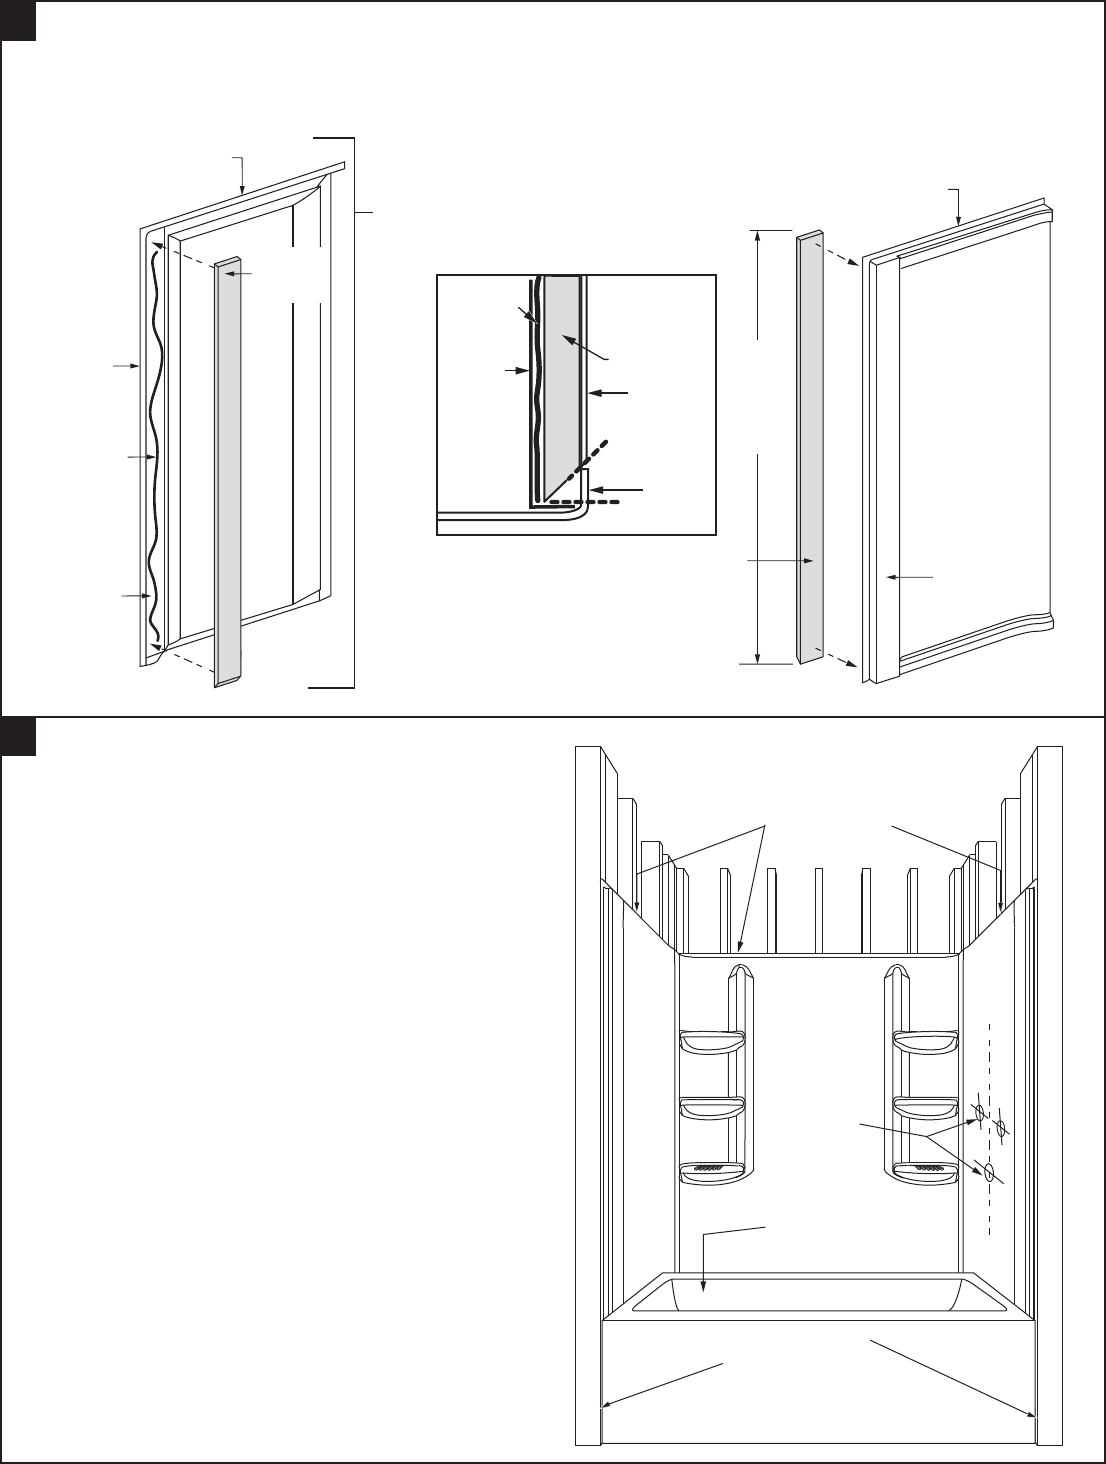
If you plan to install a bath/shower door, a 1 x 4 must be installed in the pocket on the back of both side walls.
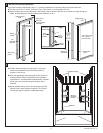
A) Cut one end of the 1 x 4 to 45° as shown. (Fig.1) Then cut the 1 x 4 to a length of 57-1/2".
B) Apply a bead of tub surround adhesive in the pocket of each side wall. With 45° cut end down and angle facing out,
attach board butting up to the top of the pocket. Allow time to cure.
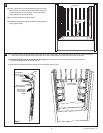
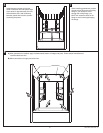
A) Position the three panels into the alcove. Lower each
panel onto the bathtub to ensure that the panels fit
properly in the alcove.
B) Mark the appropriate side panel (right or left) cutouts for
plumbing fixtures. Refer to plumbing fixture installation
instructions for hole dimensions and placement. Carefully
locate, mark and cut holes using the properly sized
hole saw.
C) When satisfied with fit, mark a line across the top of the
panels on each stud. Remove the panels. The marked
line will help align the panels in subsequent steps.
Nailing
flange
Nailing flange
(top)
Nailing flange
(top)
Tub
Surround
Adhesive
Wall pocket
(back)
Wall pocket
(front)
1 x 4
(Butt to top
of pocket)
Back view of
side wall.
Typical of both
side walls.
Front view of side
wall. Typical of
both side walls.
71-1/2"
(1816mm)
Shower
Base
57-1/2"
(1461mm)
Tub
1 x 4
(Butt to top
of pocket)
1 x 4
WALL
POCKET
(FRONT)
Fig. 1
45°
Cut
WALL
NAILING
FLANGE
TUBTILE
FLANGE
TUB
SURROUND
ADHESIVE
Top Nailing flange
Front Nailing Flange
Mark for
plumbing
fixtures
Bath Tub