HOW TO TAKE A READING
8
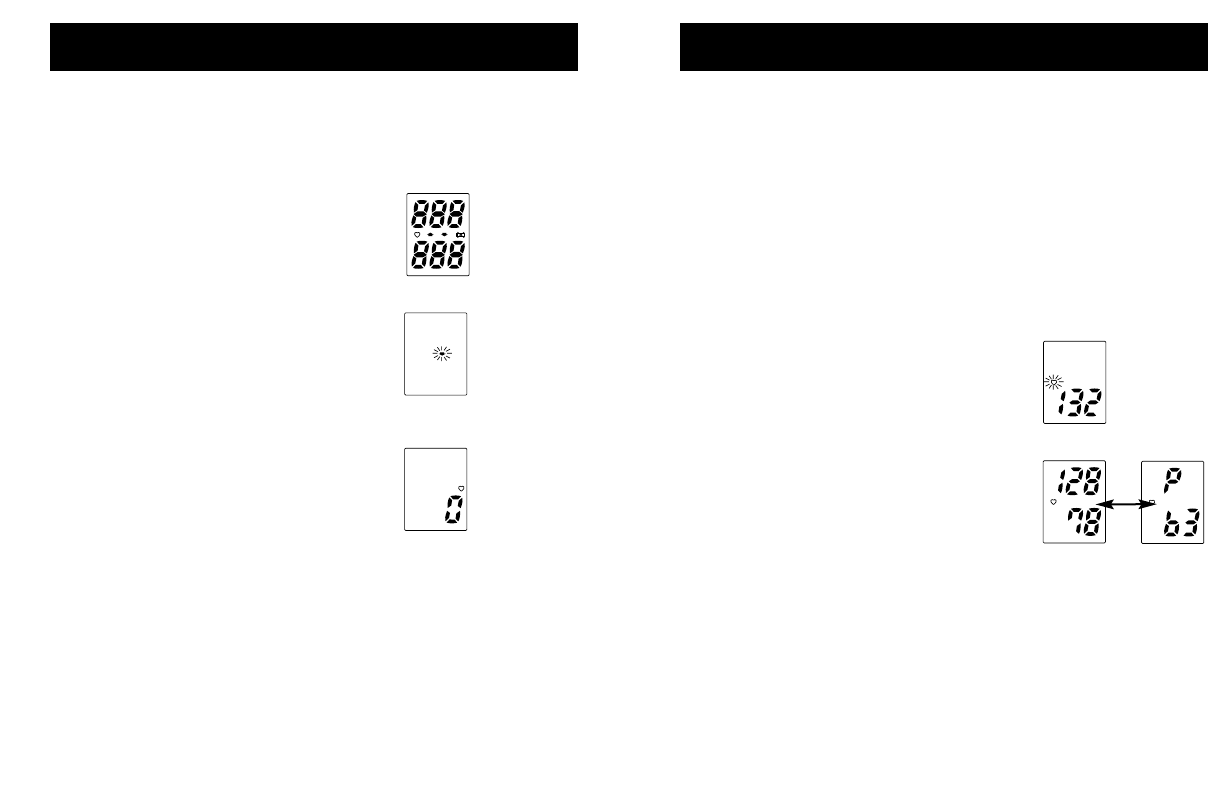
1. Press the ON/OFF Button.
a) All the display symbols appear
for approximately one second.
This is the initial LCD test.
b) The display symbols disappear
and the Deflation Indication
Symbol ( ) starts to flash.
c) When the monitor completes
the necessary preparations
before measurement, the
Heart Symbol (♥) appears
with a zero.
➧
2. Hold the unit at your heart level and press the START button.
The cuff automatically inflates to approximately 180 mm Hg.
a) Keep the unit at the heart level until the measurement is completed.
Read and follow directions in "Suggestions Before
Measuring Blood Pressure" and "How To Apply
The Wrist Cuff" before taking a reading.
SYSTOLIC mm Hg
DIASTOLIC mm Hg
PULSE/min
SYSTOLIC mm Hg
DIASTOLIC mm Hg
PULSE/min
SYSTOLIC mm Hg
DIASTOLIC mm Hg
PULSE/min
HOW TO TAKE A READING
SYSTOLIC mm Hg
DIASTOLIC mm Hg
PULSE/min
SYSTOLIC mm Hg
DIASTOLIC mm Hg
PULSE/min
SYSTOLIC mm Hg
DIASTOLIC mm Hg
PULSE/min
b) If during your measurement (deflation) the
monitor determines that a higher pressure
value is required, it will momentarily stop
deflation and automatically increase the
pressure value to 230 mmHg.
c) To inflate higher than 230 mm Hg, during
deflation press and hold the START button
until the necessary pressure value is reached.
DO NOT INFLATE HIGHER THAN 280 mmHg.
3. When the cuff reaches your correct inflation
level, it begins to deflate automatically.
As the cuff deflates, decreasing numbers
appear on the display. The Heart Symbol
(
♥) flashes at every heart.
4. The monitor exhausts the residual air when the
measurement is complete. The Heart Symbol
(
♥) stops flashing and your blood pressure
and pulse rate display alternately.
NOTE: Wait 2-3 minutes before taking another blood pressure
measurement. Waiting allows the engorged blood vessels to return
to normal. You may require more rest time between readings depending
on your individual physiological characteristics.
Remember To Keep A Record Of Your Blood Pressure And
Pulse Measurements.
9
