••••••••••••••••••••••••••••••••••••••••••••••••••••••••••••••••••••••••••••••••••••••••••••••••••••••••••••••••••••••••••••••
48
SECTION THREE
••••••••••••••••••••••••••••••••••••••••••••••••••••••••••••••••••••••••••••••••••••••••••••••••••••••••••••••••••••••••••••••
Printer Cleaning Procedure
Ink streaking is easily prevented or corrected by doing
scheduled cleaning to three areas of the printer: the print
cartridges, the print cartridge cradle, and the service station. It
is recommended that you preform this cleaning every 3 months.
Materials You Will Need
Before you start, make sure you have the following materials
available.
• Cotton swabs or any soft material that will not come apart or
leave fibers (for example, a scrap piece of clean cotton cloth)
• Distilled, filtered, or bottled water (Tap water may contain
contaminants that can damage the print cartridges.)
N OTE
Be careful not to get ink on your hands or clothing.
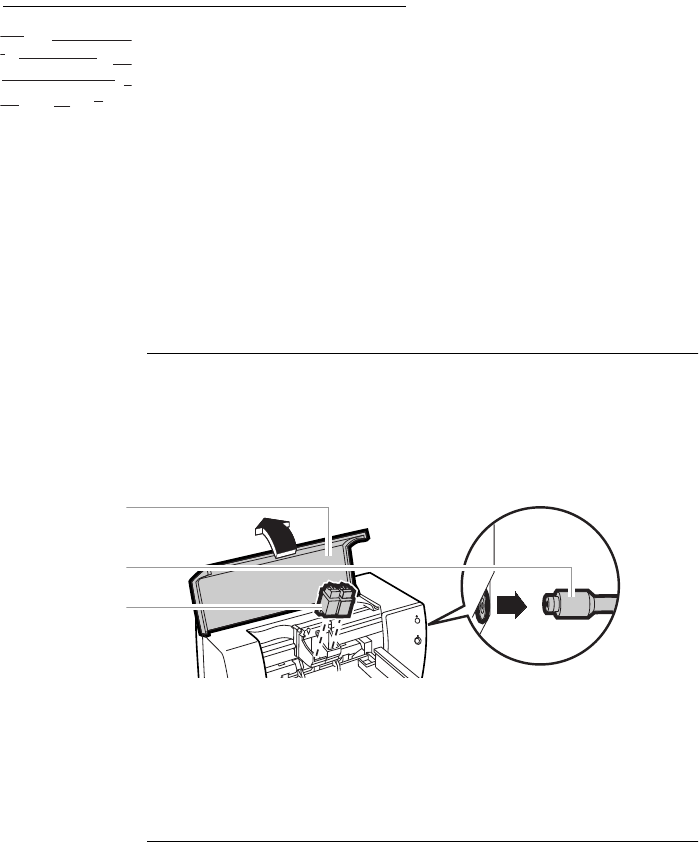
Remove the Print Cartridges
1. Turn the printer on and lift the printer’s top cover. The print
cartridges will move to the center of the printer.
2. After the print cartridges have moved to the center of the
printer, unplug the black power cord from the back of the
printer.
3. Remove the print cartridges and place them on their sides on a
scrap piece of paper.
CAUTION
Once you’ve removed the print cartridges, make sure that they are not outside of
the printer more than 30 minutes.
n ame jstujn
am noft juest
labore qusft
kitft
hockn
7539-01
1
2
3


