Installing the HP Jetdirect 170X Print Server 3-3
Installing the
HP 170X
3
Install the 170X Hardware
Follow the steps below to install the 170X. For technical specifications
or part numbers for power modules or parallel cables, see Appendix A.
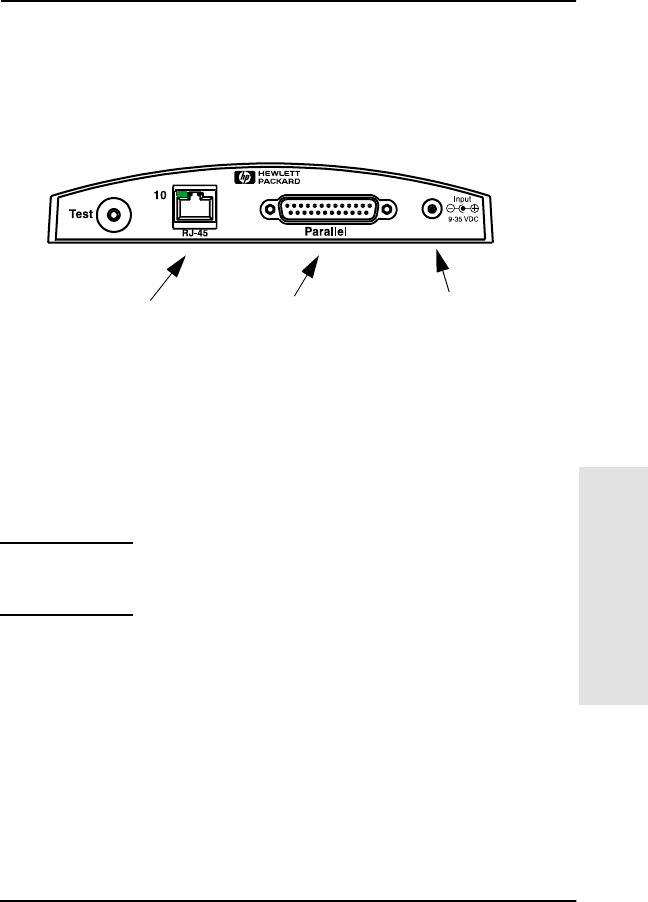
Figure 3-1 Connecting the 170X to the LAN and Printer
1. Connect the 170X to the network with a 10Base-T network cable.
2. Connect the 170X to the printer with a IEEE 1284 parallel cable
(see Appendix A for cable part numbers).
3. Plug the DC power cord from the power module into the power port.
Caution Do not use the power module shipped with the 170X
with other Jetdirect products!
4. Plug the 170X power module into a wall outlet.
5. The 170X should now be on. Verify that the Status light on the 170X
is blinking. If the internal self-test failed, the light will be off. For
troubleshooting information, see chapter 7.
Network Cable
Parallel Cable
Power
0Book-asF01.book Page 3 Tuesday, August 14, 2001 2:06 PM


