Before You Begin
1,19111Ovet_
PTull
extension
ouen Y(I_(']gs
Upper
frontrail
Lower
frontrail
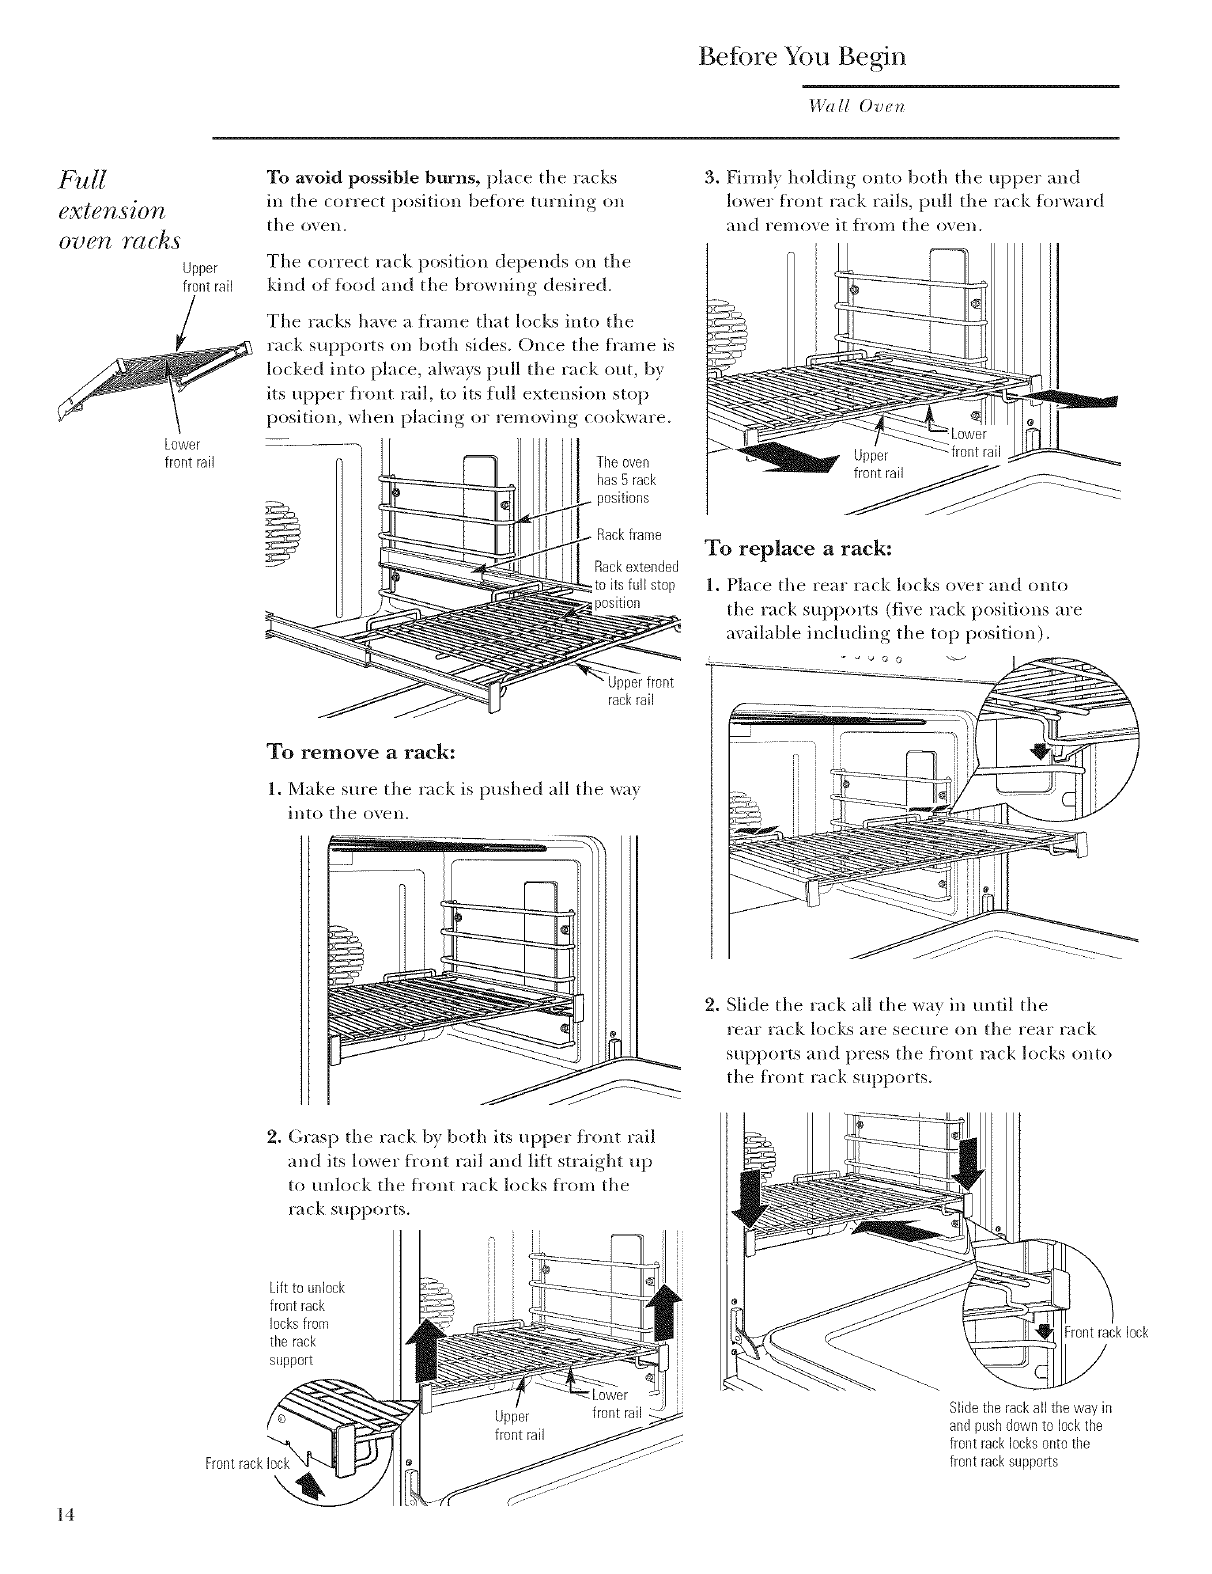
To avoid possible burns, place tile racks
ill tile correct position beflwe turning on
tile oven.
Tile correct rack position depends sill tile
kind of fl)od and tile browning desired.
Tile racks haxe a frame that locks into tile
rack supports on both sides. Once tile frame is
locked into place, always pull tile rack out l)_
its upper front rail, to its full extension stop
position, _,_hell l)lacin°_ or renloving, cook_#are.
Theoven
has5rack
lositions
Rackextended
_toitsfull stop
_osition
Upperfront
rackrail
3. Firml} holding onto both tile upper and
lo',_er front rack rails, pull tile rack forward
alld I'en/oxe it [i-(111/ tile ovell.
Upper _frontrail
To replace a rack:
1. Place tile rear rack locks over and onto
tile rack supports (fixe rack positions are
available including tile top position).
To remove a rack:
1. Make sure the rark is pushed all the wa_
into the oven.
2. Grasp tile rack bv bodl its upper fi'ont rail
and its lower fl'ont rail and lilt straight up
to unlock the fi'ont rack locks fi'om tile
rack supports.
2. Slide tile rack all tile way m {mtil tile
rear rack locks are secure sill tile rear rack
supports and press tile ti'(mt rack locks onto
tile fi'ont rack supports.
14
Front rack
Lift to unlock
front rack
locksfrom
the rack
support
Frontrack lock
Slide therackall theway in
and pushdown to lockthe
front racklocksonto tl_e
front racksupports
