Setting Up the Projector 21
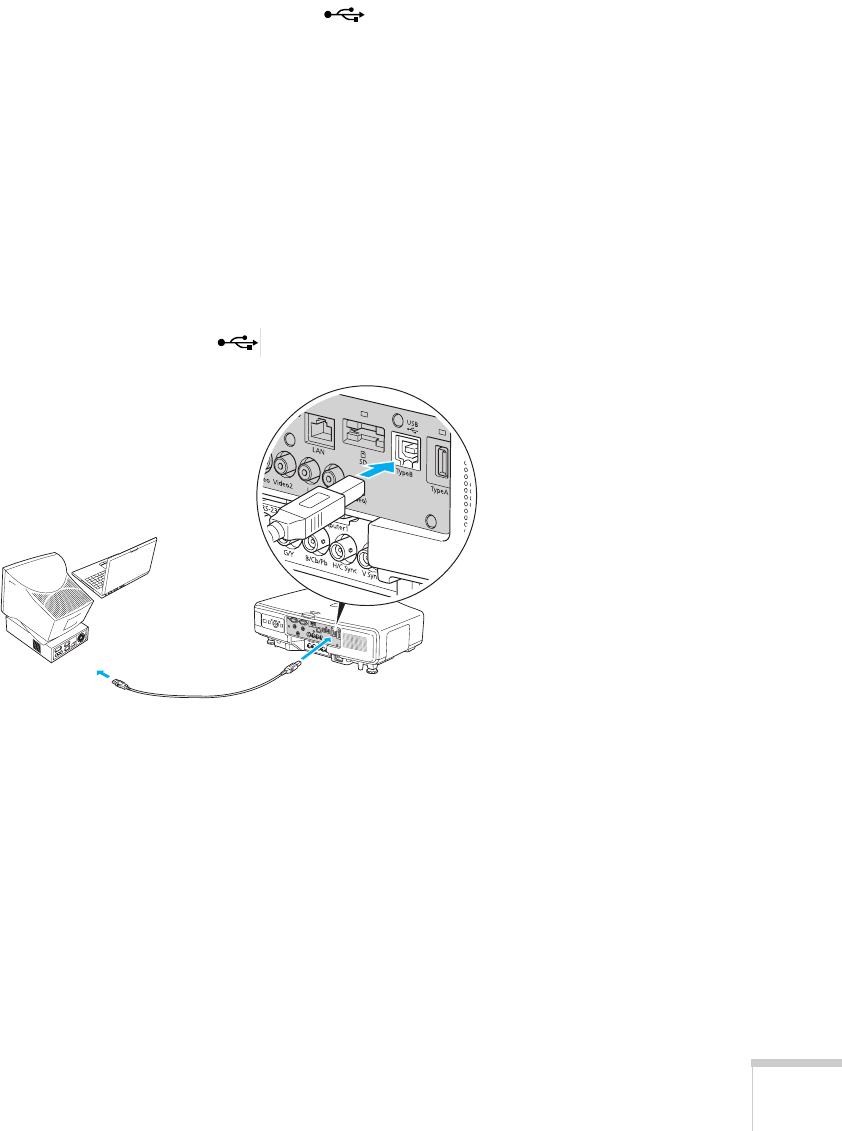
Connecting to the USB Port
You can connect a Windows Vista, XP, or Windows 2000 (SP4)
computer to the projector’s Type B (square) USB port and
project your computer’s display (G5150NL and G5350NL only).
A USB 2.0 connection provides better picture quality and response
than USB 1.1.
The first time you connect a computer to the projector’s USB port,
software from the projector is installed on your computer.
1. Follow the instructions beginning on page 37 to turn on the
projector.
2. Turn on your computer.
3. Connect the square end of your USB cable (not included) to the
projector’s Type B (square) USB port.
4. Connect the flat end of the cable to any available USB port on
your notebook or desktop computer.
Messages appear as the projector is recognized and the software is
installed.
5. Follow the instructions on your computer screen to install the
Epson USB Display software. If you see a “Digital Signature
Warning,” select
Continue. You will need to install the software
only the first time you connect.
USB cable


