


3
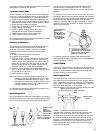
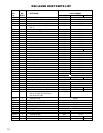
4. Pull on hook side and loose end side of load chain to
make sure chain feeds freely into and out of the hoist.
5. Grasp unit by frame or upper hook and pull on end ring or
lower hook to pull the chain through hoist to the length
required to attach lower hook to load. Pull on end ring to
take-up slack in chain and THEN LET GO OF END RING.
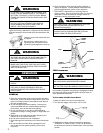
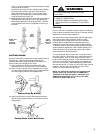
6. Rotate the cam counterclockwise (to left) until the arrow
points to “operate”.
7. Pull sharply on the loose end of chain and THEN LET GO
OF CHAIN. Pull sharply on the lower hook side of chain,
to make sure gearing is fully engaged.
8. The hoist is now ready for operation. Move trigger to “UP”
position and operate lever in and up and down motion to
shorten the distance between hooks and thus pull or lift
load. Only move the load enough to slightly load the hoist.
Check free-play of cam knob. The arrow tip should
not move more than 3/16 inch (4.7mm). If
movement is greater than this, move trigger to
“DN” position and operate the
lever to remove the load. Repeat step 7 and if
the free-play is still more than 3/16 inch (4.7mm), the hoist
should be disassembled to check for damaged or worn
parts. Do not take up the load chain to the point where
the end ring or lower hook block becomes jammed
against the frame.
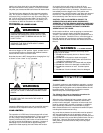
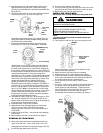
ATTACHING TO LOAD
Attach the lower hook to the load so that it is seated in the
bowl of the hook and is not bearing against the tip of the
hook, and the latch is tight against the hook tip.
Do not wrap the load chain around the load and hook onto
itself as a choker chain sling or bring the load in contact with
the hoist. Doing this will result in the loss of the swivel effect
of the hook which could cause twisted chain and a jammed
liftwheel. Also, the chain may be damaged at the hook.
Make sure the upper and lower hooks are in a straight line
and the frame is free to swivel on the upper hook. If the
proposed use prevents straight line attachment, use an
Anchor Sling (see page 1) or a chain sling to obtain a
straight line pull.
TO PULL OR LIFT LOAD
Move lever trigger to “UP” position. Operate lever in up and
down motion to shorten the distance between hooks and
thus pull or lift the load.
When pulling or lifting move the load only enough to slightly
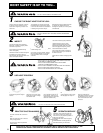
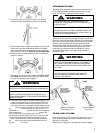
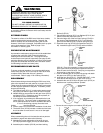
WARNING
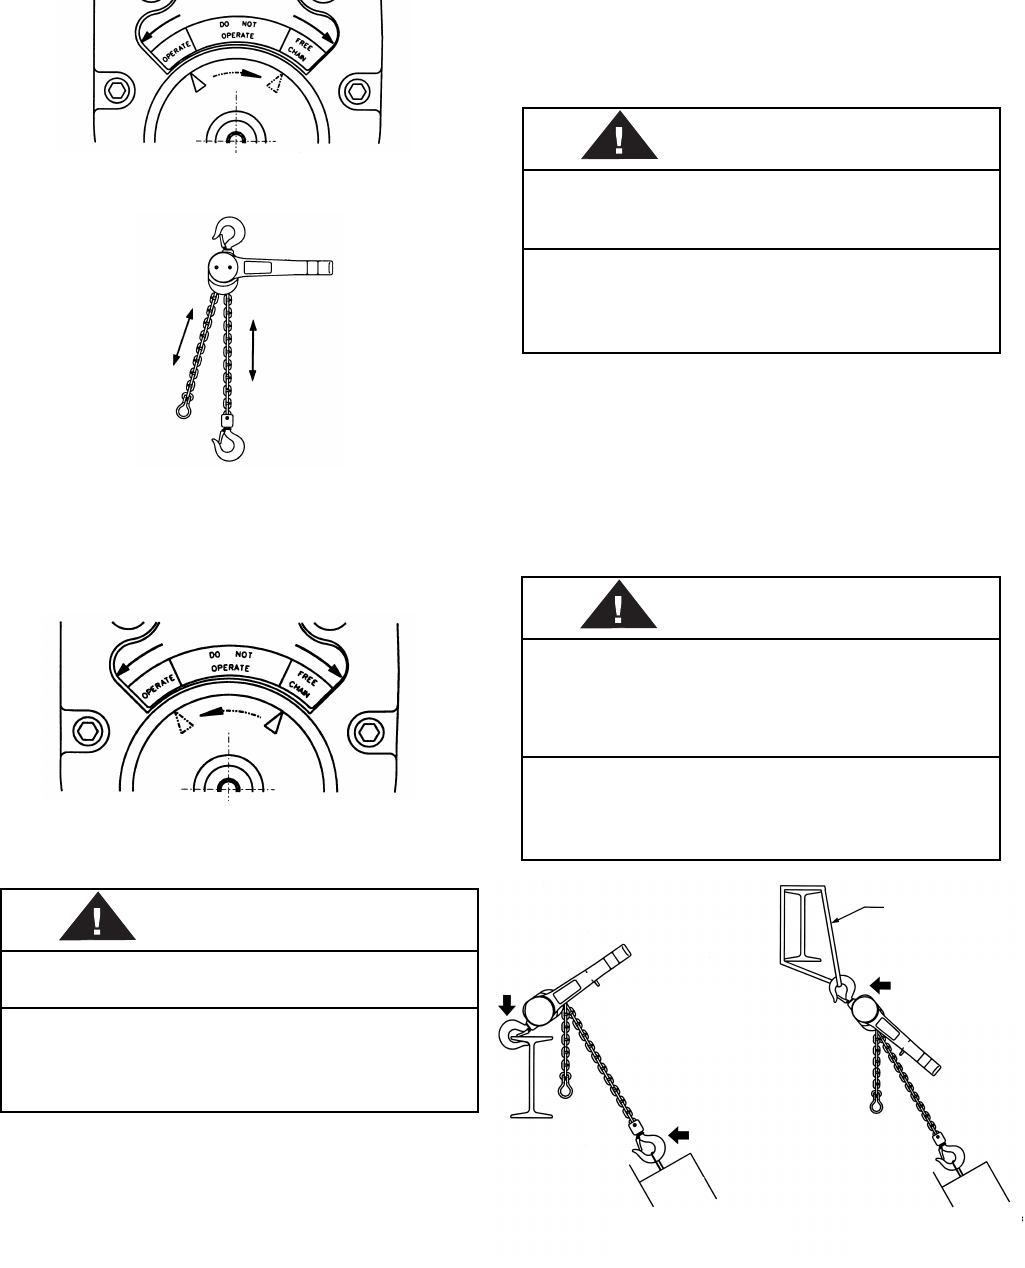
IF THE UNIT IS NOT RIGGED IN A STRAIGHT LINE
HOOK TO HOOK MANNER, AND IF THE FRAME IS
NOT FREE TO SWIVEL, LEVER PULL MAY BREAK
FRAME AND CAUSE PHYSICAL INJURY AND LOSS
OF LOAD.
TO AVOID INJURY:
RIG THE UNIT IN A STRAIGHT LINE HOOK TO
HOOK MANNER AND KEEP FRAME FREE TO
SWIVEL - SEE BELOW.
NOT A STRAIGHT
LINE BETWEEN
UPPER AND LOWER
HOOKS, FRAME NOT
FREE TO SWIVEL
UPPER AND
LOWER HOOKS
IN STRAIGHT
LINE. FRAME
FREE TO SWIVEL.
SLING
LOAD
LOAD
IMPROPER ATTACHMENT:
DANGEROUS PULLING
PROPER ATTACHMENT:
SAFE PULLING
WARNING
ALLOWING THE LOAD TO BEAR AGAINST THE
HOOK LATCH AND/OR HOOK TIP CAN RESULT IN
LOSS OF LOAD.
TO AVOID INJURY:
DO NOT ALLOW THE LOAD TO BEAR AGAINST THE
HOOK LATCH AND/OR HOOK TIP. APPLY LOAD TO
HOOK BOWL OR SADDLE ONLY.
WARNING
FAILURE TO FULLY ENGAGE THE GEARING WILL
ALLOW LOAD TO RELEASE AND THUS CAUSE INJURY
TO AVOID INJURY:
AFTER ROTATING CAM KNOB TO “OPERATE”, PULL
EACH CHAIN SHARPLY TO RE-ENGAGE GEARING AS
DIRECTED ABOVE.