


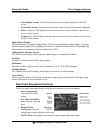
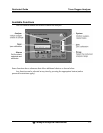

Quickstart Guide Trace Oxygen Analyzer
Teledyne Analytical Instruments 18
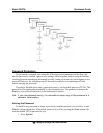
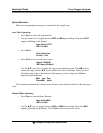
• Latching? Ltch–Y/N (Yes/No).
• To change any of the alarm parameters, use the ◄► arrow keys to move the blinking
over to the specific parameter.
• Use the ▲▼ arrow keys to change the value of the parameter. Holding down the key
speeds up the incrementing or decrementing.
• Once the parameters for alarm 1 have been set, press Alarms again, and repeat this
procedure for alarm 2 (AL–2).
• To reset a latched alarm, go to Dft– and then press either ▲ two times or ▼ two
times. (Toggle it to Y and then back to N.)
—or—
Go to Ltch– and then press either ▲ two times or ▼ two times. (Toggle it to N and
back to Y.)
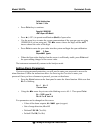
Set The Range Function
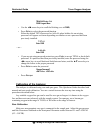
To set the 3 programmable ranges:
• Enter the range function mode by pressing the Range button on the front panel.
L—100 M—1000
H—10000 Mode—AUTO
• Use the ◄► arrow keys to blink the range to be set: low (L), medium (M), or high
(H).
• Use the ▲▼ arrow keys to enter the upper value of the range (all ranges begin at 0
ppm). Repeat for each range you want to set.
• Press Enter to accept the values and return to analyze mode.
Note: The ranges must be increasing from low to high, for example, if range 1 is set as
0–100 ppm and range 2 is set as 0–1,000 ppm, range 3 cannot be set as 0– 500
ppm since it is lower than range 2.
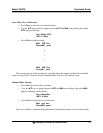
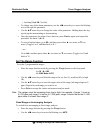
Fixed Range or Autoranging Analysis
To switch from autoranging to fixed range analysis:
• Enter the range function by pressing the Range button.
• Use the ◄► arrow keys to move the blinking over AUTO.