


Page 3
Locating the Base Station and Remote Sensor
• Choose a suitable place for the base station and remote outdoor sensor, within the transmission distance.
• Place the base station near a window, but away from direct sunlight or sources of heat or air conditioning to ensure
accurate temperature readings. The remote sensor is water resistant, but not waterproof. Locate the sensor out of
direct sunlight, in an area where it will not be exposed to rain, snow or ice.
• The location you choose is critical for maximizing the transmission range. The remote sensor is designed to transmit
up to 100 ft. unimpeded. Although the RF signal may travel through solid surfaces or objects, transmitting through
walls, metal doors, metal framed windows, thick concrete, stone or brick may reduce the transmission range. To
optimize the transmission distance, the base and remotes should be positioned in locations that minimize these
obstructions. Interference from other sources such as home security systems, wireless doorbells and wireless home
entertainment equipment may interrupt the transmission signal temporarily.
• In areas of extreme low temperatures (below 0°F), re-locate the remote sensor indoors and use a remote sensor wire.
The sensor wire is not included with the unit and can be purchased separately by contacting Springfield Precision
Instruments at 1-888-809-3284. Plug the sensor wire into the remote and route the wire through a nearby window.
Be sure to plug in the wire securely. Note: The sensor wire will transmit outdoor temperature only, not humidity.
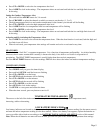
OPERATING INSTRUCTIONS
MODE BUTTON
Starting from the normal time display, press MODE to scroll through Alarm time 1 (A1), Alarm time 2 (A2), Timer,
back to normal time display.
Note: When entering your settings, you can press and hold the UP or DOWN button for fast setting.
SETTING THE CLOCK AND CALENDAR
• Press and hold the SET/AL button until the hour is flashing
• Press UP or DOWN buttons to adjust the hour
• Press SET/AL and the minutes will be flashing
• Press UP or DOWN to adjust the minutes
• Press SET/AL and the month will be flashing
• Press UP or DOWN to adjust the month
• Press SET/AL and the day will be flashing
• Press UP or DOWN to adjust the day
• Press SET/AL and the year will be flashing
• Press UP or DOWN to adjust the year
• Press SET/AL to lock in the settings
12 / 24 Hour Clock
Press DOWN 12/24 to select either 12 hour or 24 hour clock display.
Display the Calendar
Press SET/AL to scroll through:
1) normal time display (hour / minute / day)
2) hour / minute / second display
3) calendar
4) normal time display