


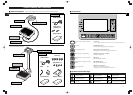
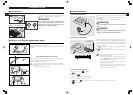


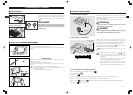

For accurate measurement, place the unit on as flat a surface
as possible and adjust the level with the adjustable feet so the
bubble in the level gauge is in the center of the frame.
ƽ
Caution
Place the equipment on a level surface. If the equipment is not
stable, for example because not all the feet are on a level
surface, there is a risk that it will topple over and it will be
impossible to obtain an accurate measurement.
GB
8
a
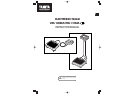
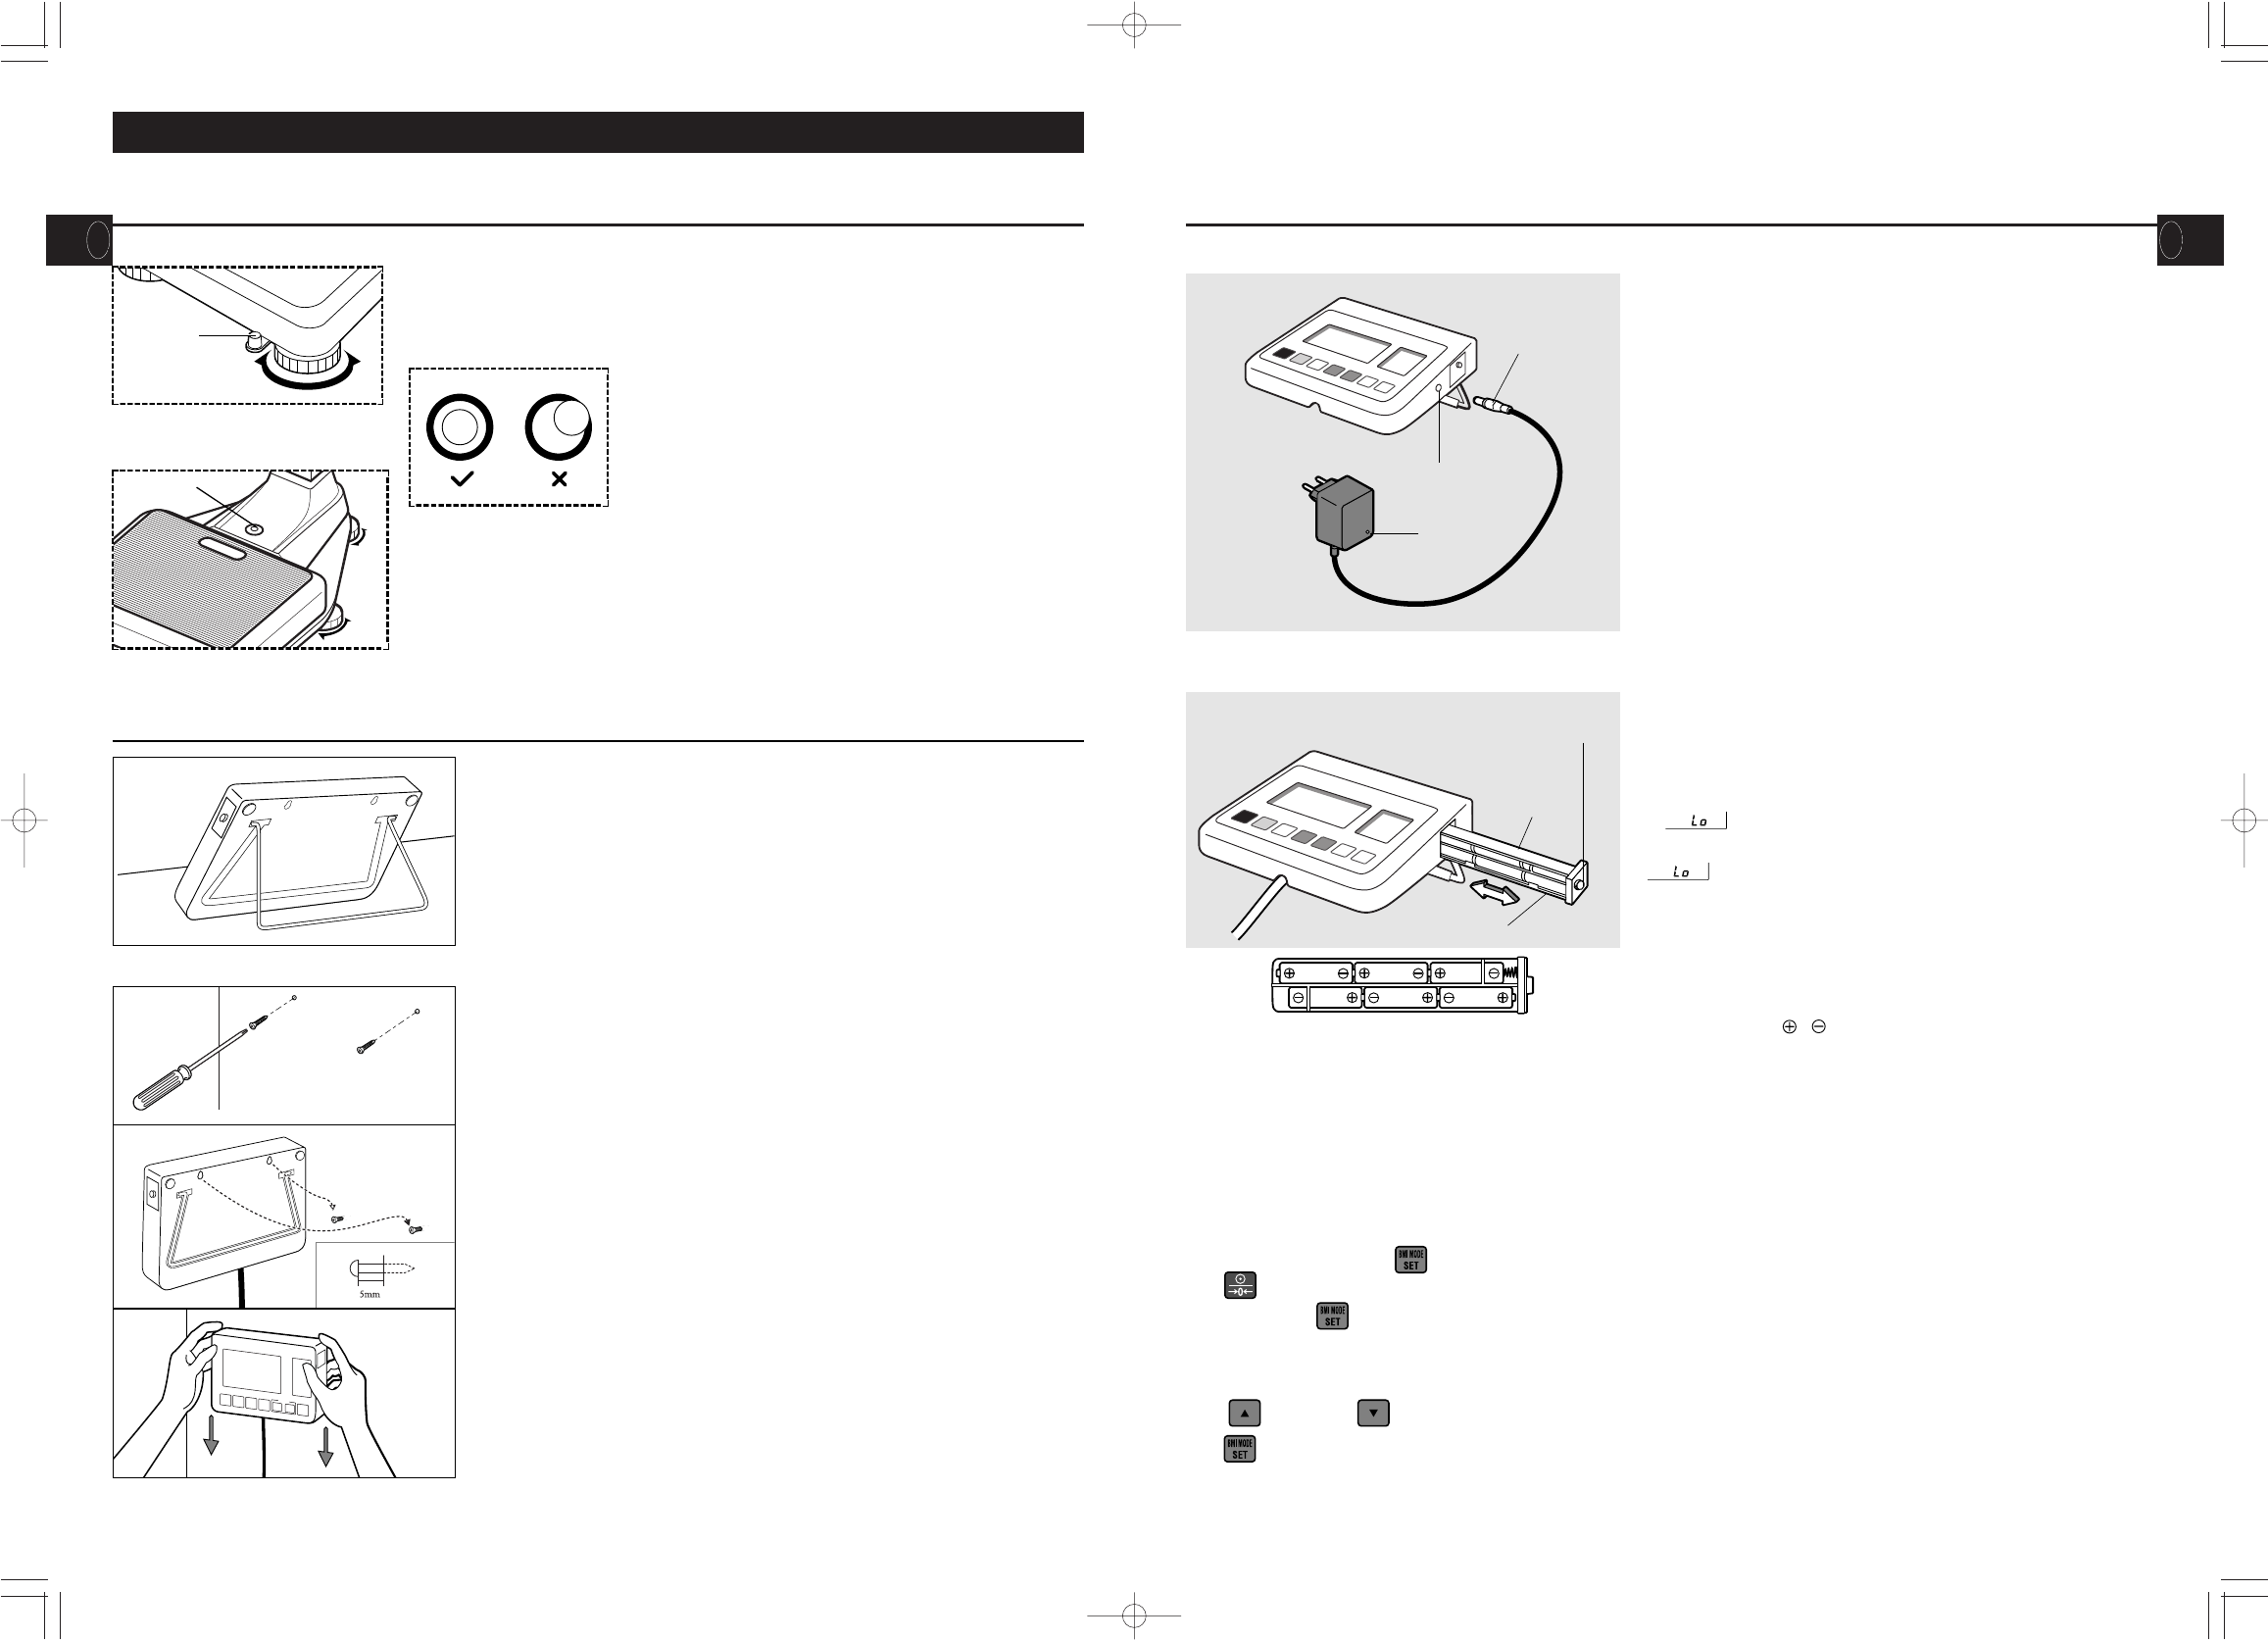
Installation of the Equipment (Remote Display Version)
a
Level Adjustment
*Adjust the level by rotating the adjustable feet.
When using the stand
When installing the display box on the wall
Please pull out the stand at the back of the display box.
When putting away the display box, please insert the stand in the slot on the back of the
display box.
ቢ Screw the wall-hanging screws into the wall (leave the screws protruding from the wall by 5
mm).
ባ Insert the screw heads in the holes on the back of the display box.
ቤ Pull down the display box securely into place.
ƽ
If the Display Box is not fixed sufficiently, there is a danger that it may fall down.
Avoid installing the Display Box in a place where users may step on or get caught
by the cable.
Do not swing the Display Box by the cable.
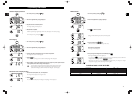
2.Preparation for Use
Level Gauge
GB
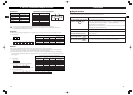
ቢ When using the AC Adapter
Insert the cable plug for the AC Adapter into the DC jack on the side
of the Display Box, and insert the AC Adapter plug into a 230V AC
mains DC jack.
Then confirm the Pilot Lamp on the AC Adapter lights up.
ƽ
Warning
•To avoid electric shocks, do not insert and remove the plug with wet
hands.
ƽ
Caution
•Use only the AC adapter (MODEL: A30930G) specified. Using an AC
Adapter other than that specified may cause malfunctions.
ባ When using dry cell batteries
Unscrew the Fixing Screws for the Battery Compartment on the right
side of the Display Box and pull out the Battery Compartment. Place
dry cell batteries LR6 (AA) in the correct positions as instructed
inside the Battery Compartment and fix the Battery Compartment
with the Fixing Screws.
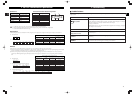
If is displayed on the Display, please replace all the six
batteries LR6 (AA) with new ones.
appares when the battery voltage is lower than 6.5 V
Ȁ10%.
ƽ
•Please change the batteries LR6 (AA) carefully to avoid
dropping them on your feet.
•Ensure that the batteries are inserted with the correct
polarity / . If the polarity is incorrect, then the batteries
may leak and damage the equipment.
•When not in use for a long time, remove the batteries
before storing the equipment.
•When the equipment has been transferred to another
location with a temperature difference of more than 20˚C,
leave at least two hours before using.
a
Prepare Power Source
9
DC jack
Pilot Lamp
Battery Compartment
plug
Dry Cell
Batteries
Fixing Screws for the
Battery Compartment
ቤ Auto Power off Interval Setting
When the Scale power off,Press key and hold.
Press key.
Release the holding key.
The display turns to "Auto Power Off Interval Setting Mode"
showing "20" as 20 minutes power off setting as default.
Press (up arrow) or (down arrow) key and set 10 for 10 minutes and/or CONT for continuous setting if required.
Press key to complete.
(Remote Display Version)
*Adjust the level by rotating the adjustable feet.
Level Gauge
(Column Mounted Version)