


Voyager Portable
Maintenance & Care
13
Voyager Portable
12
Maintenance & Care
Laundry Instructions
The following symbols are used on sling labels and relate to washing instructions:
Maximum washing temperature 140° F (60° C) permanent cycle.
Do not use bleach.
Do not dry clean.
Tumble dry low.
Do not iron.
For normal washing and cleaning, follow the care instructions on the label of the product.
Storage
Slings should be stored away from direct sunlight, stress, pressure, excessive heat or
h
umidity. The sling should be kept away from contact with sharp objects, corrosives or
other possible damaging material.
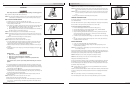
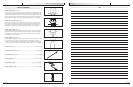
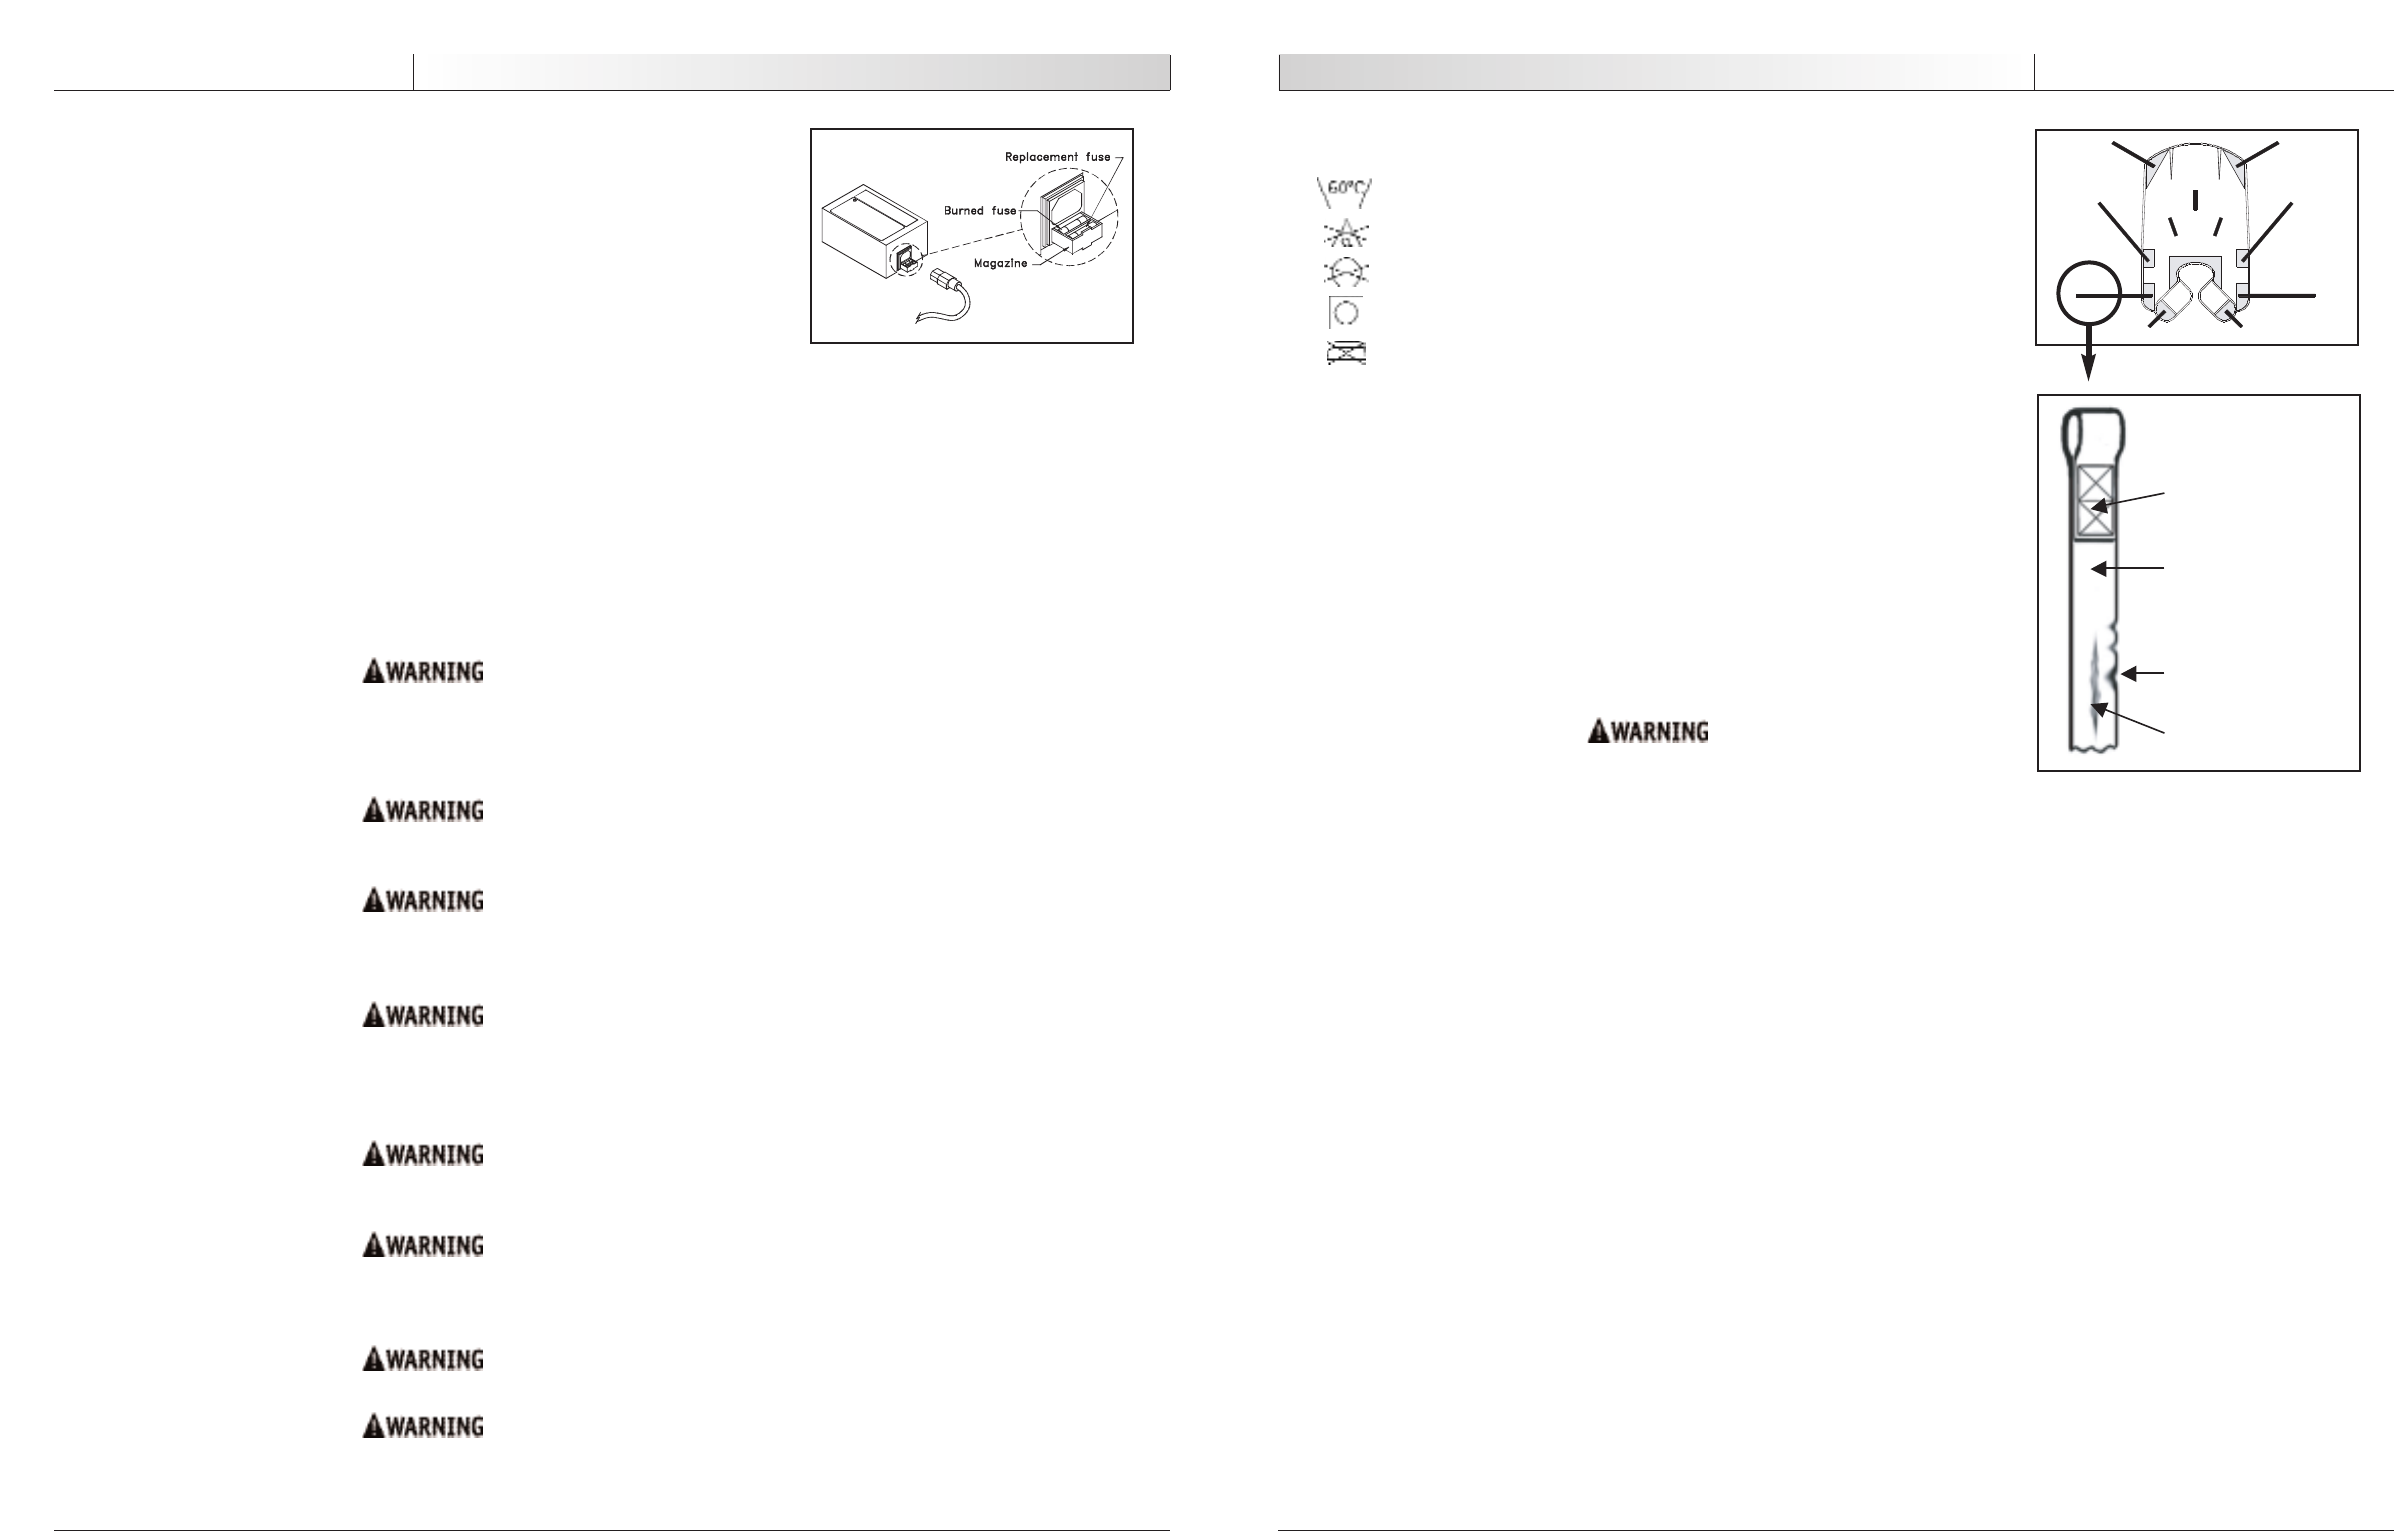
1. Check for any sign of wear on sling straps as described in Figure 11 and at the strap-
sling junction. Buckles should be checked to ensure that the locking/unlocking mech-
anism opens and closes easily and is secure when locked.
2. Check for any sign of deterioration of the sling material. Check for general external
wear, local abrasion, cuts, holes or burns in the webbing and for chemical attack.
3. Look at “stitched areas” for broken, worn, pulled or unraveled stitches.
4. Sling should be cleaned as indicated on the tag.
If there is any sign of wear or deterioration as indicated above or other visual
defects, the sling should be changed immediately. By continuing to use the lift
without changing the sling, caregiver and user safety is greatly compromised and
serious injury or death may result.
NOTE– Make note of results of inspection in the logbook at the back of this manual.
PERIODIC INSPECTION
Sunrise Medical recommends the Voyager Portable and its accessories are thoroughly exam-
ined and tested every six months. The examination and test should be conducted according
to Sunrise r
ecomm
endations.
Loose threads in stitched area.
Noticable discoloration by
having a lighter color strap than
the double thickness stitched
area.
Side wear
Middle wear
Figure 11
Loose threads in
stitched area
Noticable discol-
oration– strap is
lighter in color than
the double thickness
stitched area.
Side wear
Middle wear
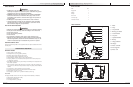
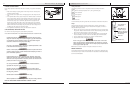
CHARGER FUSE REPLACEMENT
If the charger light doesn't illuminate when there is a battery in it, perform the following
steps:
1. Make sure the battery is properly placed in the charger. The silver contact points
sh
ould be inside the charger.
2. Check to make sure the power cord is correctly plugged in to the charger and the
wall.
3.
If the light still doesn't work, plug the charger into a different outlet in a different
area to ensure that the outlet is working properly. Pull the power cord out of the
charger. Under the socket for the power cord, there is a drawer or magazine where
th
ere are fuses. Using a pen or screwdriver, pull the drawer out gently. Pull the
burned fuse out of the drawer that is next to the charger (Figure 10) and discard.
Take the replacement fuse and place it in the same slot where the burned fuse was.
Slide the drawer back into the charger. Plug the power cord into the charger. Place
the battery into the charger and check for the light.
4. If the light does not illuminate, contact your local dealer for assistance.
SLING SAFEGUARDS, INSPECTION AND CARE
For maximum user safety and hygiene, read the following instructions:
PLEASE READ AND UNDERSTAND THE FOLLOWING WARNINGS BEFORE USING A GUARDIAN SLING.
Guardian ceiling lifts are specifically designed for Guardian ceiling lift systems,
slings and accessories. Slings and accessories designed by any other manufacturer
are prohibited and will void Guardian's warranty. Use only Guardian slings and
accessories to maintain user safety and product utility.
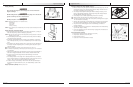
The person to be transferred must be assessed by a qualified professional as able
to be transferred before attempting to transfer.
Observe a trained expert perform the transfer procedures and practice the transfer
procedure several times with a capable individual before attempting to transfer a
person with limited capabilities.
Bef
or
e tr
ansferring the user fr
om a stationary object (wheelchair
, bath or bed),
slightly raise the person off the stationary object and check that all sling attach-
ments ar
e secur
e. If any attachment is not correct, lower the user and correct the
pr
oblem, then r
aise the user and check again.
Use a sling recommended by the user's doctor, nurse or medical assistant as
appr
opriate f
or the person's ability and needs.
DO NOT use any kind of plastic backed incontinence pad or seating cushion
between the user and the sling material that may cause the user to slide out of
the sling during a transfer.
DO NO
T e
x
ceed the maximum w
eight limitation o
f the sling.
Whenever possible have someone assist you to ensure the person's safety at all times.
READ ALL INSTRUCTIONS BEFORE ATTEMPTING TO INSTALL A SLING.
Figure 10