


4
Iss 1
Quick Start Guide
Control Functions
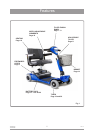
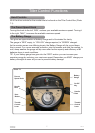
Your scooter is equipped with the following features that can be found on the tiller
fascia panel:
On/ Off Switch, Battery Gauge, Speed Control “Min to Max”, Horn and Directional
Control Levers.
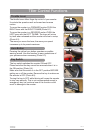
If you have previously used or owned a scooter before you MUST still read the
Owner’s Manual carefully to fully understand the controls and safety warnings.
If you are in any doubt of their functions then please turn to pages 7 and 8 of this
manual.
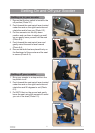
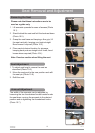
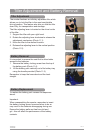
Transporting
Your scooter may be disassembled quickly and simply for transportation:
1. Lift off the front basket.
2. Remove the seat and the seat stem locking pin.
3. Remove the battery locking screw and battery pack.
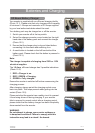
4. Lower the tiller, turning it slightly past the seat stem to its lowest setting, using the
adjustment lever provided.
5. Insert the battery locking screw into the battery locking post and the seat stem locking
pin into the hole in the left hand handle bar. This will stop the tiller from moving
during lifting operations and transportation.
6. De-dock the rear drive unit by lifting the docking handle and moving the front frame
forwards. Note: The battery pack MUST be removed before the scooter can be de-
docked.
7. Using the lifting handles provided carefully lift the scooter safely and securely into the
luggage compartment of the vehicle.
TIP:
Lift the front wheels in rst and use these to roll the frame along. Use the step at the
boot opening to rest parts if required.
To reassemble the scooter reverse the sequence above.
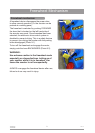
IMPORTANT:
When reassembling the scooter, remember to insert the battery locking screw,
because failure to do so may result in the battery pack disengaging during use.
Always secure your scooter parts before transportation. Remember to engage
the drive unit by pushing the freewheel lever forwards to stop the scooter from
moving.