


12/8/2006
10
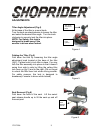
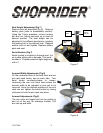
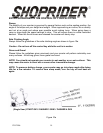
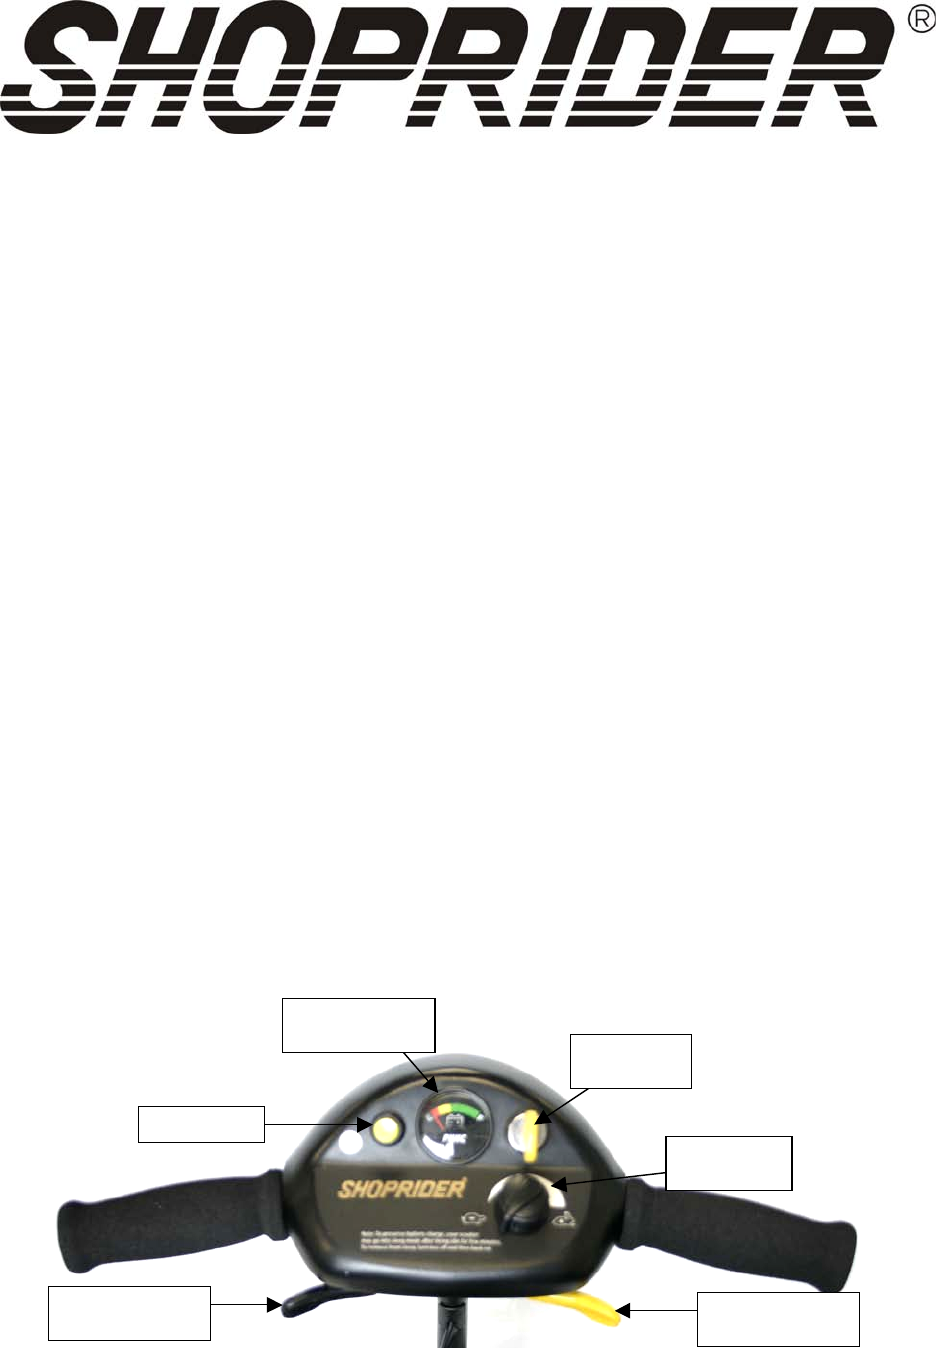
SCOOTER TILLER CONTROLS (FIG 9)
Speed Controls
The speed control allows you to set a speed between slow (turtle) and fast (rabbit).
Battery Level Indicator Gauge
Where the needle sits, shows the amount of charge left in your batteries. The amount of
charge will only show at its true level when the scooter is in drive. Always charge the
batteries completely before beginning out on any journey.
Caution – Do not allow the gauge needle to go down completely as complete
discharge of the batteries could cause irreversible battery damage.
Horn
A yellow button on top of the tiller operates the horn.
Thumb Lever Controls
The left thumb lever controls the reverse and the right thumb lever controls the forward
motion. The amount of pressure applied to each lever will determine the speed the scooter
travels at up to the speed selected. Release the thumb lever and the scooter will
automatically come to a stop as the electromagnetic brake is applied to the motor.
On/Off Key Switch
Insert the key into the key switch located on top of the tiller. Turn the key and the battery
gauge needle will move. There may be a slight delay before the thumb lever control can be
operated, while the main controller checks the circuits.
Electromagnetic Brake
The brake is automatically operated when the thumb control levers are pressed or
released. There is a slight delay when the scooter accelerates and decelerates; this allows
the scooter to start smoothly and come to a smooth stop.
Battery Level
Indicator Gauge
Speed
Control Dial
On/Off
Key Switch
Horn Button
Thumb Lever
Control (Forward)
Thumb Lever
Control (Reverse)
Figure 9