


36 www.quantumrehab.com Quantum 1402
VIII. CARE AND MAINTENANCE
! All wheel bearings are prelubricated and sealed. They require no subsequent lubrication.
! The body shroud has been sprayed with a clear sealant coating. You can apply a light coat of car wax to help it
retain its high-gloss appearance.
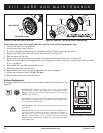
! Check all electrical connections. Make sure they are tight and are not corroded. Batteries must sit flat within the battery
well, with the battery terminals facing inward, toward each other. Refer to the frame decal for the correct wiring layout.
WARNING! Even though the power chair has passed the necessary testing requirements
for ingress of liquids, you should keep electrical connections away from sources of
dampness, including direct exposure to water or bodily fluids and incontinence. Check
electrical components frequently for signs of corrosion and replace as necessary.
Daily Checks
! With the controller turned off, check the joystick. Make sure it is not bent or damaged and that it returns to the
center when you release it. Check the rubber boot around the base of the joystick for damage. Visually inspect
the boot. Do not handle or try to repair it. See your Quantum Rehab Specialist if there is a problem.
! Visually inspect the controller harnesses. Make sure that they are not frayed or cut or have any wires exposed.
See your Quantum Rehab Specialist if there is a problem with any of these harnesses.
! Check for flat spots on solid tires. Flat spots could adversely affect stability.
Weekly Checks
! Disconnect and inspect the controller and the charger harnesses from the electronics tray. Look for corrosion.
Contact your Quantum Rehab Specialist if necessary.
! Ensure that all parts of the controller system are securely fastened to your power chair. Do not overtighten any screws.
! Check for proper tire inflation. There should be 35 psi (2.4 bar) in each tire. If a tire does not hold air, see a
Quantum Rehab Specialist for replacement of the tube.
! Check the brakes. This test should be carried out on a level surface with at least three feet (1 meter) of clearance
around your power chair.
To check the brakes:
1. Turn on the controller and turn down the speed level of your power chair.
2. After one second, check the battery condition meter. Make sure that it remains on.
3. Slowly push the joystick forward until you hear the electric brakes click. Immediately release the joystick. You
must be able to hear each electrical brake operating within a few seconds of joystick movement. Repeat this
test three times, pushing the joystick backwards, then left, and then right.
Monthly Checks
! Check that the anti-tip wheels do not rub the ground when you are operate your power chair. Adjust them as
necessary. See V. “Comfort Adjustments.”
! Check for extreme wear on the anti-tip wheels. Replace them as necessary.
! Check for drive tire wear. See a Quantum Rehab Specialist for repair.
! Check the rear casters for wear. Replace them as necessary.
! Check the rear forks for damage or fluttering which indicates that they may need to be adjusted or have the
bearings replaced. See a Quantum Rehab Specialist for repair.
! Keep your power chair clean and free of foreign material, such as mud, dirt, hair, food, drink, etc.
Yearly Checks
Take your power chair to a Quantum Rehab Specialist for yearly maintenance, especially if you use your power chair on
a daily basis. This helps ensure that your power chair is functioning properly and helps prevent future complications.