


33
AUS Pride LX Series/RevC/Apr03
IX. CARE AND MAINTENANCE
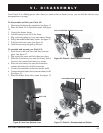
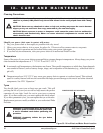
Follow these easy steps for a quick and safe tyre replacement:
1. Place a support under the motor.
2. If you have pneumatic tyres, make sure it is completely deflated
3. Pry off the drive wheel nut cap.
4. Use a 17-mm socket to remove the nut and washer from wheel axle. See figure 30.
5. Pull the wheel off of the axle.
6. Slide the new wheel onto the axle.
7. Reinstall the washer and nut, and tighten the nut.
8. Install the drive wheel nut cap.
9. Inflate the tyre to 2-2.4 bar/30-35 psi.
Battery Replacement (use only sealed lead-acid or gel cell batteries).
WARNING! Battery posts, terminals, and related accessories contain lead and lead compounds. Wear
goggles and gloves when handling batteries and wash hands after handling.
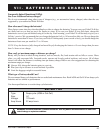
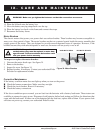
Figure 32. Battery Wiring Label
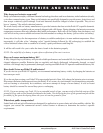
Figure 33. Battery Installation
To replace the battery:
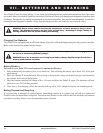
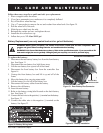
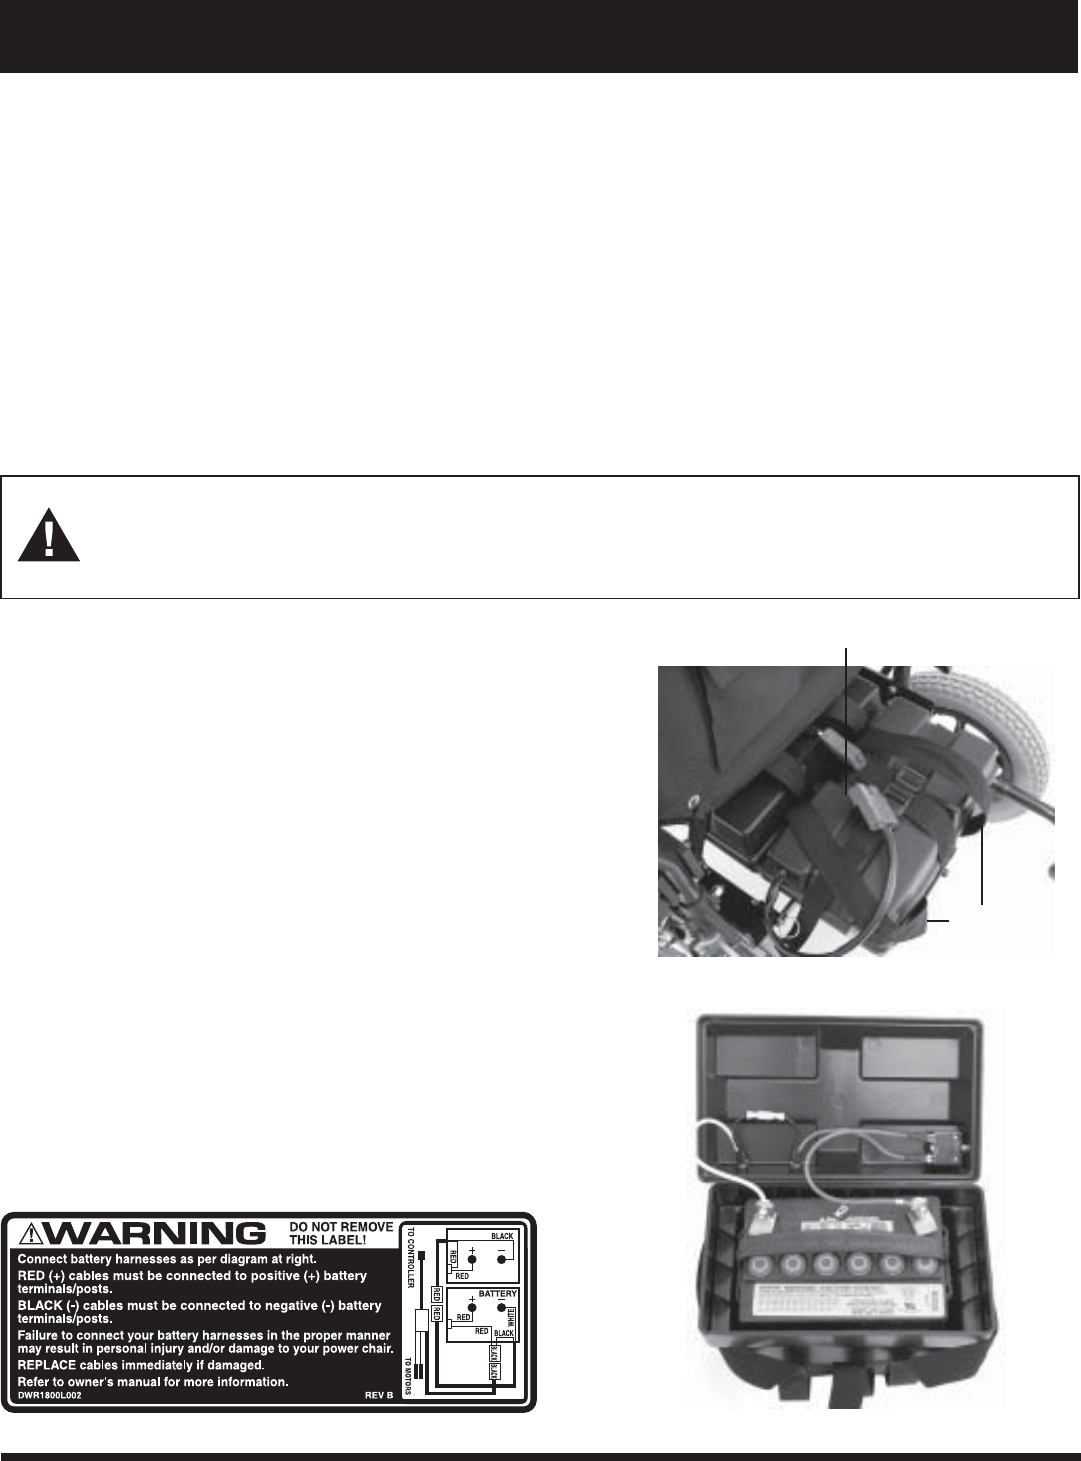
1. Disconnect the rear battery battery box from the front battery
box. See figure 31.
2. Disconnect the rear battery box hold down strap.
3. Lift the rear battery box up and off of the frame.
4. Disconnect the front battery box from the controller. See
figure 16.
5. Unstrap the front battery box and lift it up and off of the
frame.
6. Move the battery box carrying straps aside.
7. Lift the battery box lid off of the battery box.
8. Disconnect the battery cables from the battery.
9. Remove the old battery.
10. Insert the new battery.
11. Refer to the battery wiring label located on the back battery
box. See figure 32.
12. Connect the red wire to the positive (+) terminal on the battery.
See figure 33.
13. Connect the white wire to the negative (-) terminal on the
battery. See figure 33.
WARNING! Pride Power Chair batteries are heavy. Refer to the specifications table. If you are unable to lift
that much weight, be sure to get help. Lifting beyond your capacity can result in personal injury.
BATTERY BOX HOLD DOWN STRAP
BATTERY BOX
CARRYING STRAP
Figure 31. Rear Battery Box Connector