


JAZZY 1122/REV D/FEB 03 WWW.PRIDEMOBILITY.COM 51
X. CARE AND MAINTENANCE
WARNING! To avoid possible injury, be sure that the
controllers power is turned off and the power chair is not
in freewheel mode before performing this procedure.
WARNING! Completely deflate the tire before attempting
repair.
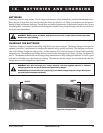
Follow these easy steps for a quick and safe repair:
1. Completely deflate the tire if pneumatic.
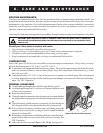
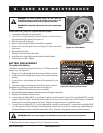
2. Use a 3/4-in. socket wrench to remove the drive wheel nut from
the center hub of the wheel. See figure 41.
3. Pull the wheel off of the axle.
4. Remove the bolts that hold the wheel halves together.
5. Remove the old tube and/or tire and replace it with a new tube
and/or tire.
6. Reassemble the wheel.
7. Slide the wheel back onto the shaft.
8. Install the drive wheel bolt into the center hub and tighten.
9. Inflate the tire to 30 35 psi.
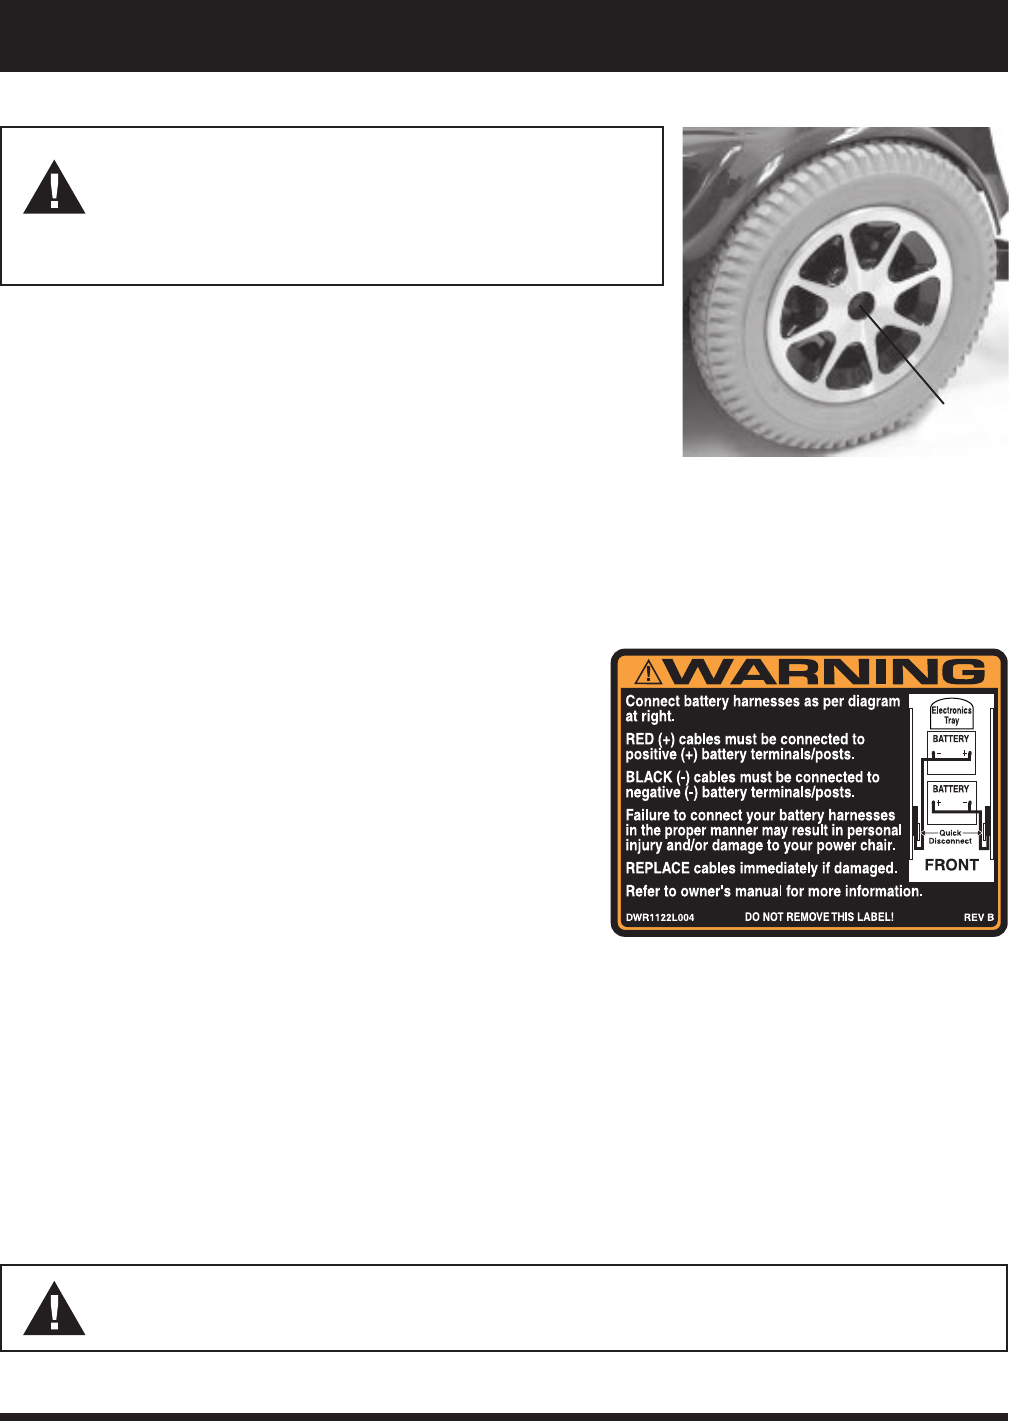
BATTERY REPLACEMENT
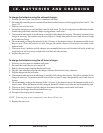
To replace the battery:
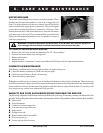
A diagram is printed on a decal on the Jazzy 1122 frame near the
battery tray. See figure 42.
1. Remove 1/4-in.detent pin from the bottom of the foot frame.
2. Lift the foot frame straight up to remove it from the mounting
bracket.
3. Locate the two wiring harnesses that will be attached to your
batteries.
4. Disconnect these two harnesses from their respective quick
disconnects by pulling the quick disconnects toward you.
5. Remove batteries from the power base assembly.
6. Disconnect the battery harnesses from the positive and negative terminals.
7. Replace old batteries with new ones.
8. Connect the wire labeled BAT (+) to a batterys positive (red) terminal. Connect the wire labeled BAT (-) to the
negative (black) terminal. Install the battery in the rear of your Jazzys battery tray with the batterys terminals
facing inward, toward the center of the Jazzy. Plug the wiring harness into a quick disconnect.
9. Connect the wire labeled BAT (+) to the other batterys positive (red) terminal. Connect the wire labeled BAT
(-) to the negative (black) terminal. Install the battery in the front of your Jazzys battery tray with the batterys
terminals facing inward, toward the center of the Jazzy. Plug the wiring harness into a quick disconnect.
WARNING! Make sure you tighten the fasteners so that the connections are secure.
10. Replace the foot frame using the 5/16-in. detent pin to secure.
Figure 41. Drive Wheel
DRIVE
WHEEL NUT
Figure 42. Battery Connections