


39Celebrity X LE www.pridemobility.com
AXLE BEARINGS AND THE MOTOR/
TRANSAXLE ASSEMBLY
You do not need to lubricate these items, as they are
all prelubricated and sealed.
MOTOR BRUSHES
The motor brushes are housed inside of the motor
transaxle/assembly. They should be inspected
periodically for wear by your authorized Pride
Provider.
WHEEL REPLACEMENT
If your scooter is equipped with pneumatic tires and
you have a flat tire, you can have the tube replaced.
If your scooter is equipped with a solid tire insert,
either the solid insert or the entire wheel must be
replaced depending on the model. Contact your
authorized Pride Provider for information regarding
replacement wheels for your scooter.
WARNING! Wheels on your scooter
should only be serviced/replaced by
an authorized Pride Provider or qual-
ified technician.
WARNING! Completely deflate
pneumatic tires before dismantling
the rim or attempting repair.
WARNING! Be sure that the key is
removed from the key switch and the
scooter is not in freewheel mode
before performing this procedure.
WARNING! When changing a tire,
remove only the center lug nut, then
remove the wheel. If any further
disassembly is required, deflate the
tire completely or it may explode.
Follow these easy steps for a quick and safe
repair of both pneumatic and solid tires:
1. Remove the key from the key switch.
2. Elevate the side of the scooter from which you
are
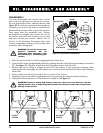
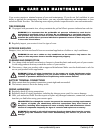
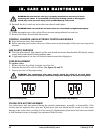
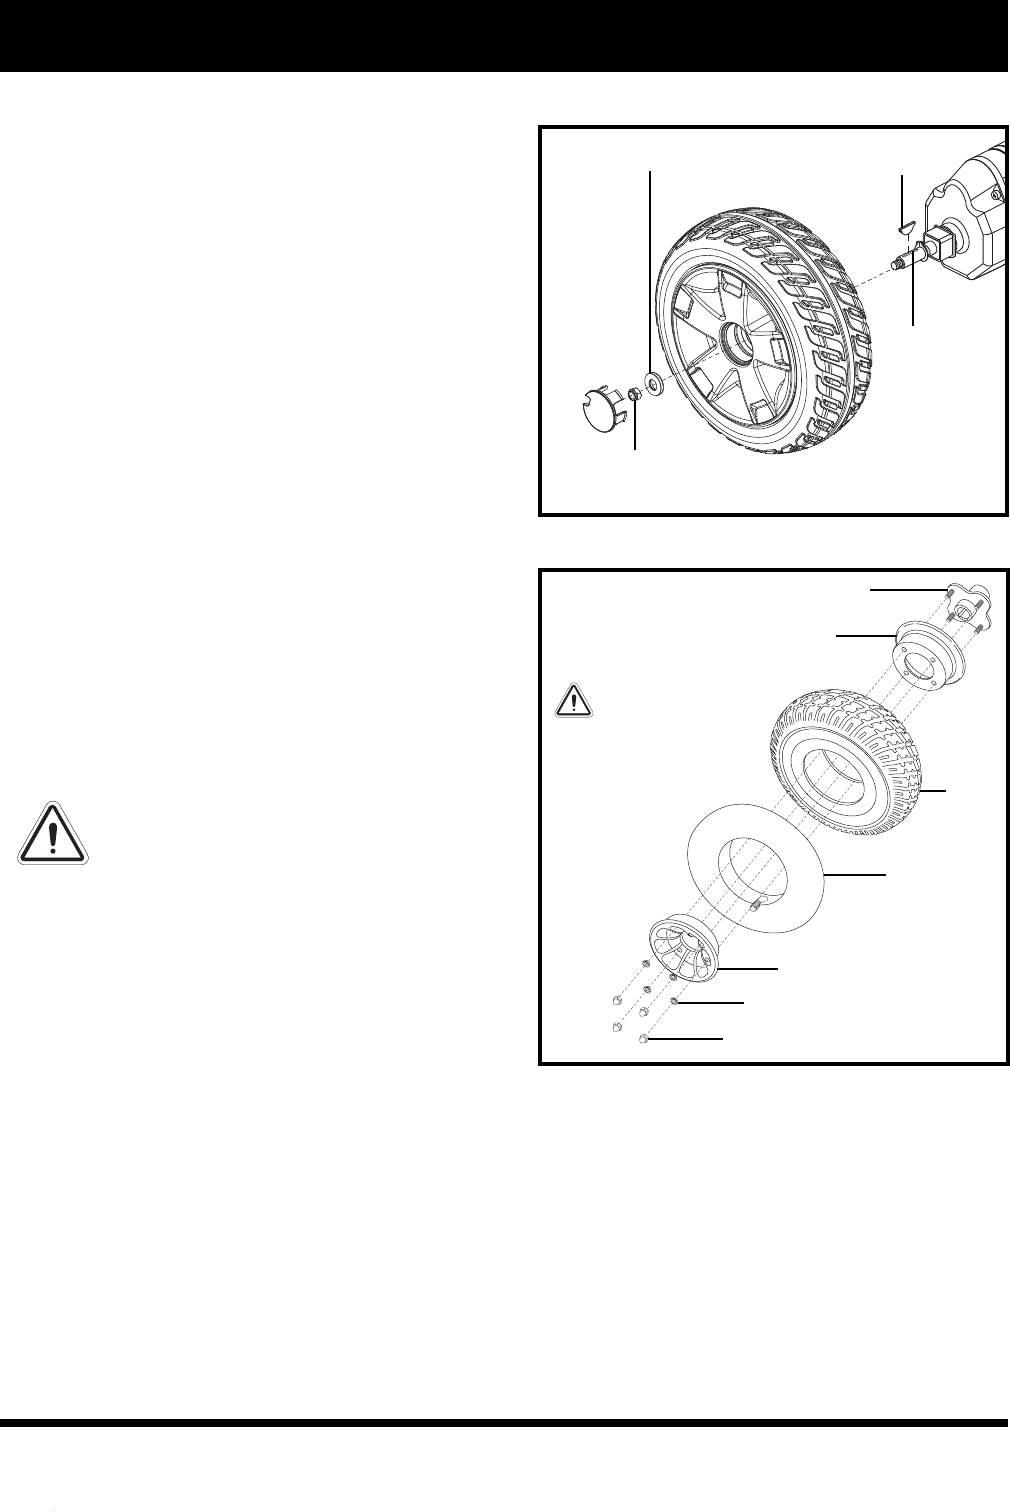
HUB
REAR RIM HALF
TUBE
TIRE
FRONT RIM HALF
WASHERS
NUTS
WARNING! COMPLETELY
DEFLATE THE TIRE BEFORE
ATTEMPTING REPAIR!
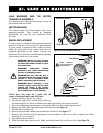
AXLE KEY
AXLE SLOT
DRIVE WHEEL NUT
DRIVE WHEEL WASHER
are removing the tire. Place wooden blocks under the frame to elevate the scooter.
3. If you are changing a pneumatic tire, completely deflate it before removing the wheel.
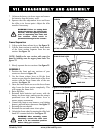
4. Remove the drive wheel nut and washer from the axle. See figure 26.
5. Pull the wheel off the axle.
6. Remove the nuts and washers and separate the rim halves. See figure 27.
7. Remove the old tube from the pneumatic tire and replace it with a new tube or replace the entire
assembly if it is a solid tire.
8. Reassemble the rim halves.
9. Slide the wheel back onto the axle. Make sure that the axle key is in the axle slot. See figure 26.
XI. CARE AND MAINTENANCE
Figure 26. Solid Tire Wheel Removal
Figure 27. Drive Wheel Assembly