


8
all the batteries at the same time - it is dangerous to
mix old and new batteries.
Contact your local waste
disposal authority for instructions on how to dispose
of used batteries. Used batteries can be harmful to
the environment, and should not be thrown out with
household trash.
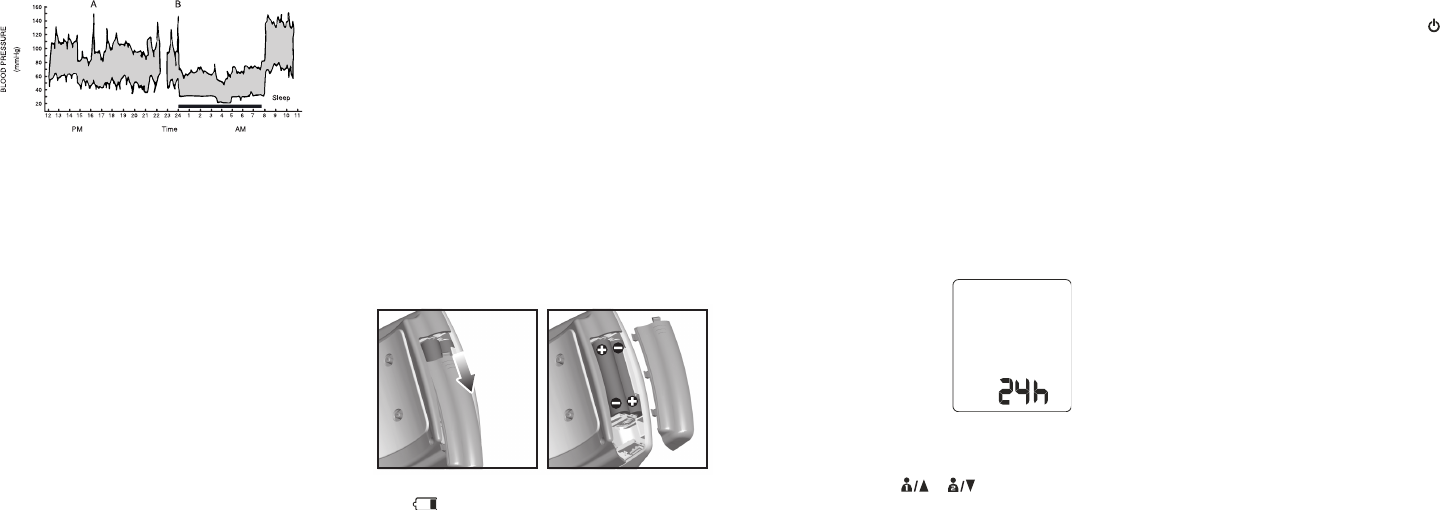
Setting Date, Time And Measurement Units
It is important to set the clock before using your blood
pressure monitor, so that a time stamp can be assigned
to each record that is stored in the memory.
1. When the unit is off, press and hold SET for 2 seconds
to enter the setting mode.
2. The setting order is as follows: 12/24 hour format,
hour, minute, year, month/day or day / month format,
month, date, and measurement unit (kPa or mmHg).
3. Press
or to increase / decrease a value or
change the setting.
4. Press
SET to accept the change and switch to the
next setting.
5. When you are finished, press
to exit the setup
menu.
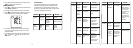
Positioning The Wrist Cuff
It is important to properly position the wrist cuff to
ensure that you receive an accurate reading.
1. Remove all accessories (watch, bracelet, etc.) from
your left wrist. If your physician has diagnosed you
with poor circulation in your left arm, use your right
wrist.
2. Roll or push up your sleeve to expose the skin.
3. Apply the cuff to your left wrist with your palm facing
up.
4. Position the edge of the cuff about 0.4 inches (1cm)
from the bottom of your palm.
5. Fasten the wrist cuff around your wrist, leaving no
extra room between the cuff and your skin. If the cuff
is too loose, the measurement will not be accurate.
7
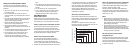
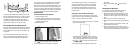
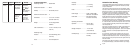
The graph above illustrates the variations over a single
day with measurement taken every 5 minutes. The thick
line represents sleep time. The rises in blood pressure
at 4PM (A in the graph) and 12AM (B in the graph)
correspond to an attack of pain and sexual intercourse
(Beven, Honour & Stott, Clin. Sci. 36:329, 1969).
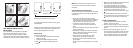
How The Blood Pressure Monitor Works
This product uses the Oscillometric Measuring method to
detect your blood pressure. Before every measurement,
the unit establishes a “zero pressure” equivalent to the
air pressure.
Then it starts inflating the wrist cuff to 180mmHg or
higher until it senses that it has blocked your blood
in the artery. After that, the deflation process starts,
during which time the unit detects pressure oscillations
generated by beat-to-beat pulsatile, which is used to
determine the systolic, mean and diastolic pressure, and
also your pulse rate. Any motion during this period will
result in an incorrect measurement. After all readings are
determined and displayed on the LCD, the measurement
is finished and the wrist cuff automatically deflates.
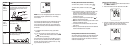
Getting Started
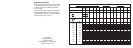
Installing And Replacing The Batteries
1. Slide off the battery cover.
2. Install the batteries by matching the correct polarity,
as shown below. Always use the correct battery type
(2 alkaline LR03 AAA-size).
3. Replace the cover.
NOTE: Replace the batteries whenever the weak battery
mark shows, the display is dim, or the display
does not illuminate when the power is on. Replace