


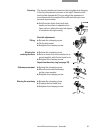

Objective nosepiece
• Suggested for Leica MZ16 and MZ16 A
Please note: When using the objective nosepiece together with MS5, MZ6,
MZ7
5, MZ95 or MZ125 large fields of view at low magnifications are not fully
illuminated.
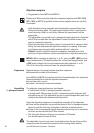
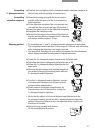
– Hold objectives during assembly and disassembly to prevent them from
falling on the stage plate. This applies particularly to the 2× planapochro-
matic objective, which is very heavy. Remove the specimens from the
stage plate.
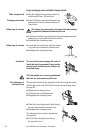
– The adjustable ring nut with the 1× planapochromatic objective is fastened
with 2 Allen screws after the adjustment. Loosen the Allen screws if you
need to remove the objective.
– Attach the limit stop to the stand column. It prevents the 2× objective from
hitting the limit stop when the objective nosepiece is rotating, if the work-
ing distance was changed ×while working with the 1 objective.
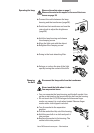
– Caution: Carefully rotate the objective nosepiece and take care not to
pinch your fingers between column and objective or objective nosepiece.
MZ16 A: When changing to objective 1× or 2×, press the OPT + SEL function
keys simultaneously. The display shows the current total magnification, and
in REF mode it shows the current measurement with objective 1× or 2×.
A 1 or 2 in front of the value indicates the selected objective.
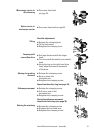
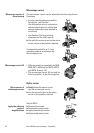
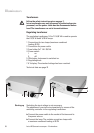
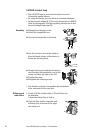
Remove the securing strap from the objective nosepiece:
̈ Remove both screws (at the bottom).
Leica MZ16 and MZ16 A are delivered with a threaded adapter for objectives.
Remove the adapter to use the objective nosepiece.
̈ Invert the optics carrier.
̈ Loosen 3 screws and remove the adapter.
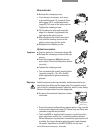
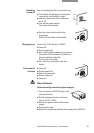
The objective nosepiece features two threads:
– a fixed thread for the 2× planapochromatic objective
– a thread with 2 Allen screws for the 1× planapochromatic objective with
adjustable ring nut. The adjustable ring nut is supplied separately and used
to adjust the parfocality between both objectives.
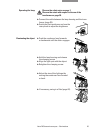
Invert the objective nosepiece to simplify the assembly of the objectives.
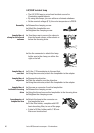
̈ Screw on the adjustable ring nut on the thread of the 1× planapochromatic
objective until the limit stop and tighten it with the enclosed wrench.
̈ Screw in the 1× planapochromatic objective with the ring nut in clockwise
direction on the side with the 2 Allen screws.
• The fine-pitch thread on the ring nut consists of 24 threads.
You should expect at least 40 turns.
The adjustable ring nut must never be set higher than the top surface of the
nosepiece plate to prevent the nosepiece from locking while rotating.
Preparation
Assembling
1× planapochromatic
36
Leica M Stereomicroscopes – Assembly