


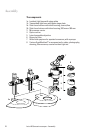


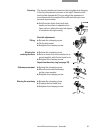
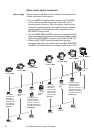
Large swinging-arm and table-clamp stands
̈ Use the clamp to secure the column to
a table top 20 mm – 50 mm thick.
̈ Insert 4 Allen screws into the base from
beneath and secure them to the end of
the column.
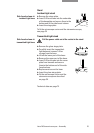
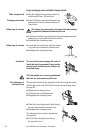
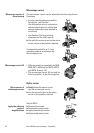
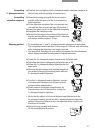
The safety ring secures the instrument and must always
be positioned beneath the horizontal arm.
̈ Position the safety ring with the screw head uppermost and
towards you, and slide it down the column.
̈ Retighten the clamping screw.
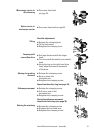
̈ Lower the horizontal arm onto the safety
ring, with its end pointing towards you.
̈ Retighten the clamping screw.
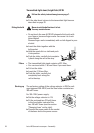
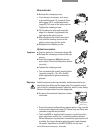
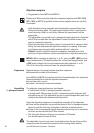
The screw head must engage the notch. It
limits the lateral movement. It may not be
removed, and neither may the safety ring
be milled down.
If the horizontal arm is swung out beyond
the limit, the instrument may fall over.
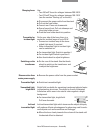
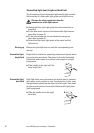
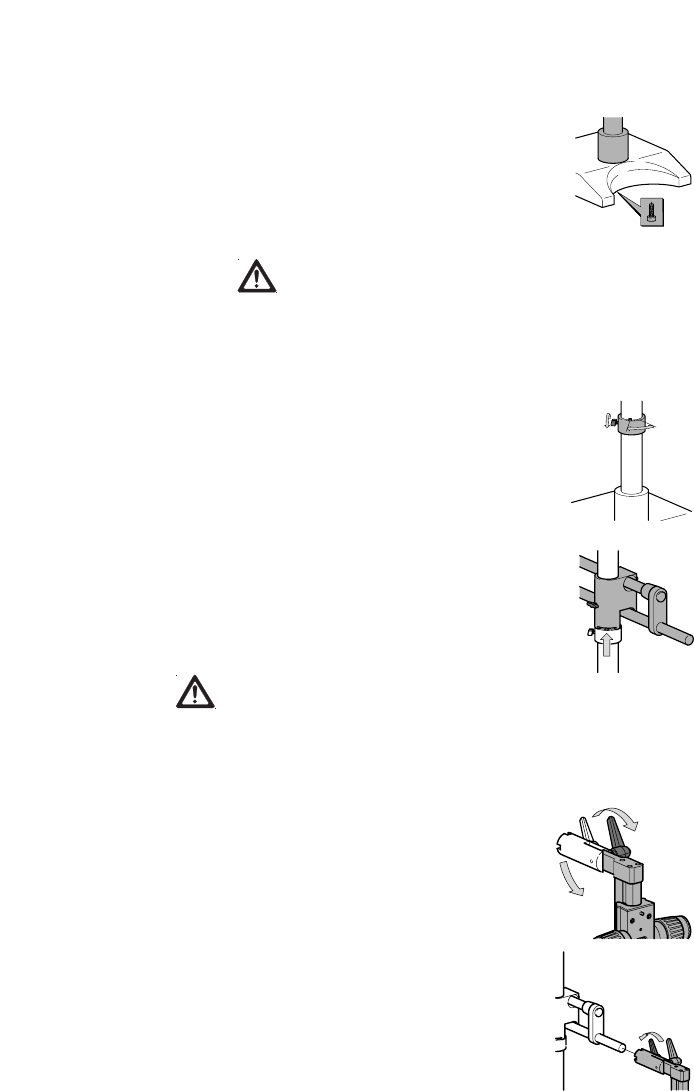
This section describes the assembly of the focusing drive with
side-faced carrier rod. To fit the focusing drive with peg, refer
to page 28.
̈ Release the clamping lever.
̈ Tilt the carrier rod downwards.
̈ Retighten the clamping lever.
̈ Slide the drive housing with side-faced
carrier rod onto the horizontal arm.
̈ Retighten the clamping lever.
The clamping levers can be positioned
as required.
̈ Pull out the clamping lever along
its axis and turn it.
Table-clamp stand
Swinging-arm stand
Safety ring ➜ column
Safety ring ➜ column
Limitation
Drive housing ➜
horizontal arm
30
Leica M Stereomicroscopes – Assembly