


52
R
E
C
L
I
N
E
R
PROCEDURE 14 RECLINER
CAUTION
DO NOT over tighten the phillips screws that se-
cure the actuator to the pivot block. Damage to
the actuator will occur.
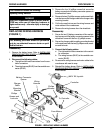
8. Secure the NEW actuator to the pivot block with the
two (2) phillips screws and washers.
CAUTION
DO NOT over tighten the phillips screws that se-
cure the limit switch to the chair frame.
Damage to the limit switch will occur.
9. Position the limit switch sensor onto the seat frame.
10. Secure limit switch sensor to the seat frame with the
two (2) phillips screws and washers.
11. Secure the wire retainer onto the INSIDE of the seat
frame with the phillips screw.
12. Tie wrap the limit switch wire to the seat frame.
13. Reinstall primary portion of wiring harness from con-
troller. Refer to
REPLACING WIRING HARNESS in
PROCEDURE 11 of this manual.
14. Reinstall nylon boot onto motor and battery leads.
Refer to
DISCONNECTING/CONNECTING MKIV
CONTROLLER MOTOR AND BATTERY LEADS in
PROCEDURE 9 of this manual.
15. Adjust the limit switch. Refer to ADJUSTING LIMIT
SWITCH in this procedure of the manual.
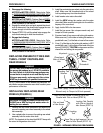
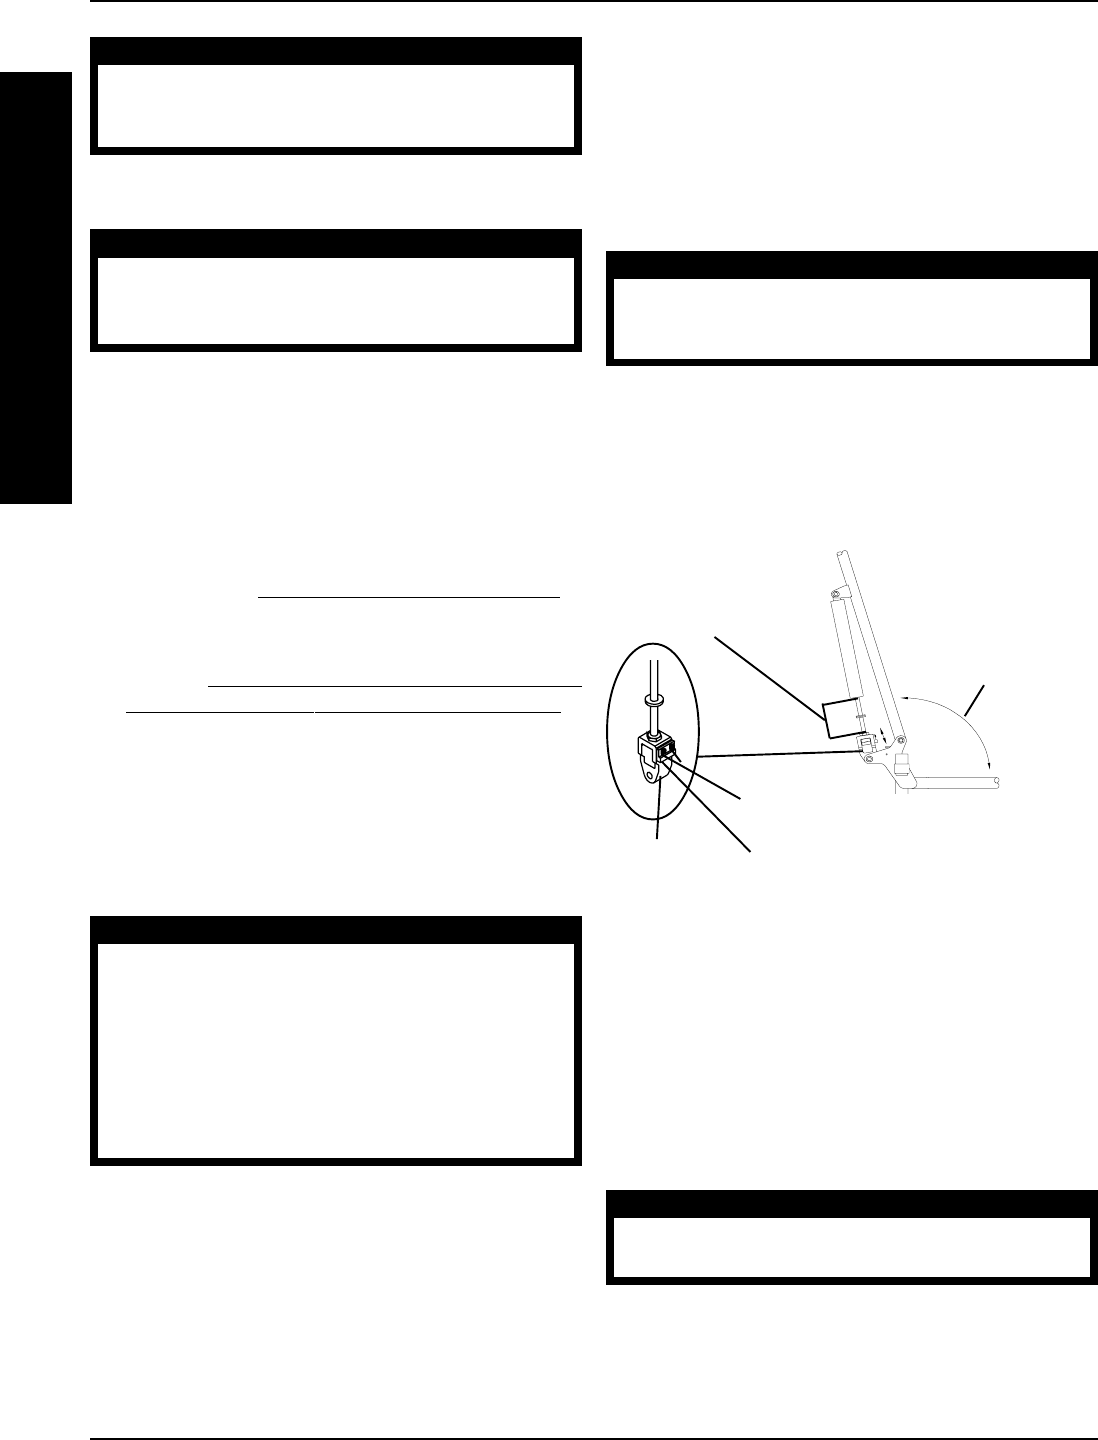
ADJUSTING LIMIT SWITCH
(FIGURE 5)
WARNING
NEVER operate the wheelchair while in any
recline position over 105
o
RELATIVE TO THE SEAT
FRAME. If the limit switch does not stop the wheel-
chair from operating in a recline position greater
than 105
o
RELATIVE TO THE SEAT FRAME, do not
operate the wheelchair. Adjust the limit switch or
have the wheelchair serviced by a dealer or
qualified technician.
1. Recline the back of the wheelchair until the gas cyl-
inder rod measures 3-21/32 of an inch.
2. Turn the power of the joystick to the ON position.
NOTE: ALL segments of the bar graph on the joystick
should start to flash on and off and wheelchair should
not operate.
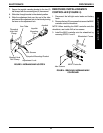
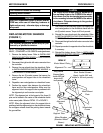
FIGURE 5 - ADJUSTING LIMIT SWITCH
Gas Cylinder
Rod Measures
3-21/32-inches
Pivot Block
Phillips Screws and Washers (DO
NOT Over-Tighten)
Actuator
POSITION OVER
105
O
RELATIVE TO
THE SEAT FRAME
3. IF the wheelchair operates, proceed to the following
steps to adjust the actuator on the pivot block:
A. Loosen, but do not remove, the two (2) phillips
screws and washers that secure the actuator to
the pivot block.
B. Slide the actuator UP (towards the top of the
wheelchair).
CAUTION
DO NOT over tighten the phillips screws that se-
cure the actuator to the pivot block. Damage to
the actuator will occur.
C. Only tighten the two (2) phillips screws and wash-
ers that secure the actuator to the pivot block until
the actuator does not move.
D. Repeat STEPS 1, 2 and 3 until the wheelchair
does not operate when the gas cylinder rod is
3-21/32-inch long.
REPLACING RECLINER CABLE
ASSEMBLIES (FIGURE 6)
NOTE: There are three (3) different cable lengths depend-
ing on back height:
CABLE LENGTH BACK HEIGHT
Short 18-1/2 and 20-inches
Medium 22 and 24-inches
Long 26-inches
WARNING
Replace ONE (1) recliner cable assembly at a time
to avoid injury.
1. Cut the tie wraps that secure the existing recliner cable
assembly to the back cane.
2. Remove the pan screw that secures the handle of the
existing recliner cable assembly to the back cane.
3. Loosen the jam nut on the gas cylinder rod.