59
PROCEDURE 12MWD WHEELCHAIRS
M
W
D
W
H
E
E
L
C
H
A
I
R
S
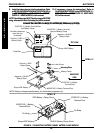
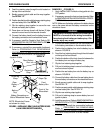
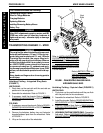
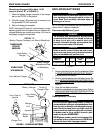
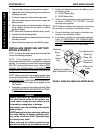
BATTERY TRAY (FIGURE 7)
Installing Battery Tray
1. If necessary, remove the shrouds. Refer to
REMOV-
ING/INSTALLING SHROUDS - MWD WHEEL-
CHAIRS in PROCEDURE 9 of this manual.
2. Turn the battery tray slightly to one (1) side.
NOTE: Make sure the end of the battery tray labeled
"FRONT" is towards the front of the wheelchair.
3. Position the battery tray pins over the mounting slots on
the hanger brackets.
WARNING
Make sure pins of battery tray are secure in the
mounting slots of the hanger bracket, otherwise in-
jury or damage may result.
4. Push down on the battery tray to secure in place.
5. Install the battery boxes. Refer to
INSTALLING/REMOV-
ING BATTERY BOXES in this procedure of the manual.
6. If necessary, install the shrouds. Refer to
REMOVING/
INSTALLING SHROUDS - MWD WHEELCHAIRS in
PROCEDURE 9 of this manual.
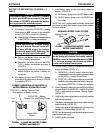
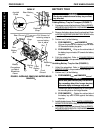
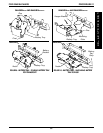
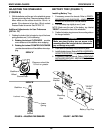
ADJUSTING THE STABILIZER
(FIGURE 6)
1. With the batteries and the user in the wheelchair, grasp
the swing arm and pull up. Clearance between the sta-
bilizer wheel and the surface should be 1/8-inch or
greater. If the clearance is less than 1/8-inch contact
Invacare Dealer for service. See DETAIL "A".
Additional Adjustments for User Preference
(DETAIL "B")
1. Rotating the locknut that is located on top of the lower
spring provides one (1) of the following:
A. Rotating the locknut CLOCKWISE - provides
more resistance of the stabilizer when stopping.
B. Rotating the locknut COUNTER-CLOCKWISE
- provides less resistance of the stabilizer when stop-
ping.
Clearance should be
1/8-inch or greater
Ground/Floor
Stabilizer
Wheel
Stabilizer
Locknut
FIGURE 6 - ADJUSTING THE STABILIZER
Lower
Spring
DETAIL "A"
DETAIL "B"
Battery
Tray
Hanger
Bracket
Battery Tray Pins
"FRONT"
Label
Mounting
Slots
FIGURE 7 - BATTERY TRAY


