


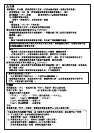

- Failure of drying with
the LED light dryer
Check for accumulation of dust,
etc., inside the LED light dryer.
Periodically perform maintenance.
Check to see if water drops on
the main body and blade surface
have been wiped off after
washing with water.
Wipe off water drops on the main
body and blade surface before setting.
Check the above, and if the shaver is still in poor condition, do not repair by yourself but consult your
distributor.
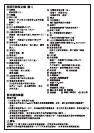
Specifications
Power
supply
Power adaptor
(KH-187B)
100 – 240V AC, 50/60Hz, 14VA
Main body Battery (Lithium-ion battery 3.6V DC, 1300mAh) x 1
Charging time 1.5 hours as standard Rated time 5 minutes
Mass Main body : Approximate 200g
Power adaptor : Approximate 70g
LED light dryer : Approximate 150g
Accessories Pouch, Shaver oil, Cleaning brush
Symptom Check point Remedy
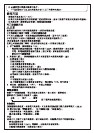
Please note when disposing of the product
Do not charge the removed battery and also: (Cause of heat generation, catching fire, or rupture)
- Do not throw in fire or overheat it.
- Do not puncture with a nail, give a shock, disassemble, or modify it.
- Do not bring (+) and (-) into contact with metal, etc.
- Do not carry or store it together with a necklace, hairpin, etc.
- Do not leave it in a hot place, such as near a fire or under a scorching sun.
Keep the removed battery out of reach of children.
If they are suspected of having swallowed the battery, immediately seek medical attention.
If the battery fluid leaks, do not touch it with bare hands but take the following action.
- If the fluid gets in eyes, do not rub eyes but immediately rinse with clean water and then seek
medical attention.
- If the fluid adheres to the body or clothing, sufficiently rinse with clean water and then seek medical
attention.
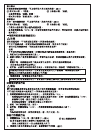
This product includes recyclable parts.
For disposal of the parts, observe your local laws and regulations etc.
Do not disassemble except when disposing of the product.
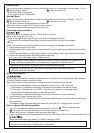
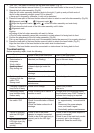
How to remove the lithium-ion battery
1. Keep the switch “ON” until the shaver stops moving completely to discharge the lithium-ion battery.
2. Remove the cap, head holder, and outer-cutter assembly.
3. Remove the screws from the rear cover with a Phillips screwdriver, and remove the rear panel.
(Fig.31)
4. Remove blind piece B and blind piece C from the front panel by using tweezers or the like, disengage
the claws with a flat-blade screwdriver or the like, and remove the front panel. (Fig.32)
Screws
Blind piece C Blind piece B Claws Front panel
Flat-blade screwdriver
5. Remove the two Phillips screws from the housing case, and remove the housing case. (Fig.33)
Housing case
6. Take out the lithium-ion battery, and cut the lead wires separately near the base of the battery. (Fig.34)
Lead wires Lithium-ion battery
Do not bring the (+) and (-) lead wires of the removed lithium-ion battery into contact.
(Cause of short circuits or burns)