


4
SET UP / BATTERIES 498KL
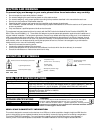
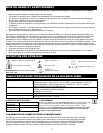
INSTALLING BATTERIES
1. Locate the battery compartment on the bottom of the remote display head.
2. With a Phillips screwdriver remove the screw from the battery compartment cover and remove cover.
3. Place 6 new AA batteries into battery compartment. Make sure the ‘+’ and ‘-‘ are positioned correctly, as shown on the bottom of
the battery compartment. Replace the batteries when the display reads ‘LobAt’ (Use only AA alkaline batteries).
4. Replace the battery compartment cover.
NOTE: Dispose used batteries in accordance to your country’s national, state or local requirements.
OPERATION WITH ADAPTER POWER
Plug the optional adapter (NOT INCLUDED) into the base of the scale and then into the outlet for power. Please refer to page 3 for
information regarding the adapters available for use with this scale.
PREPARING THE SCALE FOR USE
1. Plug the coiled “phone” cord into the base of the scale.
2. Remove the protective plastic film from the display.
3. Turn the scale on by pressing the ON/OFF button. The display will show “Start” and then “0.0”.
NOTE: If set up instructions failed, refer to the troubleshooting instructions. If troubleshooting does not resolve the problem,
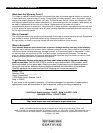
please contact Health o Meter® Professional Technical Support at 1-800-638-3722.
REMOTE HEAD MOUNTING
The remote head can be mounted to a wall up to 6 feet from the base or it can be mounted on the display bracket (included) for
placement on a table up to 6 feet from the base.
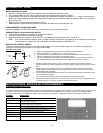
To Mount on Wall
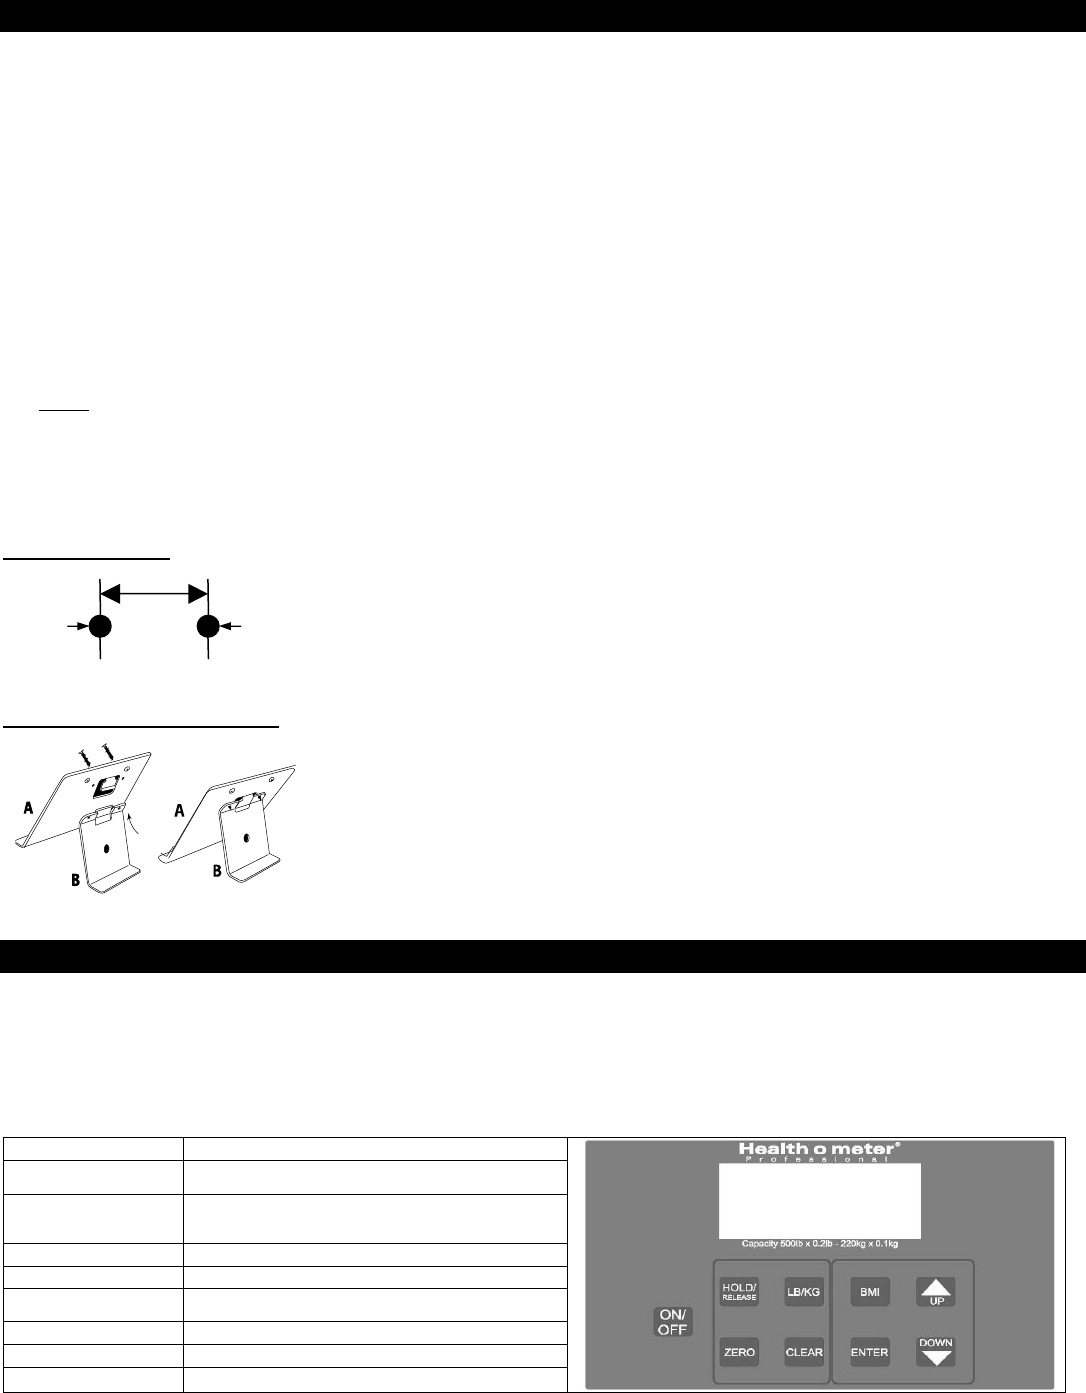
1. Use the above diagram to locate the position of the screws at the desired height.
2. Drill two holes 1 13/16” apart.
3. Screw the two screws into the wall, let the screw heads protrude 1/8” from the wall.
Extending the screw heads further could damage the scale.
4. Align the holes on the back of the remote display with the screws. The remote head
should slide onto the screw heads firmly and securely.
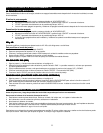
To Mount on Display Bracket
1. While holding Part A (Stand) as illustrated in the figure to the left, slide the center tab of
Part B (Support) up and under the tab on the back of the Stand.
2. Align the Stand and the Support so the tab on the rear of the Support can slide beneath
the tab on the rear of the Stand. The holes on the Stand and Support should line up.
3. Insert the two small screws (included) into the two holes in the front of the Stand and
through the holes in the Support.
4. Using a Phillips screwdriver, tighten the screws to secure the Stand to the Support.
5. Slide the two protruding knobs on the bracket into the two holes in the back of the
remote display. The display bracket is now ready for use.
QUICK START / OPERATING INSTRUCTIONS
QUICK START INSTRUCTIONS
QUICK START INSTRUCTIONSQUICK START INSTRUCTIONS
QUICK START INSTRUCTIONS
1. Press the ON/OFF button to turn the scale on. “START” will appear on the display for 4-5 seconds, then “0.0” will be displayed.
2. Have the patient step on the scale. After the weight has stabilized, “LOCK” and the patient’s weight will be displayed.
3. The stable weight will continue to be displayed until the patient steps off the scale. The display will again show “0.0”.
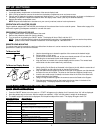
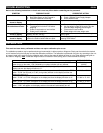
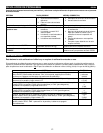
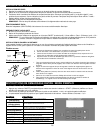
DESCRIPTION FUNCTION
DESCRIPTION FUNCTIONDESCRIPTION FUNCTION
DESCRIPTION FUNCTION
ON/OFF
Turns the scale ON and OFF.
HOLD/RELEASE
Holds the value of the weighed object on the display until
the button is pressed again.
ZERO
Zeros the display prior to weighing; enables the
cancellation of weight if some object was placed on the
scale.
LB/KG
Toggles between pounds and kilograms.
CLEAR
Clears the incorrect height input when in BMI mode.
BMI
Prompts entry of data to calculate the patients Body Mass
Index (BMI)
ENTER
Used to accept height in BMI mode.
UP▲
Increases height input (0.5 in / 0.5 cm increments)
DOWN▼
Decreases height input (0.5 in/ 0.5cm increments)
Drill Hole Drill Hole
1 13/16”