


21
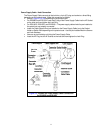
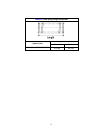
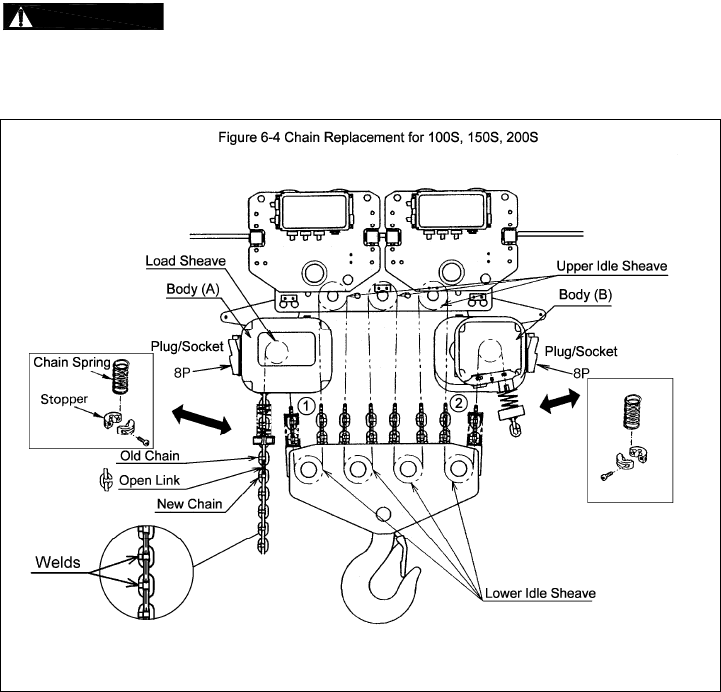
11) Remove the remaining Stopper and Chain Spring from the old chain. Inspect and replace any
damaged or worn parts. Install the Stopper and Chain Spring to the end of the new chain. Refer to
Section 3.2 in this supplement for correct location.
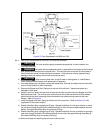
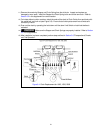
12) For hoists without a chain container, attach the ends of the chain to Chain Guide A on each body with
the socket bolt, and lock nut (see Figure 3-2). Ensure that all chain parts remain free of twists and
correct any if found.
13) Even out the chain by operating the hoist down until the down Limit Switch on both hoist bodies is
activated.
14)
WARNING
Make sure the Stopper and Chain Springs are properly installed. Refer to Section
3.2 in this supplement.
15) After installation has been completed, perform steps outlined in Section 3.6 "Preoperational Checks
and Trial Operation".
Figure 6-4 Chain Replacement for 100S, 150S, 200S