Instruction Manual
IM-106-880, Rev 1.0
January 2007
2-3
OCX 8800
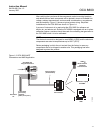
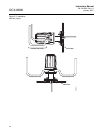
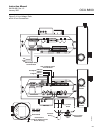
4. Ensure the conduits drop vertically from the OCX 8800 and the conduit
is routed below the level of the conduit ports on the housing to form a
drip loop. Drip loops minimize the possibility that moisture will damage
the electronics (Figure 2-3).
5. Where a positive stack pressure exists at the installation site, connect all
pneumatic lines prior to installing the OCX 8800 in the stack or
ductwork.
NOTE
If process temperatures will exceed 392°F (200°C), use anti-seize compound
on stud threads to ease future removal of the OCX 8800.
6. Insert sample and exhaust tubes through the opening in the mounting
flange and bolt the unit to the flange.
7. If insulation is removed to access the duct for OCX 8800 mounting,
make sure to replace insulation afterward.
Enclosures
The OCX 8800 enclosures are designed to meet ingress conditions of IP66.
Each enclosure cover is threaded to its base and sealed with an o-ring that
isolates the threads from external contaminants.
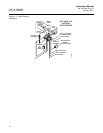
Each cover is secured by a clip attached to the base that engages the cover
between the ribs of the cover sidewall. The clip is held in place by an Allen
head cap screw and lockwasher mounted in a recess. Cover removal and
installation requires an Allen wrench to loosen and tighten the screw.
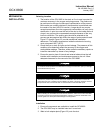
Uninsulated stacks or ducts may cause ambient temperatures in the electronics housing to
exceed 185°F (85°C) and damage the electronics.


