4-2
1
2
3
4
5
Cover/Table of
Contents
Downloading Images
from the Camera,
and Camera Settings
Working with
Images in the
ZoomBrowser EX
Remote Shooting in
the EOS Capture
Troubleshooting
and Uninstalling
the Software
Index
Setting the EOS 5D
and EOS-1D Series
Cameras
Introduction
Camera Settings
You can specify settings for the camera such as the camera owner’s name, the date and time,
Personal Functions and all shot settings.
1
Select the [Set to Camera] tab.
¿ The [Set to Camera] tab sheet
appears.
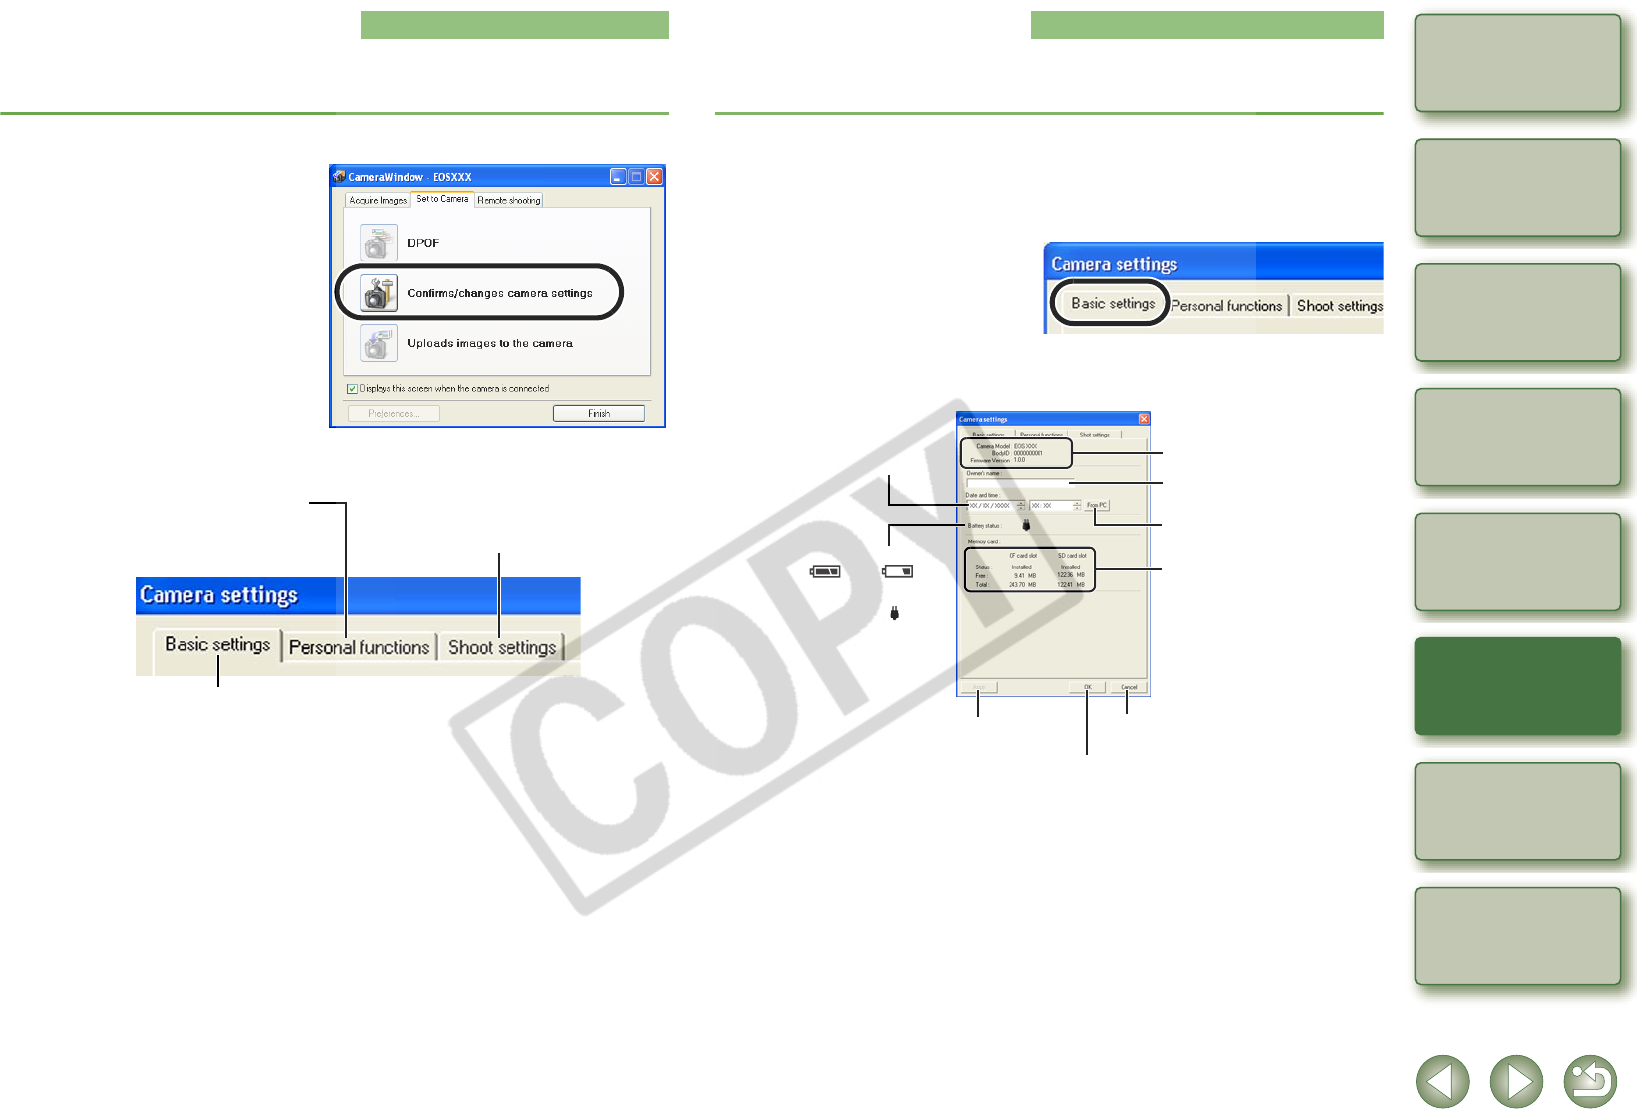
2
Click the [Confirms/
changes camera settings]
button.
¿ The [Camera Settings] dialog box
appears.
3
Select a tab and specify the camera settings.
O With the EOS 5D, only the [Basic settings] tab and [Shoot settings] tab are displayed.
O With the EOS-1Ds and EOS-1D, the [Basic Settings] tab and the [Detailed Settings]
tab are displayed. In the [Detailed Settings] tab sheet, you can set Personal
Functions (p.4-3), processing parameters (p.4-12) and personal white balance (p.4-
14), and apply the settings to the camera.
You can set up Personal Functions and
apply the settings to the camera (p.4-3).
You can specify camera owner’s name and shooting date/time on the camera, and
confirm the camera properties data and the status of the battery and the memory card.
You can apply to the camera all settings
relating to the images shot by the camera.
Basic Settings
You can specify the camera owner’s name and the date and time on the camera, and confirm
the status of the camera’s battery and memory card.
1
Display the [Camera settings] dialog box.
2
Select the [Basic settings] tab.
¿ The [Basic settings] tab sheet
appears.
3
Specify desired settings.
* With the EOS 5D, EOS-1Ds and EOS-1D, the [Format] button is displayed in the CF card information
display. You can initialize the CF card by clicking this button. Be careful as [Format] will delete the
entire recorded contents on the CF card.
O The above window shows information displayable when the EOS-1D Mark II N is
connected. The displayed information varies depending on the camera model
connected.
4
Click the [OK] button.
¿ The settings are applied and the [Camera settings] dialog box closes.
Displays the information relating
to the memory card inside the
camera.*
Enter the camera owner’s name.
You can enter up to 31 characters.
Imports the date and time
from your computer.
Displays the information relating
to the camera.
The battery level of the camera is
indicated by [ ] or [ ].
When you are using the DC Coupler
Kit supplied with the camera or the
AC Adapter Kit (optional), [ ] is
displayed.
Cancels all the settings and closes
the dialog box.
Enter a value or click the [S]/[T]
buttons to specify the date and time.
Applies the settings to the camera.
Applies the settings to the camera
and closes the dialog box.


