5. Lens Adjustment
5. LENS ADJUSTMENT
Lens adjustment features:
The lens adjustment menu contains the following items:
• Zoom/Focus adjustment of the lens
• Vertical and Horizontal shift of the image.
• Activation of a specific test pattern for lens adjustment.
Lens adjustment via Control Button s on projector only possible for R LM series.
Overview
• Lens Adjustment via Control Buttons on Projector
• Lens Adjustment via Menu Bar
• Direct Lens Adjustment (RCU)
5.1 Lens Adjustment via Control Buttons on Projector
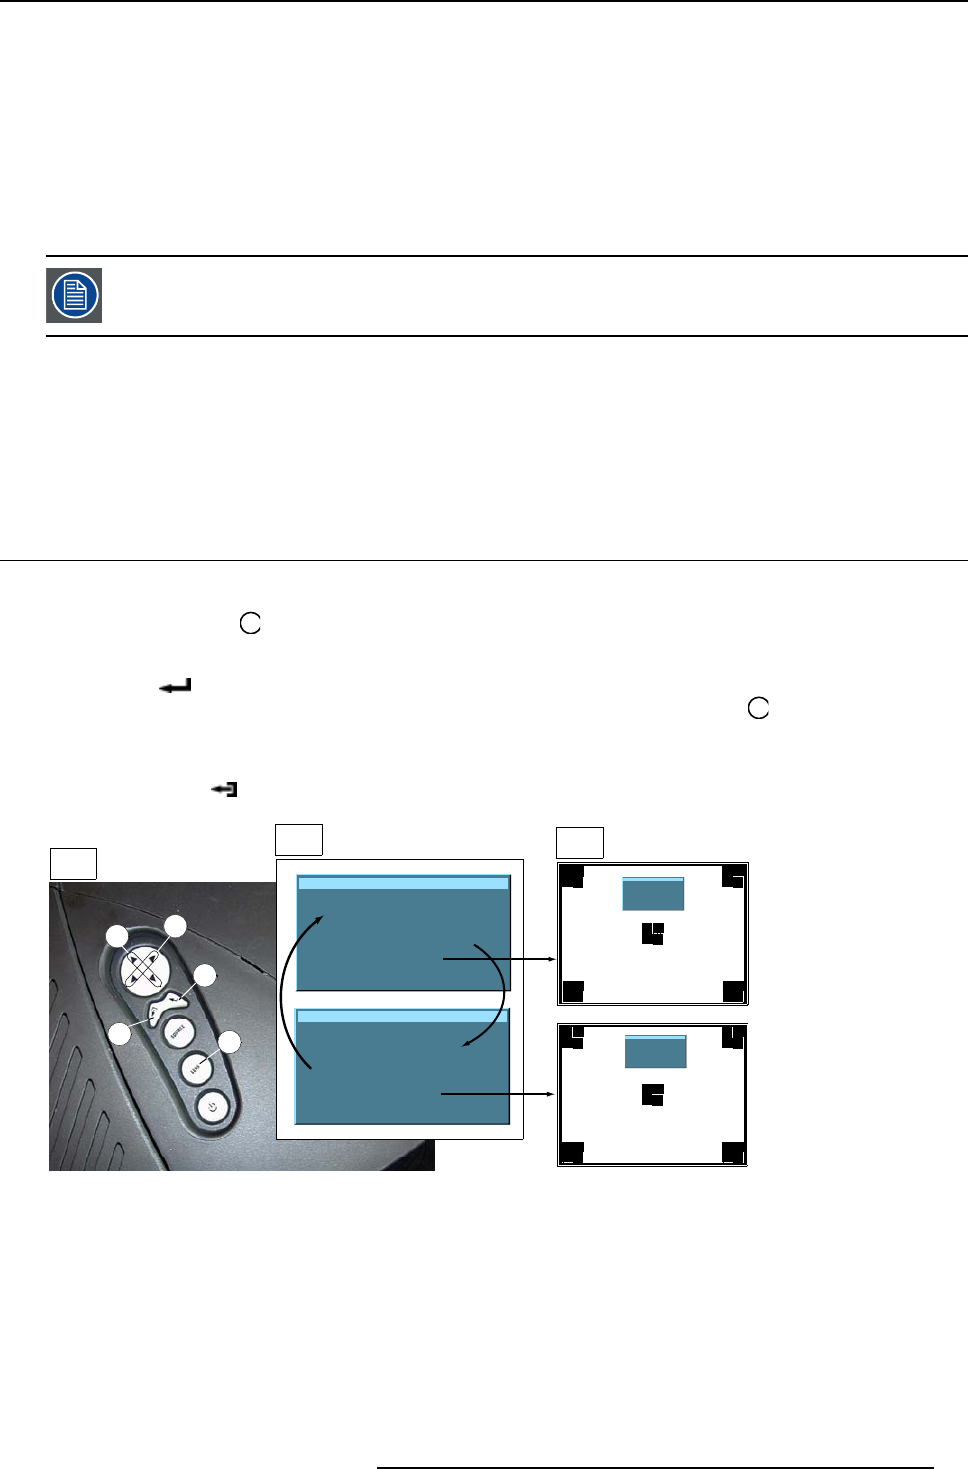
How to enter the adjustment menu.
1. Press the control button
Lens
(C).
The lens adjustment menu appears on the screen, requesting for ZOOM/FOCUS alignment.
2. Press button
(B) to toggle between ZOOM/FOCUS and Vert. Hor. SHIFT menu.
Note: For the alignment, a lens adjustment test pattern can be activated: toggle control button
Lens
(C) to activate or deactivate
the lens adjustm ent test pattern.
3. Press the corresponding arrows (A1) or (A2) on the adjust button, as indicated in front of the menu items, for alignment.
4. Press control button
(D) to leave the lens adjustment menu. (image 5-1)
Lens adjustment
Use
↑
and
↓
for zoom
Use
←
and
→
for focus
Press <enter> for SHIFT mode
Press <LOGO> or <LENS>
for test pattern
Lens adjustment
Use
↑
and
↓
for vertical shift
Use
←
and
→
for horizontal shift
Press <enter> for ZOOM/FOCUS
Press <LOGO> or <LENS>
for test pattern
A2
B
C
D
A1
1
2
3
Lens adjustment
Use
↑
and
↓
for zoom
Use
←
and
→
for focus
Press <enter> for SHIFT mode
Press <LOGO> or <LE NS>
for test pattern
Lens adjustment
Use
↑
and
↓
for vertical shift
Use
←
and
→
for horizontal shift
Press <enter> for ZOOM/FOCUS
Press <LOGO> or <LE NS>
for test pattern
Image 5-1
Lens Adjustment
1 Button panel on projector
2 Menu Zoom/Focus and Vertical & Horizontal shift
3 Same menus inserted in lens adjustment test pattern
R5976641 OPTICAL LENS ADAPTER 29/03/2004
17


