INSTALLATION INSTRUCTIONS
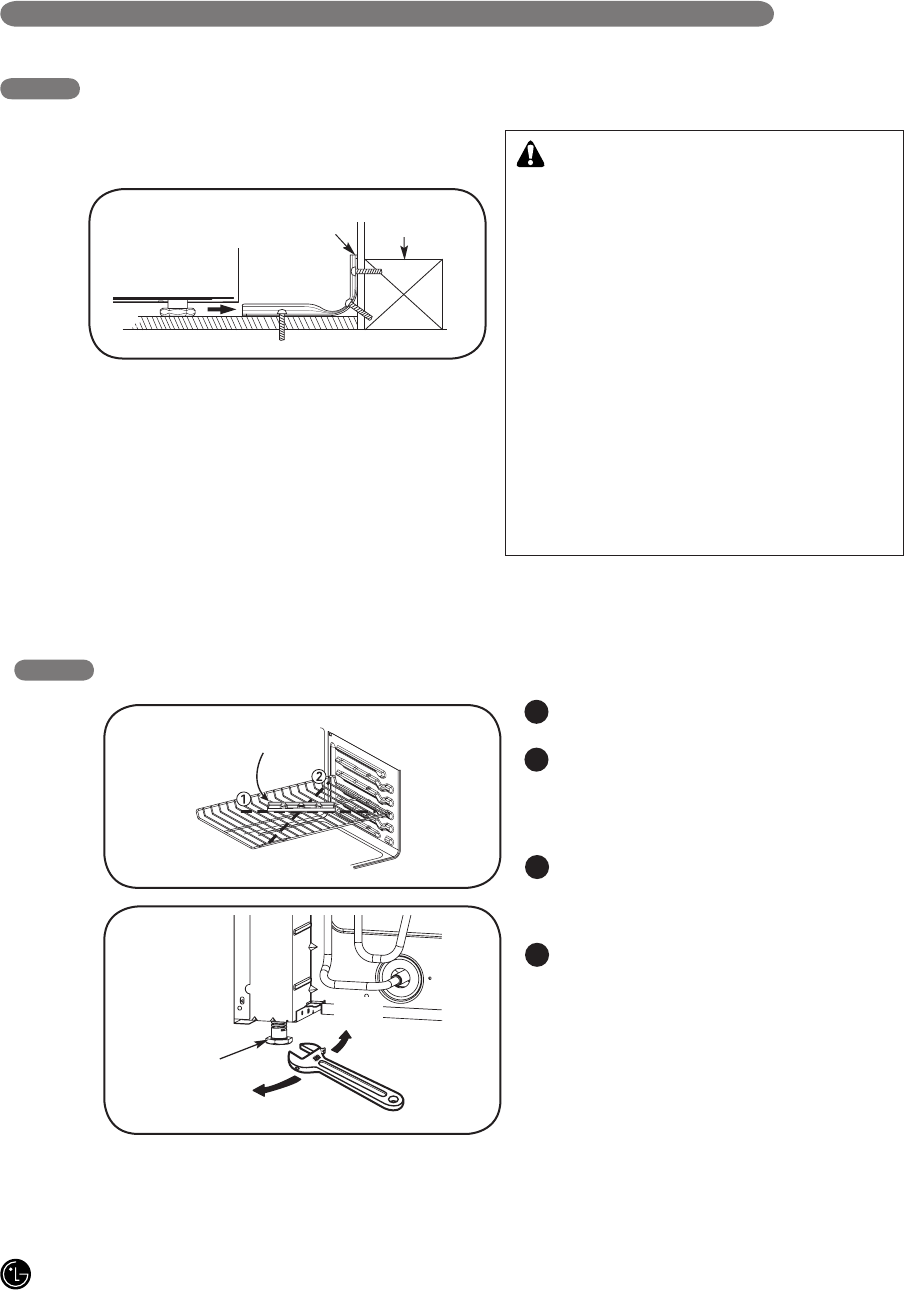
Install the oven shelves in the oven and locate the
range where it will be installed.
Check if the range is level by placing a spirit level or
a cup, partially filled with water, on one of the oven
shelves. If using a spirit level, take two readings—
with the level placed diagonally first in one direction –
① and then the other –②.
Remove the lower door. See the “CARE AND
CLEANING OF THE RANGE” section in the owner's
manual. The front and rear leveling legs can be
adjusted from the bottom.
Use an open-end or adjustable wrench to adjust the
leveling legs until the range is level.
11. LEVELING THE RANGE
Spirit level
A
C
D
B
10. INSTALLING THE ANTI-TIP DEVICE
The Anti-tip bracket is packaged with an installation
template.
The instructions include necessary information to
complete the installation.
Read and follow range installation instruction sheet.
Anti-tip
bracket
Screw must
enter wood or
concrete
Wall plate
INSTALL THE BRACKET USING THE BRACKET
INSTALLATION SHEET
WARNING
• Range must be secured with an approved Anti-
Tip device.
• The range could be tipped by standing, sitting or
leaning on an open door if the range or Anti-Tip
device is not properly installed.
• After installing the Anti-Tip device, verify that
it is in place by carefully attempting to tilt the
range forward.
• This range has been designed to meet all
recognized industry tip standards for all normal
conditions.
• The installation of the Anti-Tip device must meet
all local codes for securing the appliance.
• The use of this device does not preclude tipping
of the range when not properly installed.
Leg leveler
Raise
range
Lower
range
