2
HP PrecisionScan Pro User’s Guide 31
A tour of the scanning
software
Book Contents Index
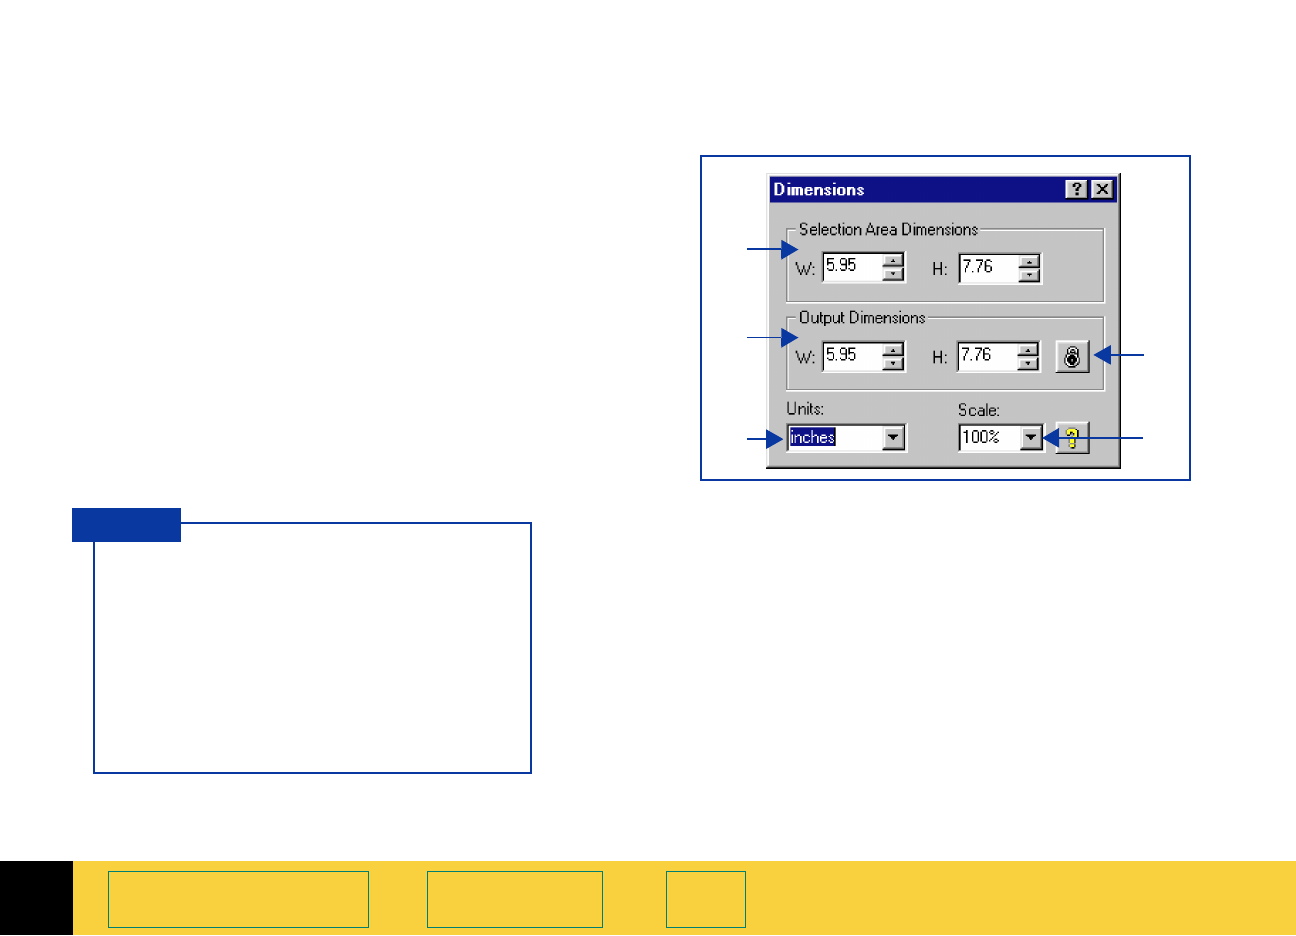
After you have drawn a selection area, use the
Dimensions tool to:
See
Set the output dimensions on page 58 for more
about how to use the
Dimensions tool.
➊
adjust the dimensions of the selection area
➋
set values for the width and height of the image
to be included in the final scan
➌
select the units you want to work with
➍
enlarge or reduce output dimensions of the
image for the final scan proportionally by scaling
to a percentage of the original’s size
➎
lock the output dimensions so you can change
the dimensions of the selection area without
changing the output dimensions
➊
➋
➌
➎
➍
To preserve image quality when you
use it in another program:
■
measure the dimensions of the area
in which you will place the image,
then
■
use the Dimensions tool in
HP PrecisionScan Pro to scale or resize
the image
to fit that area.
TIP


