Installation and Operation, cont’d
VersaTools
®
MDA EQ Series • Installation and Operation VersaTools
®
MDA EQ Series • Installation and Operation
5. Place the U-bolt around the ceiling pole and insert the two
legs of the U-bolt through the round holes in the
contoured base, then through the slotted holes in the
bracket’s mounting plate.
• For a typical (1.5" to 2.0" diameter) pole — You can
use the supplied U-bolt, which fits a typical ceiling
pole.
• For a smaller or larger pole — Locally obtain a
U-bolt that fits your ceiling pole. The slotted holes
on the bracket can accommodate a U-bolt for pole
sizes from 1.0" to 2.5" in diameter.
6. Secure the bracket to the U-bolt with the included hex
nuts.
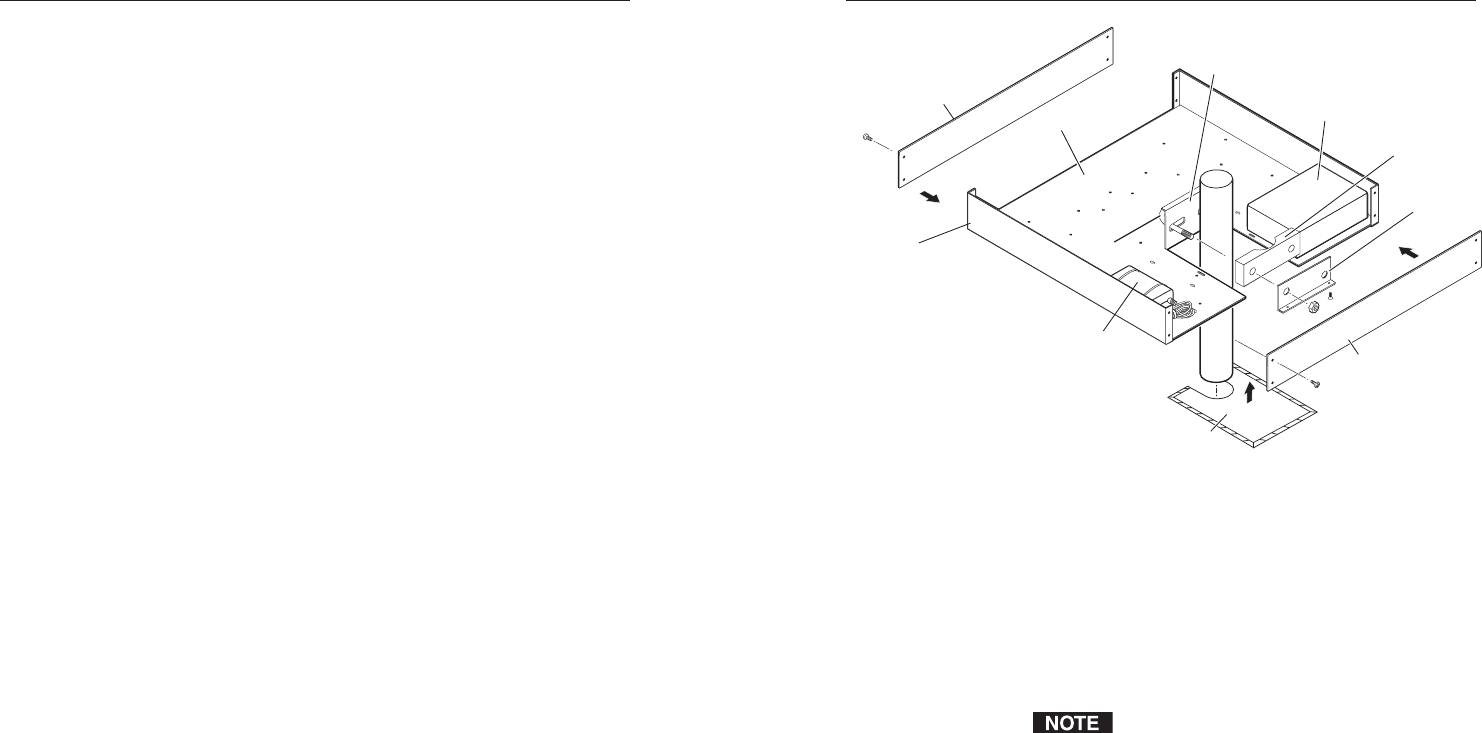
PMK 350 Projector Mounting Kit
The PMK 350 Low Profile Projector Mounting Kit is an above-
projector mounting kit that attaches to a 1.5" to 2" diameter
projector mounting pole. It can hold more than one device, in a
variety of sizes.
The PMK 350 is available in black (part #70-563-02) or white
(part #70-563-03).
Follow these steps to mount the MDA EQ on the PMK 350:
1. Remove the front panel from the PMK, using a #2 Philips
screwdriver. Retain the four screws to reattach the plate
when finished.
2. Remove any rubber feet from the bottom of the MDA EQ.
3. Secure the MDA to one side of the mounting bracket, using
two of the supplied 4-40 x 3/16" screws in opposite
(diagonal) corners. Use an Extron Tweeker (provided) or a
Philips #1 screwdriver to tighten the screws.
4. Using the two included tie wraps, strap the MDA EQ
power supply to the PMK bracket.
5. If desired, remove the back panel of the PMK 350 and
mount an additional MDA or other device(s) at the back of
the bracket, as described in step 3.
6. Place the PMK 350 mounting tray around the projector
ceiling mounting pole. (See the illustration on the next
page.)
Extron
PMK 350
Multi-product Projector
Mounting Kit
Overlay Sheet
Front Plate
Rear Plate
U-bolt
L-shaped
Bracket
Contoured
Base
Mount Plate
Flange
Mounting Tray
Extron
Power Supply
Extron
MDA EQ Series
Mini Distribution Amplifier
Mounting the MDA EQ using the PMK 350
Projector Mounting Kit
7. Assemble the U-bolt and the following parts in the order
they are listed below:
a. Pass the legs of the U-bolt through the slotted holes
on the back of the mount plate flange.
b. Place the U-bolt legs around the ceiling pole.
c. Pass the U-bolt legs through the round holes in the
contoured base.
Place the contoured base against the pole and
opposite the mount plate flange. The pole
should fit snugly into the depression in the
center of the contoured base.
d. Pass the U-bolt legs through the round holes in the
L bracket.
8. Align the two round holes in the bottom of the L bracket
with the two slotted holes in the base of the PMK 350, on
either side of the opening for the pole; and attach the L
bracket to the base by inserting the two provided 6-32 x
5/16" screws through the aligned slots. Tighten the screws
slightly; you should still be able to slide the L bracket to
adjust it as needed.
2-8 2-9


