Auto-Sync Time Clock
5-4 724-746-5500 | blackbox.com
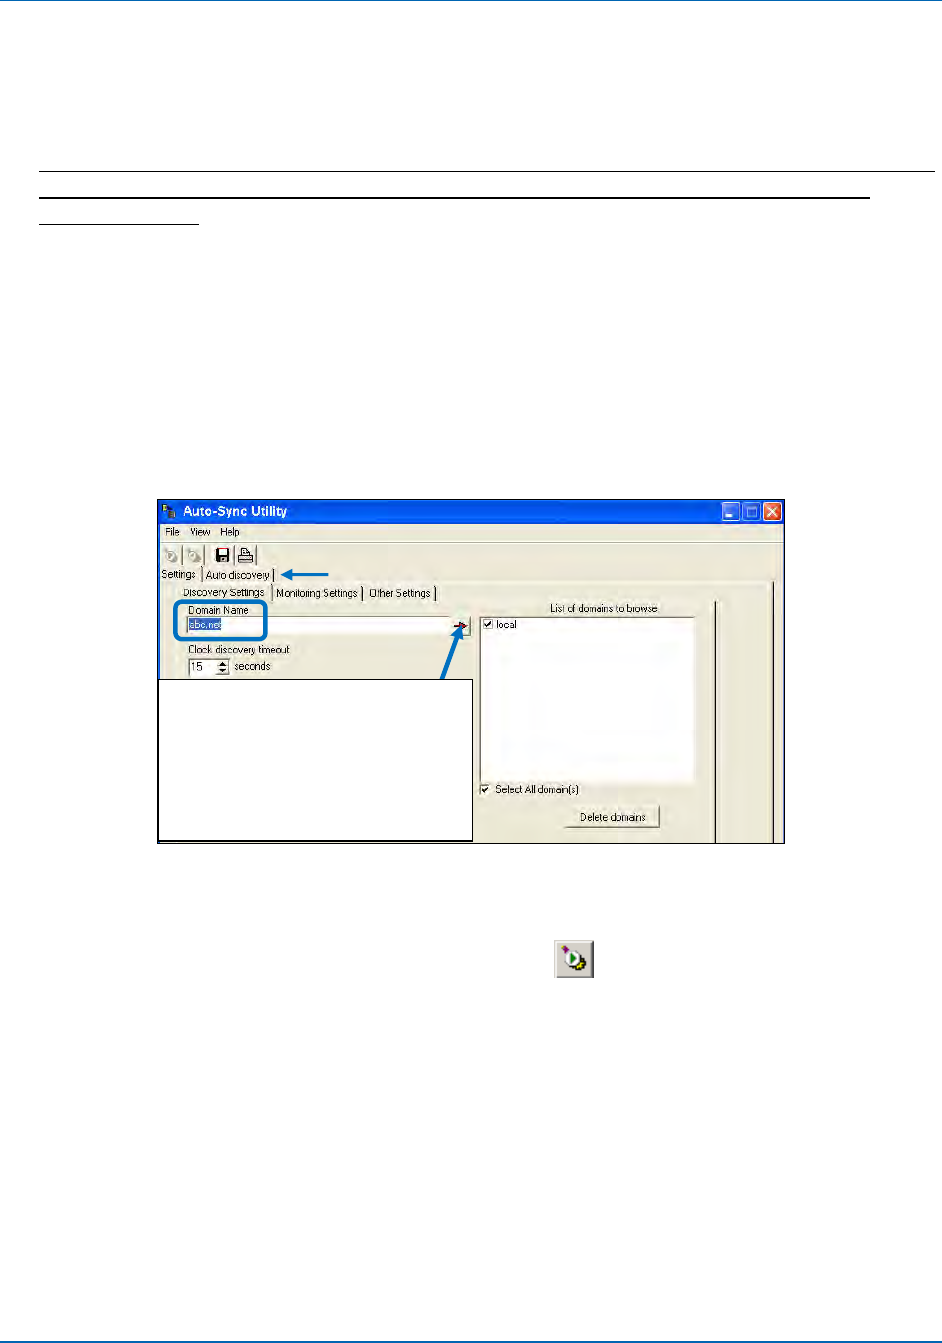
2. From the main menu, click on the View menu and select the submenu
Settings. The Settings and Auto discovery tabs will appear on top. If necessary,
from the Settings screen, click on the Discovery Settings tab to change the
discovery settings.
This step is optional and should usually be skipped. Only perform this step if you
are having discovery problems and need to change the Domain Name, and
timeout value.
Enter a new Domain Name if a different one other than the default of local is
desired. You can change the clock discovery timeout if greater than the 1 minute
default is desired.
The default factory setting on the Auto-Sync Time Clock is “Local Area Service
Discovery’ so that clocks on network1 can only be discovered and managed from
a PC connected to network1. See Chapter 7 of this Guide for Wide Area clock
discovery information.
Figure 5-5. Utility Settings.
Once these changes have been made, click on the Auto Discovery tab to return
to that screen, and click the Start Discovery
button to begin the search
again with the new discovery settings to generate a list of located clocks.
3. When the clock(s) appears in the list, follow the tool tip and double-click on the
desired Auto-Sync Time Clock to launch your browser and open to the clock’s
web login (see Figure 5-6).
After entering Discovery
Settings, click on red arrow
to include the domain,
select domains, and then
click Auto discovery tab to
search.
