


12
Routine Care and Maintenance, continued
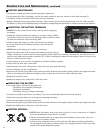
CHECK FRONT AND REAR DRUM BRAKE
SHOE WEAR
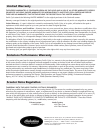
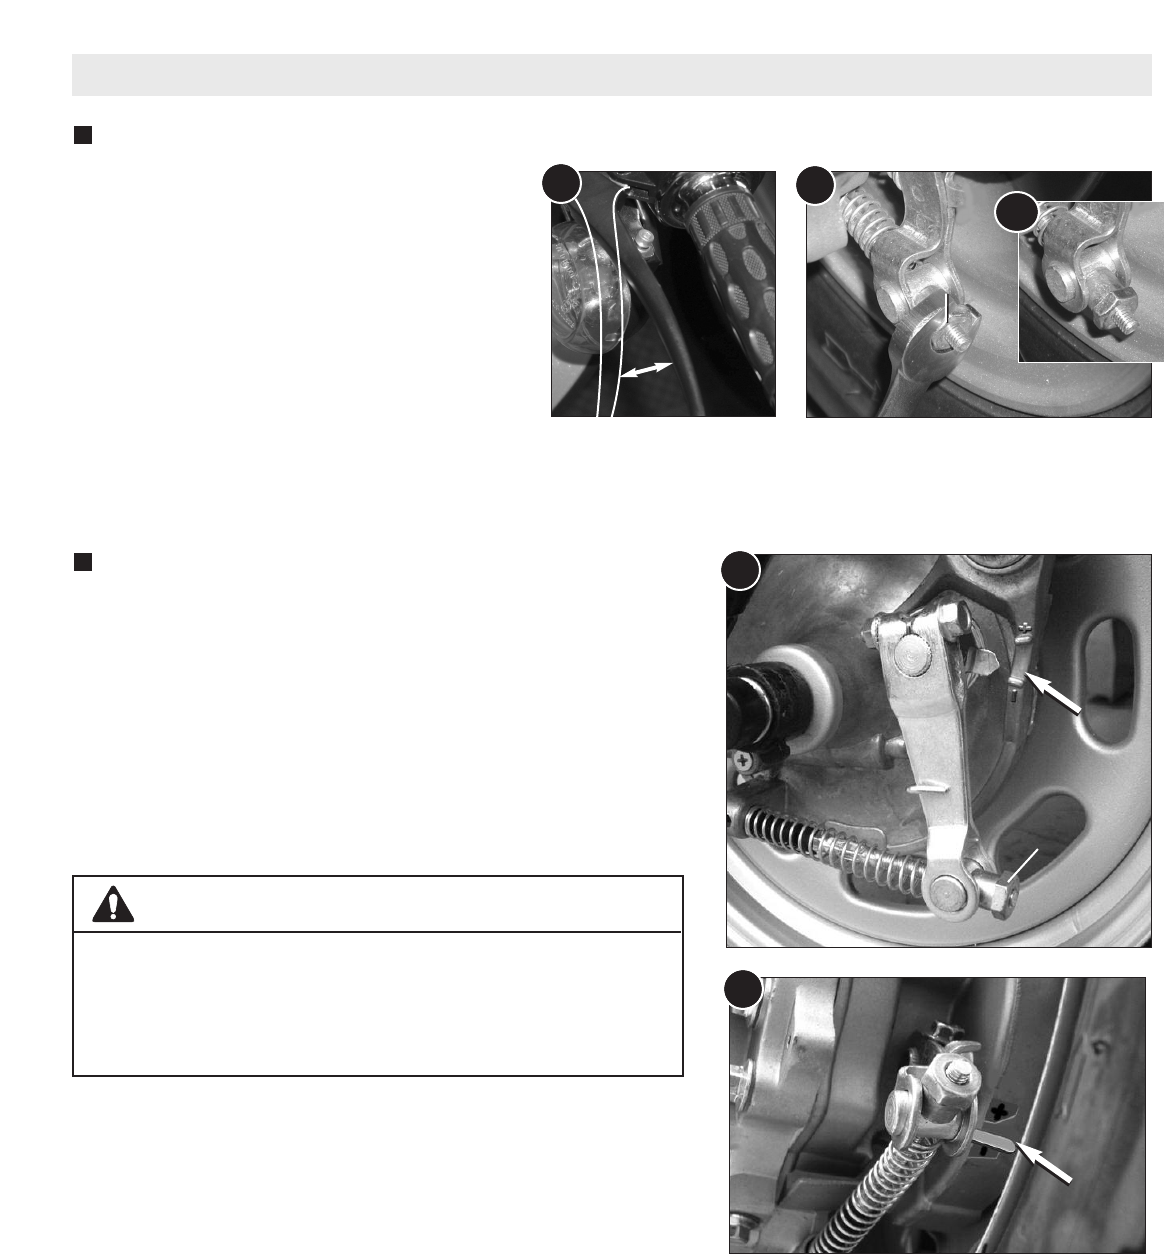
• As the drum brake shoe linings wear, freeplay in the brake lever will
increase. Each time the brake adjustment nut is tightened to
decrease freeplay in the brake lever, the brake wear indicator will
move to a position closer to the minus (–) sign (Figs. 3 and 4).
• The indicator should never reach the minus sign. Brake shoes
should be inspected and replaced by a QUALIFIED MECHANIC
before the indicator reaches the minus sign. The brake shoe must
be replaced before the lining reaches the minimum allowed
thickness of 0.06" (1.5 mm). The brake drum must never measure
larger than 3.892" (99.0 mm) in diameter.
FRONT AND REAR BRAKE ADJUSTMENT
4
FRONT DRUM BRAKE
FRONT DRUM BRAKE
REAR DRUM BRAKE
REAR DRUM BRAKE
Time to replace
brake shoe
Time to replace
brake shoe
Time to replace
brake shoe
Time to replace
brake shoe
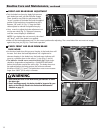
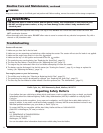
•
T
est the brake lever free play. Apply light pressure
each brake lever until you feel the brake engage.
There should be very little free play between the
“at rest” position of the brake lever and the applied
position of the brake lever. Acceptable free play is
between 3/8" and 3/4" (Fig. 1). Keep the brake
cable adjusted to maintain acceptable free play.
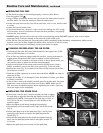
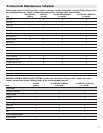
• Use a wrench to adjust the brake adjustment nut
on the rear wheel (Fig. 2). Tighten as necessary
until the correct freeplay is established.
NOTE: If you tighten the nut too much, the wheel
will “drag”, even if the brake is not applied.
• Make sure the brake adjustment nut is in the correct position after adjusting. The curved side of the nut must rest snugly
against the pivot pin (Fig 2a). Check brake operation.
1
Between
3/8" and 3/4"
2
Brake
Adjustment
Nut
Brake
Adjustment
Nut
P
ivot Pin
P
ivot Pin
2a
WARNING
• Never allow the front or rear drum brake pad indicator to reach
the minus sign.
• Even if working properly, the brakes should be inspected by your
dealer at the intervals listed in the Professional Maintenance
Schedule on page 17.
3
Brake
Adjustment
Nut
Brake
Adjustment
Nut