


3
ASSEMBLY INSTRUCTIONS
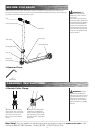
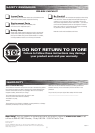
2 With the front wheel pointed
straight ahead, the handlebars
square to the front wheel and the
Razor logo facing the front, tighten
the clamp as shown. Tighten each
bolt securely.
1 Loosen the collar clamp and
slide it upward. With a clock-wise
twisting motion, push and “thread”
the T-tube onto the fork until it
bottoms out on the fork headset
lock nut.
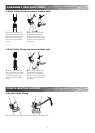
q Triple Collar Clamp (on select models only)
2 With the front wheel pointed
straight ahead, the handlebars
square to the front wheel and the
Razor logo facing the front, tighten
the clamp as shown. Tighten each
bolt securely.
1 Loosen the collar clamp and
slide it upward. With a clock-wise
twisting motion, push and “thread”
the T-tube onto the fork until it
bottoms out on the fork headset
lock nut.
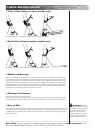
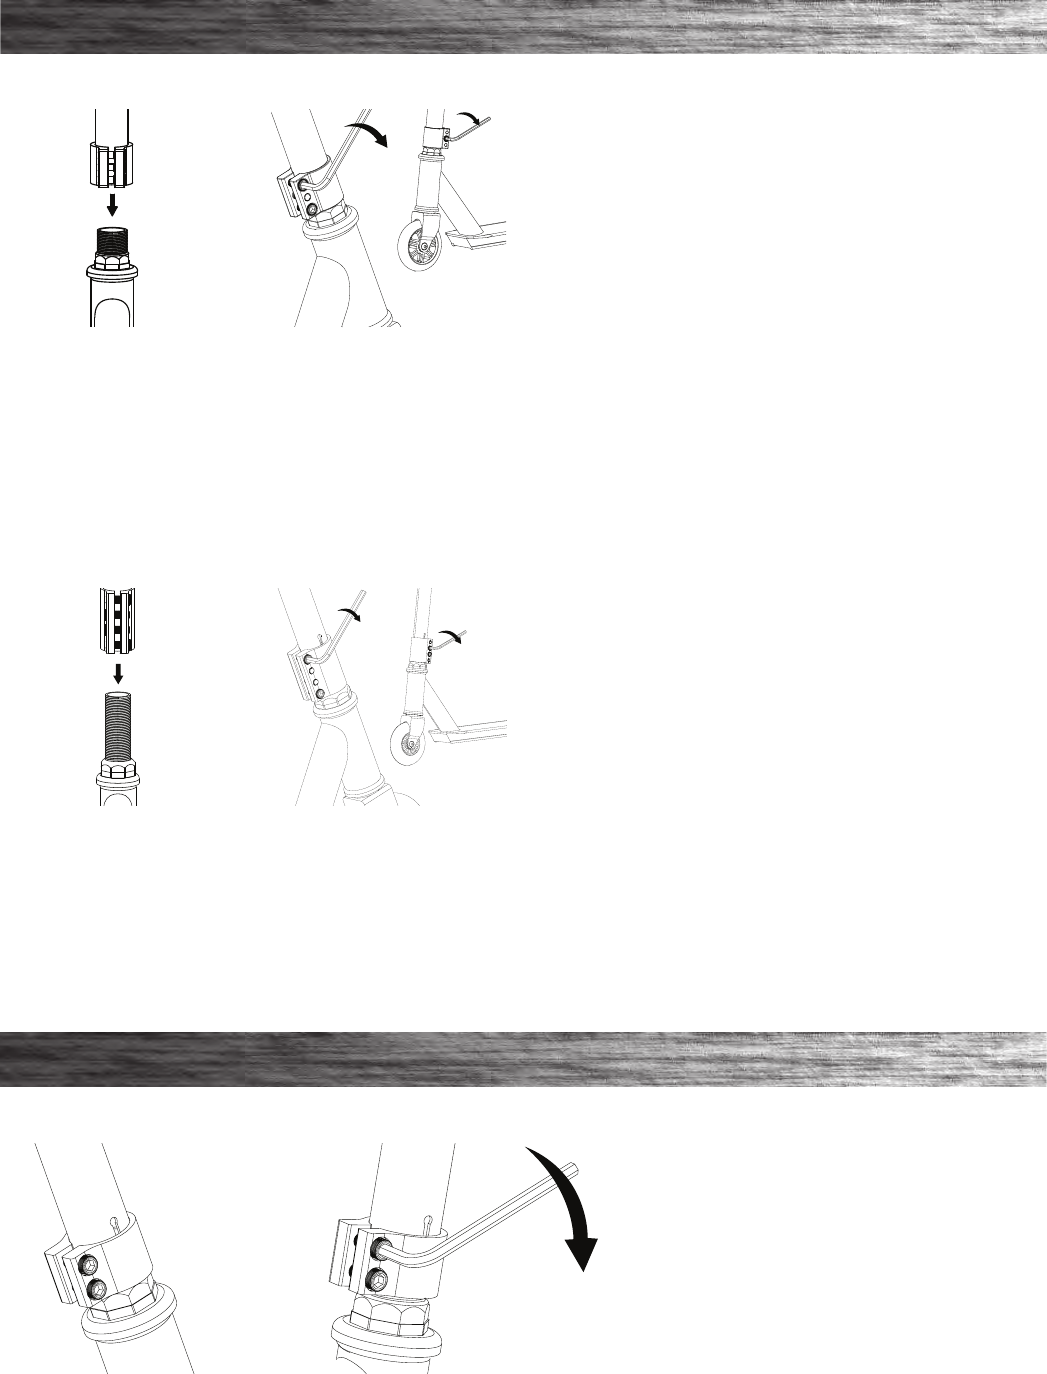
q Quad Collar Clamp (on select models only)
Using a 5mm Allen wrench, check that the collar clamp bolta are tightened securely.
CHECK BEFORE RIDING
q Double Collar Clamp