


Removecontentsfrombox.Inspectthecontentsoftheboxforscratchesinthepaintand/ordentsthatmayhave
occurred during shipping. Because your scooter was partially assembled and packed at the factory, there should not be
anyproblems,eveniftheboxhasafewscarsordents.
BEFORE YOU BEGIN
2
WARNING: DO
NOT USE NON-RAZOR
PRODUCTS WITH YOUR
SCOOTER.
Razor scooters have been built to
certainRazordesignspecications.
The original equipment supplied at
the time of sale was selected on
the basis of its compatibility with
the frame, fork and all other parts.
Certain aftermarket products may
or may not be compatible and will
void your warranty.
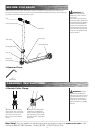
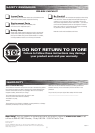
q Required Tools
Need Help? Visit our website for replacement parts and product support at www.razor.com or call
toll-free at 866-467-2967 Monday - Friday 8:00 AM - 5:00 PM Pacific Time.
5mm
Allen wrench
Grips
Handlebar
Down tube
Rear fender/brake
T-tube/ Steering column
Collar clamp
Fork headset locknut
Front fork
Wheels and
wheel bearings
Deck
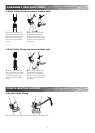
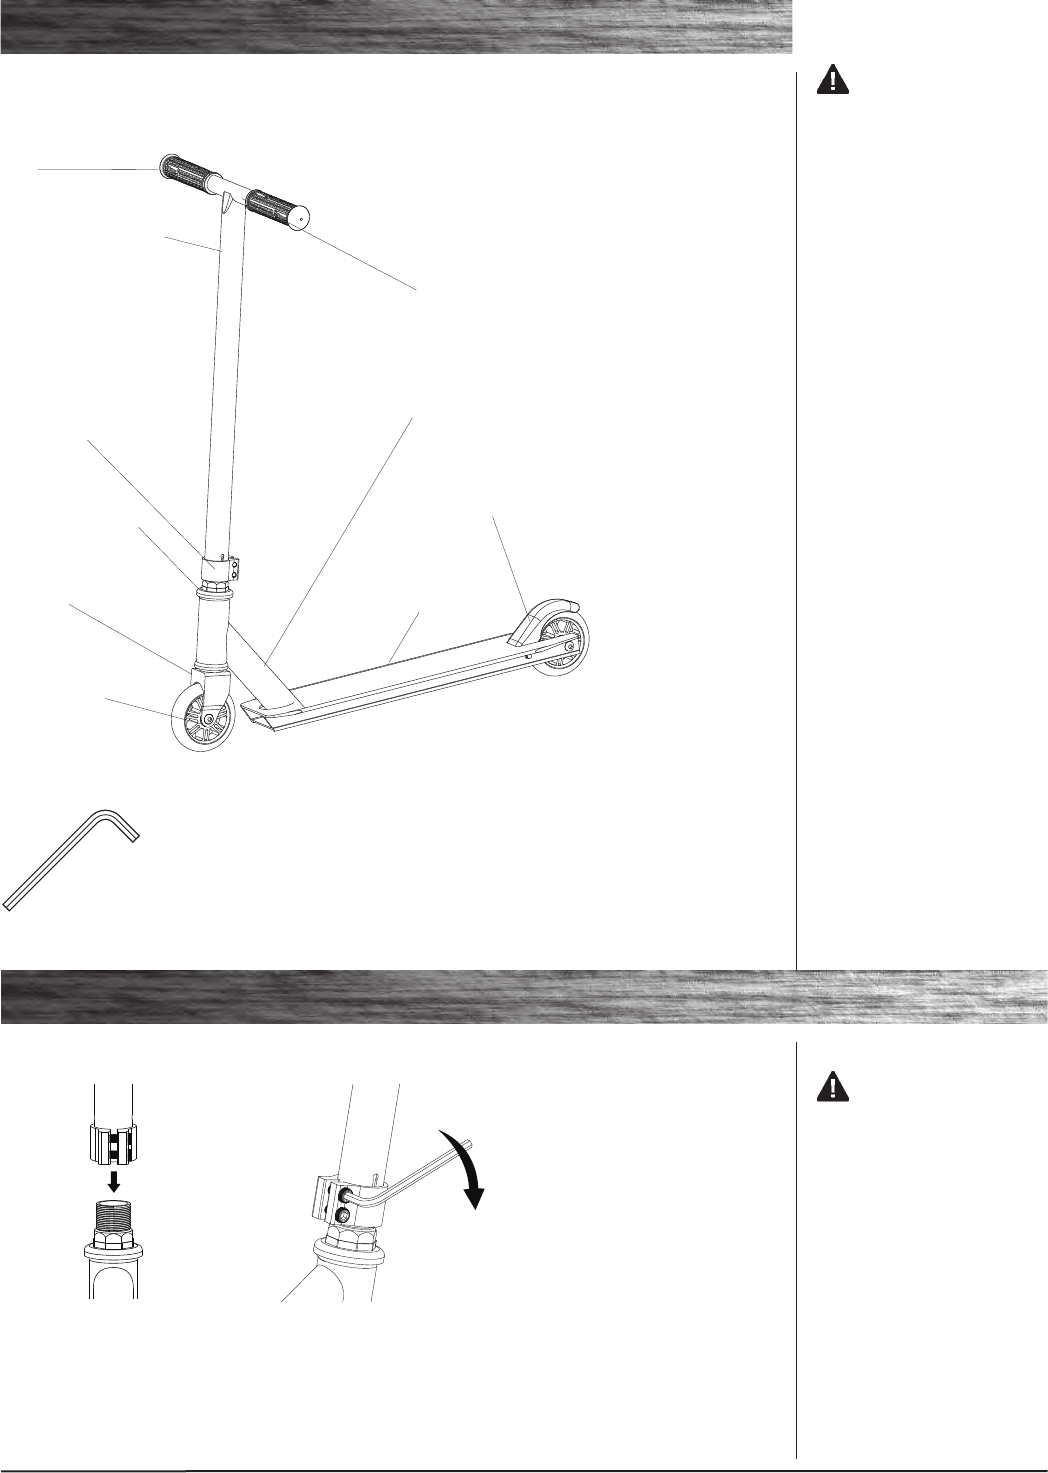
2 With the front wheel pointed
straight ahead, the handlebars
square to the front wheel and the
Razor logo facing the front, tighten
the clamp as shown. Tighten each
bolt securely.
ASSEMBLY INSTRUCTIONS
1 Loosen the collar clamp and
slide it upward. With a clock-wise
twisting motion, push and “thread”
the T-tube onto the fork until it
bottoms out on the fork headset
lock nut.
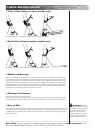
WARNING: Failure to
properly install and tighten the
collar clamp may cause the rider to
lose control and fall. If you do not
understand these instructions or
the concept of “tighten securely”
seektheassistanceofaqualied
mechanic.
q Double Collar Clamp