


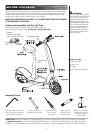
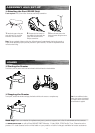

PRE-RIDE CHECKLIST
5
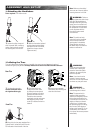
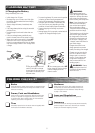
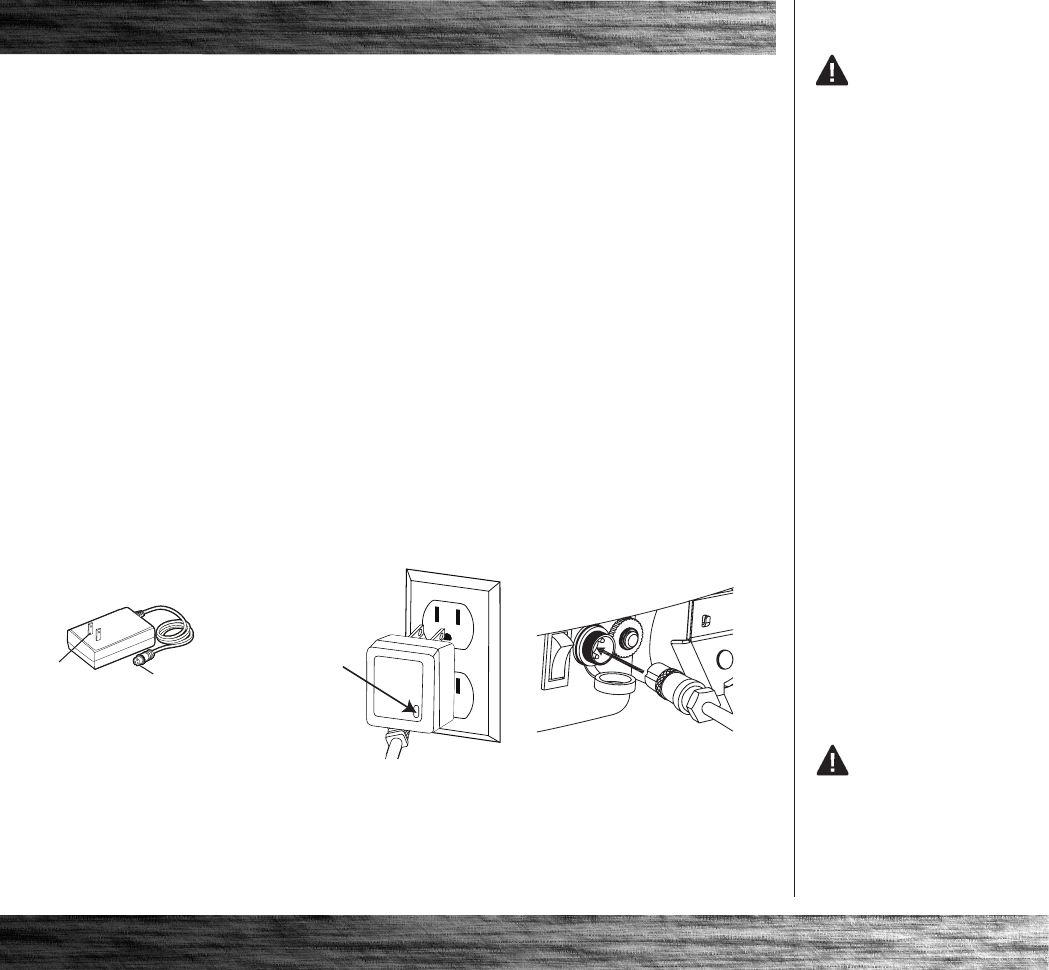
CHARGING BATTERY
q Charging the Battery
Charge the battery prior to use.
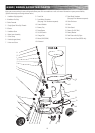
LED Light
2 Turn scooter power switch OFF
before charging. Plug the charger
into the charger port on the
electric scooter.
Charger
• Initial charge time: 12 hours
• Recharge time: up to 12 hours, even if the light
turns green. Recommended maximum charging
time is 24 hours.
• Always charge the battery immediately after
riding.
• Fully charge battery before storing for extended
periods of time.
• Unplug charger from the wall outlet when not
in use.
• Failure to recharge battery periodically may
result in a battery that will not accept a charge.
• Make sure scooter power switch is turned OFF
when unit is not in use. If the power switch is
left on for an extended period of time, the battery
may reach a stage at which it will no longer hold
a charge.
• To ensure long battery life, never store the product
in freezing or below freezing temperatures!
Freezing will permanently damage the battery.
• Run time: Up to 40 minutes of continuous ride
time. Run time may vary depending on riding
conditions, climate and/or proper maintenance.
• Constant stopping and starting may shorten
ride time.
• Average battery life for a properly maintained unit
is approx. 250 charge/discharge cycles.
Charger
Plug
Charger
Port
1 Plug the charger into a wall
outlet. If the lights on charger
do not light up, check the power
to the outlet. If necessary, try a
different outlet.
WARNING: Battery
charge can deplete over time.
Periodically recharge battery
when not in use.
WARNING:
Rechargeable batteries are
only to be charged under adult
supervision. Always disconnect
your scooter from the charger
before cleaning with damp cloth.
Note: If your charger does not
look like the one illustrated,
your unit has been supplied
with an alternative charger.
The specifications and charging
procedure would not change.
The charger has a small window
with one LED light to indicate
the charge status. Refer to the
illustration on the charger unit
for the actual “charging” and
“charged” status indications for
your model charger.
Chargers have built-in over-
charge protection to prevent
battery from being over-charged.
Charger may get warm during
use. This is normal for some
chargers and is no cause for
concern. If your charger does
not get warm during use, it
does not mean that it is not
working properly.
Hardware
Check all parts such as nuts, bolts, cables, fasteners, etc.
to ensure they are secure and assembled correctly. If the
unit is damaged do not ride. Reference “Safety Warnings”
on page 1 of this manual.
Laws and Regulations
Always check and obey any local laws or regulations.
Insurance
Do not assume that your existing insurance policies necessarily
provide coverage for scooter use. Check with your insurance
company for information regarding insurance.
Brake
Check the brakes for proper function. When you squeeze the lever,
the brake should provide positive braking action. Make sure that
brakes are not rubbing.
Frame, Fork and Handlebars
Check for cracks or broken connections. Although broken frames
are rare, it is possible for an aggressive rider to run into a curb
or wall and wreck, bend or break a frame. Get into the habit of
inspecting your scooter on a regular basis.
Tires
Periodically inspect the tires for excess wear and regularly check
the tire pressure. Re-inflate as necessary.
q
q
q
q
q
q