


13
Outlander Series www.pridemobility.com
III. INSTALLATION
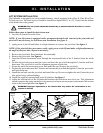
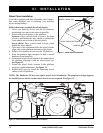
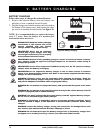
License Plate Holder
The license plate holder should be rotated to the upright position during installation. See figure 9.
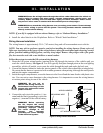
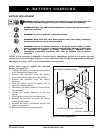
1. Pull the pivot weldment out to disengage keyway. You may need to loosen the pivot nut with a 3/4-
in. socket wrench. See figure 9A.
2. Rotate the license plate holder to its upright position. Once in the upright position, the license plate
holder will automatically lock into place. See figure 9.
3. Ensure the keyway is engaged then tighten the pivot nut if previously loosened. See figure 9A.
4. Remove the license plate from your vehicle and attach it to the license plate holder using the supplied
fasteners.
5. Insert the lighting harness into the vehicle’s trailer hitch harness.
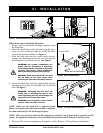
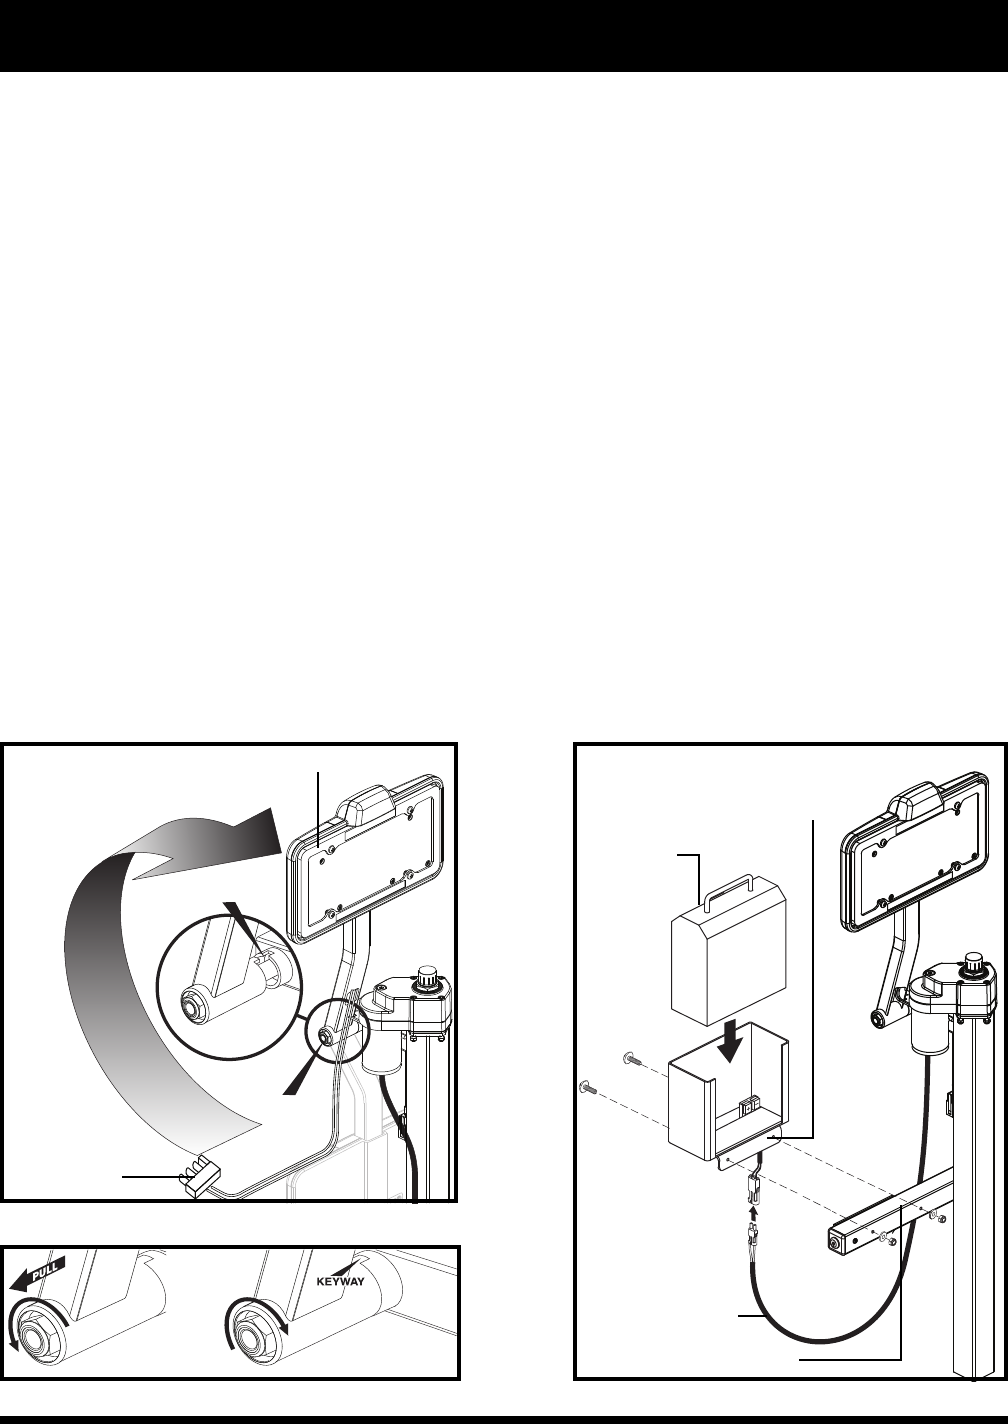
Onboard Battery Installation
The optional onboard battery is designed for easy installation as it does not require any wires to be routed
through or under the vehicle.
Follow these steps to install the onboard battery:
1. Align the mounting holes in the battery case bracket with those in the accessory bracket located under
the key switch tube. See figure 10.
2. Secure the battery case to the accessory bracket with the supplied hardware. See figure 10.
3. Insert the onboard battery into the battery case, making sure that the connector on the bottom of the
battery aligns and fully connects with the mating connector inside the battery case.
4. Plug the battery cord on the bottom of the battery case into the mating connector running from the
motor. See figure 10.
BATTERY
CASE
BATTERY CASE BRACKET
ACCESSORY BRACKET
Figure 10. Onboard Battery Installation
Figure 9. License Plate Holder
LICENSE PLATE HOLDER
LIGHTING
HARNESS
BATTERY CORD
KEYWAY
PIVOT
NUT
Figure 9A. Pivot Weldment
LOOSEN
TIGHTEN