


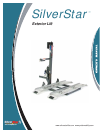

Exterior Lift System www.pridemobility.com 1716 www.pridemobility.com Exterior Lift System
prong can create an electrical hazard. If necessary, properly install an approved 3-pronged
adapter to an electrical outlet having 2-pronged plug access.
PROHIBITED! Do not allow unsupervised children to play near the battery or battery charger
while the battery is charging.
PROHIBITED! Do no expose the battery charger to rain or other sources of moisture unless
it has been tested for outdoor use. Refer to the manual supplied with the battery charger
for more information.
WARNING! Explosive gases may be generated while charging the battery. Keep the battery
and the battery charger away from sources of ignition such as flames or sparks and provide
adequate ventilation when charging the battery.
WARNING! Do not attempt to charge the battery and operate the lift system at the same
time.
WARNING! Do not attempt to wire the lift system directly to the vehicle battery if the lift
system is equipped with an onboard battery.
WARNING! You must recharge the lift system battery with the supplied battery charger.
Do not use an automotive-type battery charger.
WARNING! If the battery is exposed to adverse or extreme weather conditions, then it
must be allowed to adjust to the difference in environmental conditions before being
charged.
WARNING! Inspect the battery charger, wiring, and connectors for damage before each
use. Contact your authorized Pride Provider if damage is found.
WARNING! Do not attempt to open the battery charger case. If the battery charger does
not appear to be working correctly, contact your authorized Pride Provider.
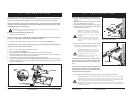
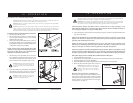
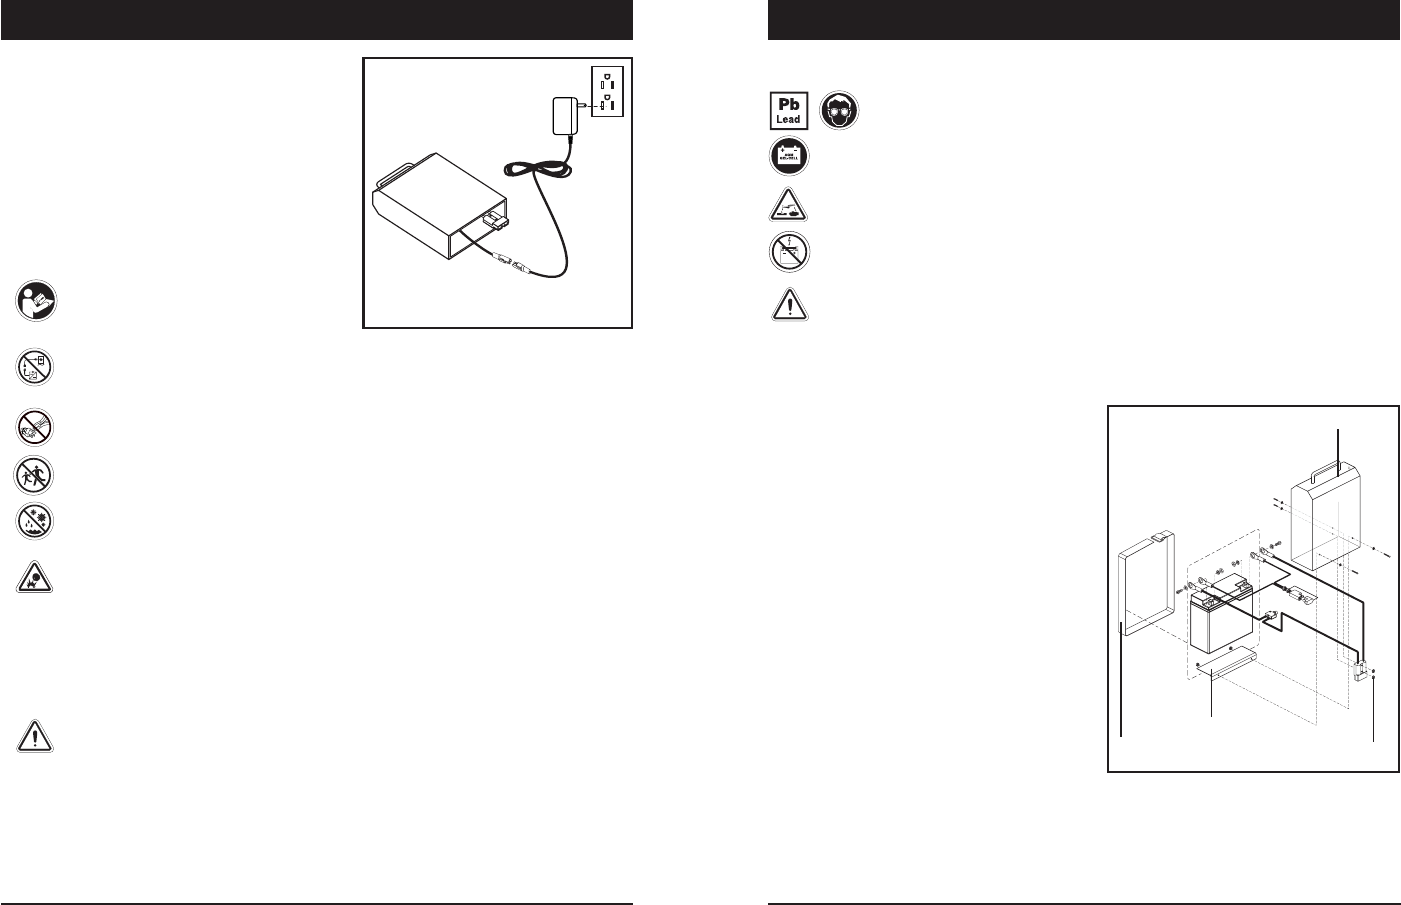
BATTERY CHARGING
Follow these steps to charge the onboard battery:
1. Remove the onboard battery from the battery case and
place it near a standard electrical outlet.
2. Plug the charger cord into the mating socket located on
the bottom of the battery case, then connect the charger
cord to a standard electrical outlet. See figure 12.
NOTE: It is recommended that you replace the battery
every 3–5 years. Store the battery in a moisture-free
environment when not in use.
MANDATORY! Read the battery charging
instructions in this manual and in the
manual supplied with the battery charger
before charging the battery.
PROHIBITED! Never use an extension
cord to plug in your charger cord. Plug
the charger cord directly into a properly
wired standard electrical outlet.
PROHIBITED! Removal of the grounding
V. BATTERY CHARGING
Figure 12. Battery Charging
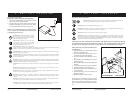
BATTERY REPLACEMENT
WARNING! Battery posts, terminals, and related accessories contain lead and
lead compounds. Wear goggles and wash hands after handling.
MANDATORY! Use only AGM or Gel-Cell batteries.
WARNING! Corrosive chemicals contained in battery. Use only AGM or Gel-Cell batteries
to reduce the risk of leakage or explosive conditions.
WARNING! Contact with tools can cause electrical shock.
WARNING! Connect the battery harnesses in the proper manner. RED (+) cables must be
connected to positive (+) battery terminals/posts. BLACK (-) cables must be connected to
negative (-) battery terminals/posts. REPLACE cables immediately if damaged. Protective
caps must be installed over all battery terminals.
NOTE: If you encounter a damaged or cracked battery, immediately enclose it in a plastic bag and call
your authorized Pride Provider for instructions on disposal. Your authorized Pride Provider will also
have the necessary information on battery recycling, which is our recommended course of action.
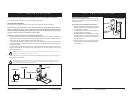
Follow these steps to replace the onboard bat-
tery (figure 13):
1. Unfasten the battery securement strap located at
the bottom of the battery box.
2. Remove the hardware from the battery secure-
ment bracket and remove the bracket.
3. Remove the hardware from the battery connec-
tor.
4. Slide the battery out of the battery box to expose
the battery harness.
5. Disconnect the battery harnesses from the battery
terminals.
6. Connect the battery harnesses to the new battery.
7. Slide the new battery into the battery box.
8. Reinstall the hardware to secure the battery con-
nector and tighten.
9. Reinstall the battery securement bracket and
tighten the hardware.
10. Refasten the battery securement strap.
If your lift system is exhibiting wear that you feel is
questionable in any way, contact your authorized Pride
Provider immediately. Do not attempt to repair, ad-
just, or modify the manufacturer settings and materi-
als.
BATTERY SECUREMENT STRAP
BATTERY BOX
BATTERY SECUREMENT BRACKET
BATTERY CONNECTOR
V. BATTERY CHARGING
Figure 13. Battery Replacement