


2. CORD/CORDLESS
SHAVING
CORD
1. Connect cord provided
to razor.
2. Plug into 100V to 240V
AC/DC outlet.
3. Slide and depress ON/
OFF switch ON. Begin
shaving.
4. Turn razor OFF and un-
plug.
IMPORTANT: It is not
recommended that this
razor be used exclusively as
a corded razor. Continual
use as a corded razor as
well as continuously charg-
ing razor will reduce life of
batteries.
NOTE: Razor does not
recharge during corded
shaving.
CORDLESS
1. Charge according to
directions. Unplug razor
from outlet.
2. Slide and depress ON/
OFF switch ON. Begin
shaving.
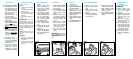
4. SHAVING
1. Remove Protective Razor
Head Assembly Guard.
Turn razor ON.
2. Shave against the direc-
tion of beard growth
using a quick, circular
motion.
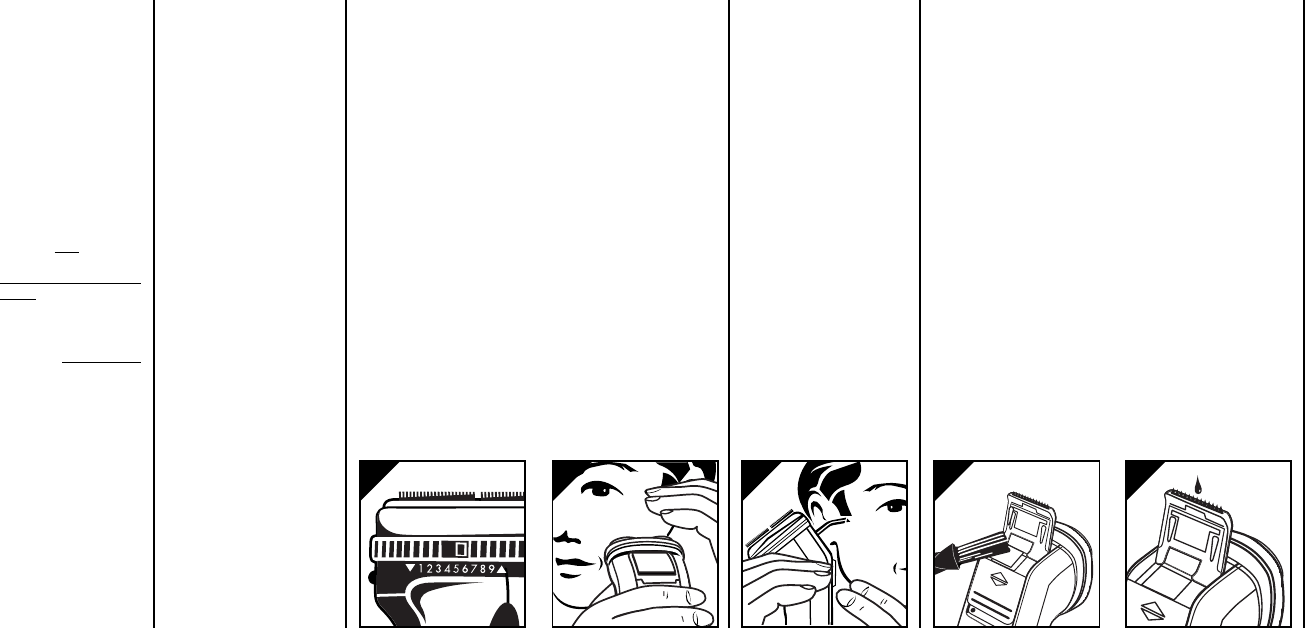
3. Keep the skin taut using
your fingers to stretch
the skin so blades can
lift and cut whiskers off
(Fig. 2).
4. Easy does it. Gently
press the razor to your
skin so the floating
heads can follow the
contours of your face.
5. Turn razor OFF (and
unplug if shaving with
cord).
IMPORTANT: Clean razor
head regularly following
MAINTENANCE instruc-
tions.
5. POP-OUT
TRIMMER
1. Switch razor ON.
2. Push Trimmer Slide Switch
up to pop out Trimmer.
3. Hold Trimmer, as
shown (Fig. 3), to exact
hairline desired. Move
Trimmer downward with
gentle pressure.
4. Close Trimmer by push-
ing Trimmer Slide Switch
down.
5. Turn razor OFF (and unplug
if shaving with cord).
7. MAINTENANCE/
CLEANING
INSTRUCTIONS
IMPORTANT
■ Always switch razor
OFF and remove plug
from outlet before
cleaning.
■ Always store razor with
Protective Plastic Head
Guard on Razor Head
Assembly.
■ Never clean, remove or
replace head assembly
while motor is on.
■ Do not apply pressure
to combs. Do not touch
razor heads with hard
objects as this may dent
or damage precision-
made slotted combs.
■ Do not use razor if
combs are damaged or
broken.
21 3 4 5
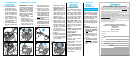
6. TO CLEAN TRIMMER
1. Switch razor OFF (and
unplug if shaving with
cord).
2. Push Trimmer Slide
Switch up to pop out
Trimmer.
3. Brush out Trimmer sec-
tion using long bristles
of brush (Fig. 4).
1. TO CHARGE
■ Use only the cord provided.
■ (Re)charge at tempera-
tures between 40°F and
95°F. Charging at lower
or higher temperatures
adversely affects life-
time of batteries.
1. Slide and depress ON
OFF switch to OFF.
2. Connect cord to razor.
Plug into 100V to 240V
AC/DC outlet.
3. Green Charging Indicator
Light will light to indicate
razor is (re)charging.
4. Charging requires a full 8
hours.
■ (Re)charging longer
than required period of
time will not harm razor.
However, continuously
charging razor will
reduce life of batteries.
1A.TO RECHARGE
1. Recharging requires 8
hours for approximately
2 weeks of 3 minute
shaves per day.
2. If razor has not been
used for at least a
month, razor must be
recharged for a full 8
hours (see TO CHARGE).
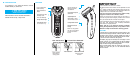
3. ADJUSTABILITY
BAND
1. Select position best
suited for your skin and
beard type and which
will give you the most
comfortable shave.
2. Each position is indicat-
ed by a clicking sound.
Move Adjustability Band
(Fig. 1) on razor clock-
wise for a lower setting
and counterclockwise
for a higher setting.
■ Lowest setting for sen-
sitive skin/soft beard
(#1).
■ Highest setting for not
so sensitive skin/tough
beard (#9).
■ Choose one setting for
“custom” shaving cheeks/
chin, another “comfort”
setting for neck.
4. Lubricate Trimmer teeth
twice a year with Norelco
Razor Lubricant, model
AL80, or one drop of
mineral oil (Fig. 5).
5. Close Trimmer by push-
ing Trimmer Slide Switch
shown.