


7
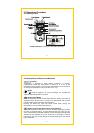
2.4 Source Mode Procedure (Calibration Simulation)
1. Turn CL3512A on by turning selector switch to any one of the output
selector positions.
2. Press T1 button.
3. Select thermocouple type (J, K, T or E) using type button.
Select °C or °F using °C or °F buttons.
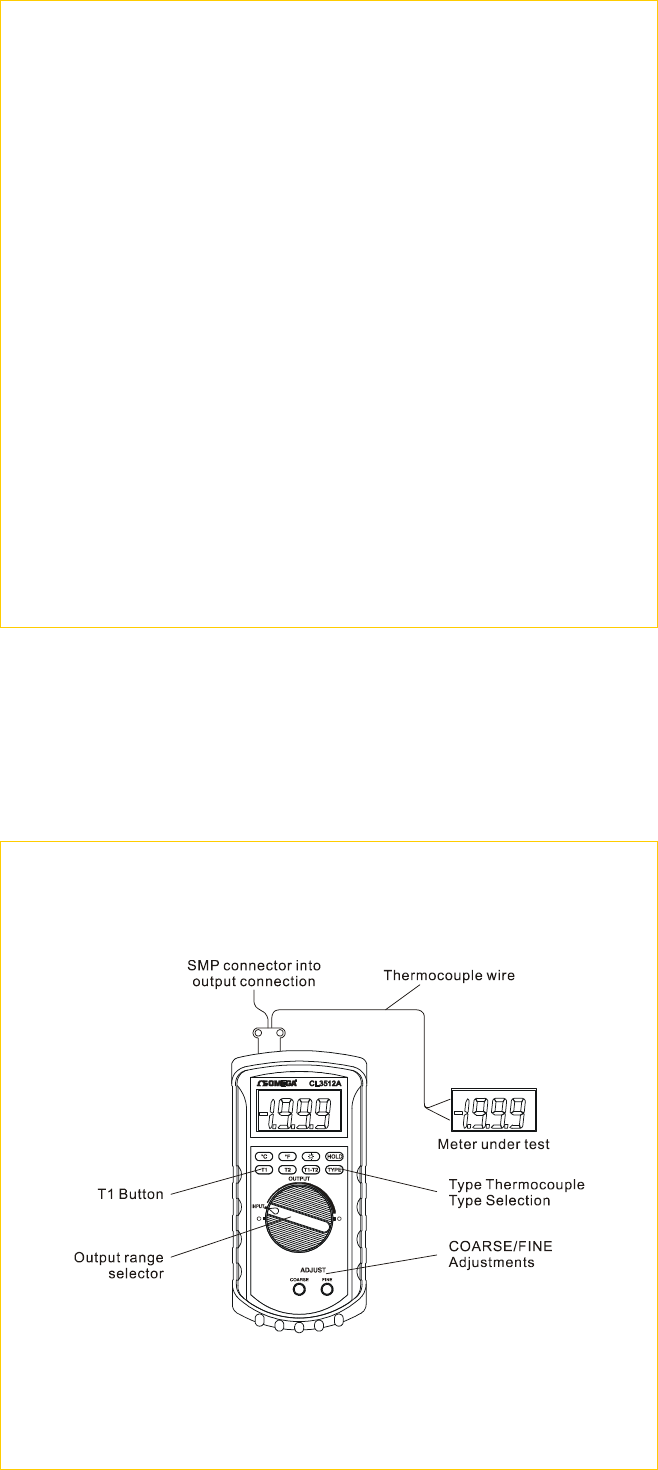
4. Plug proper type of thermocouple wire into either one of the two output
connectors. (SMP male connector required)
5. Attach the other end of the thermocouple wire to the instrument being
tested/calibrated.
6. Move the output range switch to the temperature value close to the desired
simulated value.
Note: There are 9 temperature range switch positions arranged from left to
right representing low to high temperatures.
The display will read -OL if the output voltage for the meter is higher
than the maximum voltage for that particular thermocouple type. For
type T this will be in the highest 4 positions, type K in the highest 3
positions, type J in the highest 2 positions, and type E in the highest
position only.
7. Adjust course and/or fine adjustment dial until desired temperature is
displayed on CL3512A.
8. Instrument under test should read same temperature as CL3512A. If not
adjust instrument under test or have recalibrated.
9. Repeat steps 6-8 at different temperatures as needed.
8
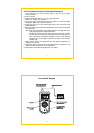
Source Mode Diagram