v8.06 - Depósito legal y Copyright 2008. Todos los derechos reservados.
VMB ESPAÑOLA, S.A.
4.6 - The TL-A320, can also be used as a
conventional towerlift.
If you are using it as a conventional towerlift
always place the load as close to the body as
possible. In all frontal load towerlifts the
maximum load is reduced the further away from
the body the load is placed.
See load table opposite indicating distance of
centred load for a TL-075C towerlift. (Fig. 6)
4.7 – Elevating the lift:
Once the Line Array is attached to its buffer
and in the desired position on the forks it is
ready to be lifted to the required height. Turn
the winch handle in a clockwise direction to
elevate the lift.
During elevation the RTS system (Retentor-
System) will ensure that the profiles lift one by
one.
First, the lifting carriage with the attached Line
Array will raise. When it has reached the top
then the first profile will start to rise. When this
has reached the top the second profile will raise
followed by the third.
The ILS and ALS enable the lift to rise and
automatically block the carriage and profiles
whilst rises ensuring that it will never fall. The
lift, with the Line array attached will remain fixed
at all times.
Once the system is elevated to its required
height gently turn the handle in a clockwise
direction. The security systems will ensure that
the load stays fixed and blocked. The red ALS
locks will be blocked. This enables the cable
to be without any force and means it is only
used for the elevation and descent of the lift.
The following instructions will help you to
bring the system down.
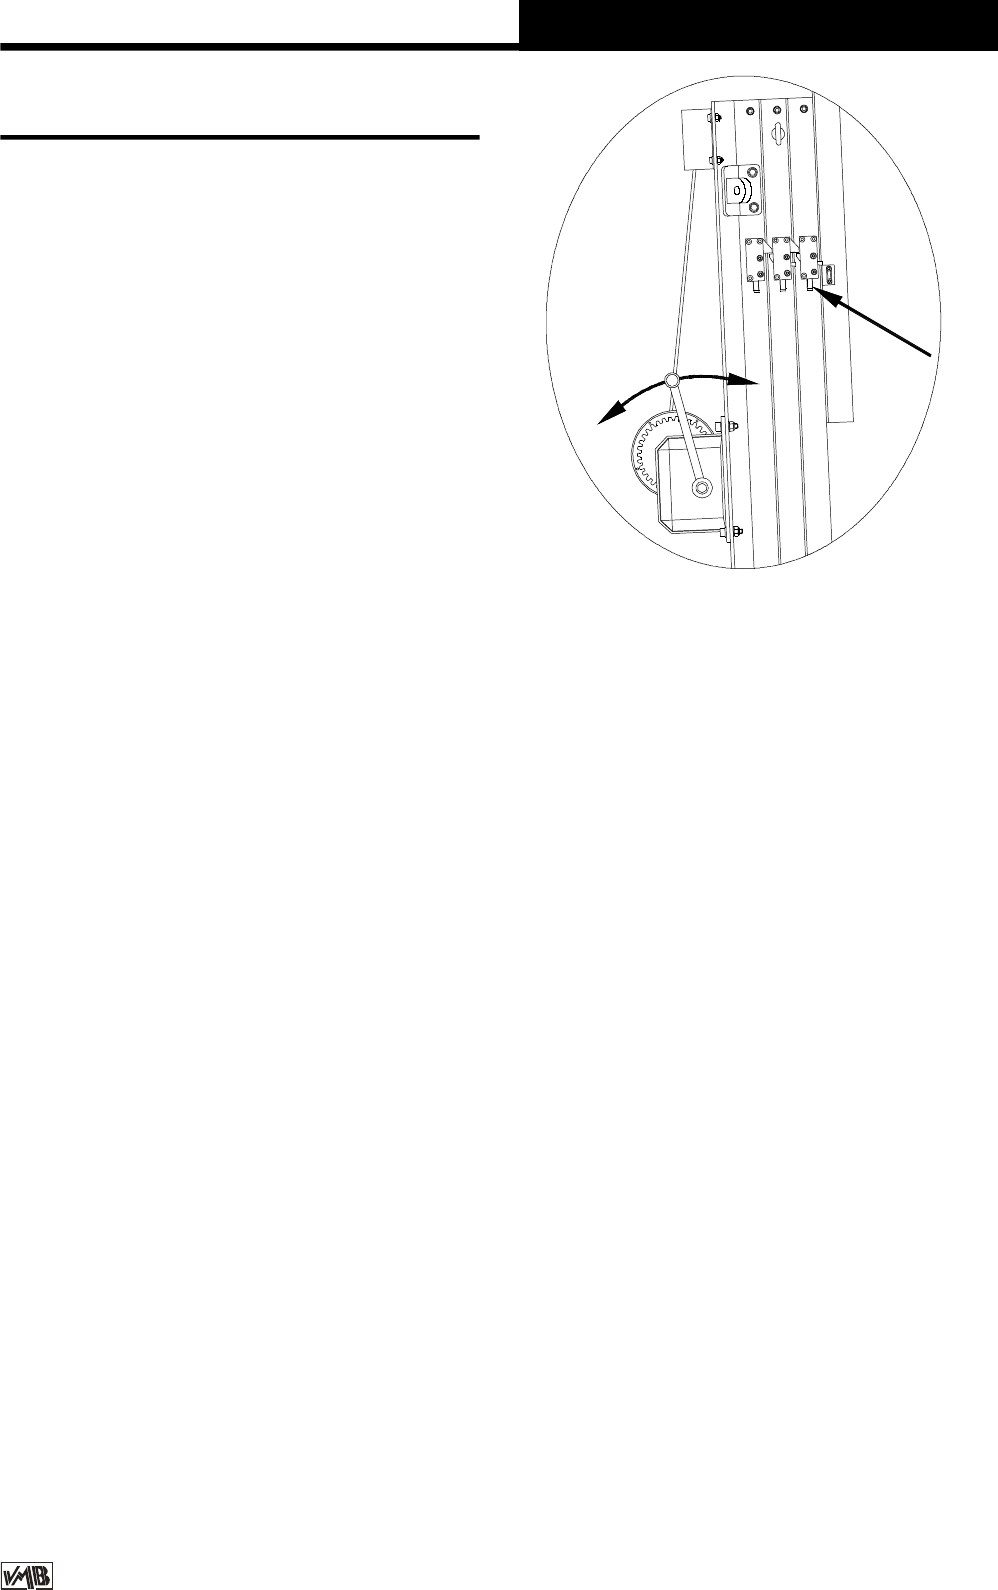
4.8 – Descending the lift:
To bring the lift down you need to first turn the
winch handle slightly clockwise and at the same
time push the red ALS lock in (G). (Fig. 7)
This releases the blocking systems. Then turn
the handle anti clockwise, whilst maintaining
the ALS lock pushed in until the profile has been
completely lowered.
All red ALS locks should be held in one by one
whilst the handle is turned anti clockwise and
the profiles are brought down, one by one. If
you release your finger from the ALS lock it
will automatically block. In this case, repeat the
first operation by turning slightly clockwise and
then anti clockwise whilst always pushing the
red ALS lock in.
It is necessary to completely lower each profile
before starting to lower the next. If you push
another red ALS lock without having completely
lowered the previous profile the first profile will
remain blocked by the security system and you
will not be able to lower it later.
If this happens, elevate the towerlift to the
locked position and free the lock so that you
can commence the descent again until it is
completely lowered.
Finally, release the carriage lock following the
same principle as before and lower it to the
required level to be able to dismount the Line
Array from the lift.
Quick Operation Guide
ENGLISH
4.9 - Transport
Once all the profiles are completely lowered
remove the FAS-01 or FAS-02 support and the
forks placing them in their horizontal position
facing down. Lower the carriage so that right
fork can be fixed and blocked for transport (B).
Remove the front support bars ( BA ) by taking
out the pins (BU). Replace the pins in the top
support ( E ) of the lift’s base profile and also
at the top of each front support bar.
G
Fig. 7


