PAGE 18 —MC-62P/S CONCRETE MIXERS — PARTS & OPERATION MANUAL — REV. #5 (09/13/04)
MC-62P/S CONCRETE MIXER — ELECTRIC MOTOR
Electric Motor
For maintenance care and operation of the electric motor, refer
to your electric motor instruction booklet furnished with the electric
motor.
Protect the electric motor from dust as much as possible and
keep ventilating openings clean.
The electric motor used in this mixer is a single-phase 1.5 HP
motor. The input voltage requirement for this motor is either 115
or 230 VAC only.
Electric Motor Connection
A 12 inch electrical cable (Figure 2) with a pigtail at one end is
provided with the electrical motor for hookup to a power source.
Table 1. shows the required NEMA connector for the desired
motor horsepower rating. In addition, Table 2 also shows the
matching NEMA approved connector for the required extension
cord.
ALWAYS
, make certain that the power source required for the
electric motor is
correct
and always use the correct NEMA
configuration plug.
Failure
to supply the correct voltage to the
motor can severely damage the motor.
The electric motor supplied with the mixer is configured from the
factory for 115 VAC grounded operation. Make certain that the correct
size grounded (3-wires) extension cord is used. See Table 5.
Motors can burn out when the line voltage falls 10% below the
voltage rating of the motor. Failure to use proper voltage will
cause the motor to overheat and actuate the overload switch.
If overload protection should actuate because of improper voltage
or any other malfunction, turn the main switch on the motor to the
"OFF" position and correct the problem, press the reset switch
button, and turn the main switch to the "ON" position.
CAUTION:
■
DO NOT spray water at any time on the
electric motor
.
■
DO NOT operate electric motor in a
explosive environment.
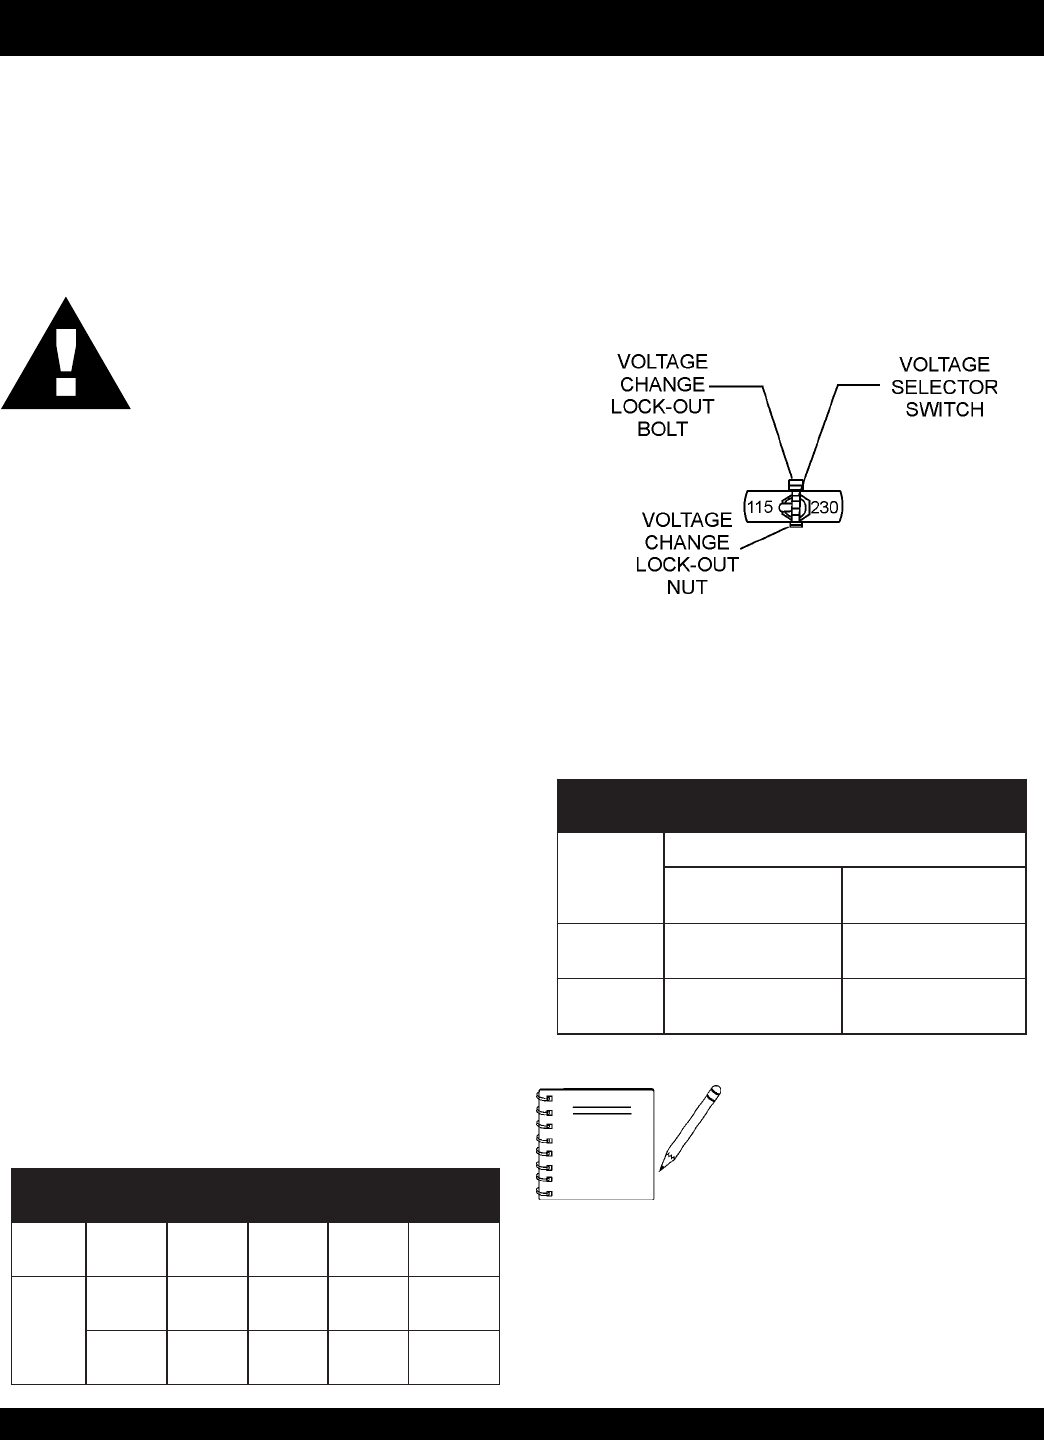
Electric Motor Voltage Change Switch
1.
ALWAYS
make certain the electric motor's ON/OFF switch
is in the "OFF" position and the power cord has been
disconnected from the power source.
2. Remove the voltage change lock-out bolt and nut
(Figure 6).
Change the position of the
voltage change toggle switch
from 115 VAC to 230 VAC. The mixer is factory wired for 115
VAC operation.
3. Re-install the voltage change lock-out bolt and nut.
NOTE
NEVER!
disable or disconnect the
ON/OFF switch on the electric motor.
It is provided for operator safety. Injury
may result if it is disable, disconnected
or improperly maintained.
Figure 6. Voltage Change Switch
4.
Important!,
when changing the input voltage to the electric
motor from 115 to 230 VAC, the
plug
on the electric motor
power cord must also be changed. See Table 6 and Figure 7.
eziSdroCnoisnetxEdednemmoceR.5elbaT
ss
s
ss
cirtcelE
rotoM
tupnI
egatloV
.tf05
)m42.51(
.tf57
)m68.22(
.tf001
)m84.03(
.tf002
)m69.06(
PH5.1
CAV51121.oN01.oN8.oN6
.oN
CAV03241.oN21.oN21.oN8.oN
noitamrofnIgniriWrotoMcirtcelE.6elbaT
rotoM
rewopesroH
gnitaR
esahPelgniS-CAV032-511
rotcennoCgulPAMENAMENgnitaM
rotcennoCelcatpeceR
PH5.1
)CAV511(
735049MEN/PP02-5L835049MEN/PR02-5L
PH5.1
)CAV032(
935049N/PP02-6L045049N/PR02-6L


