


26
A
N
T
I
-
T
I
P
P
E
R
S
/
ANTI-TIPPERS/WHEEL LOCKSPROCEDURE 6
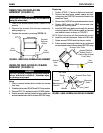
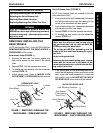
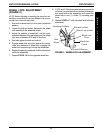
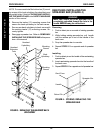
1. Depress the release buttons and insert the anti-tip-
pers with the anti-tipper wheels pointing toward the
ground/floor into the wheelchair frame tubing as
shown in FIGURE 2.
2. Ensure that the release button of the anti-tipper fully
protrudes out of the hole in the bottom of the wheel-
chair frame tubing.
3. Adjust anti-tippers as necessary. Refer to ADJUST-
ING THE ANTI-TIPPERS in PROCEDURE 6 of this
manual.
FIGURE 2 - INSTALLING THE ANTI-TIPPERS
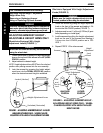
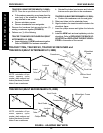
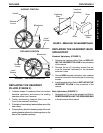
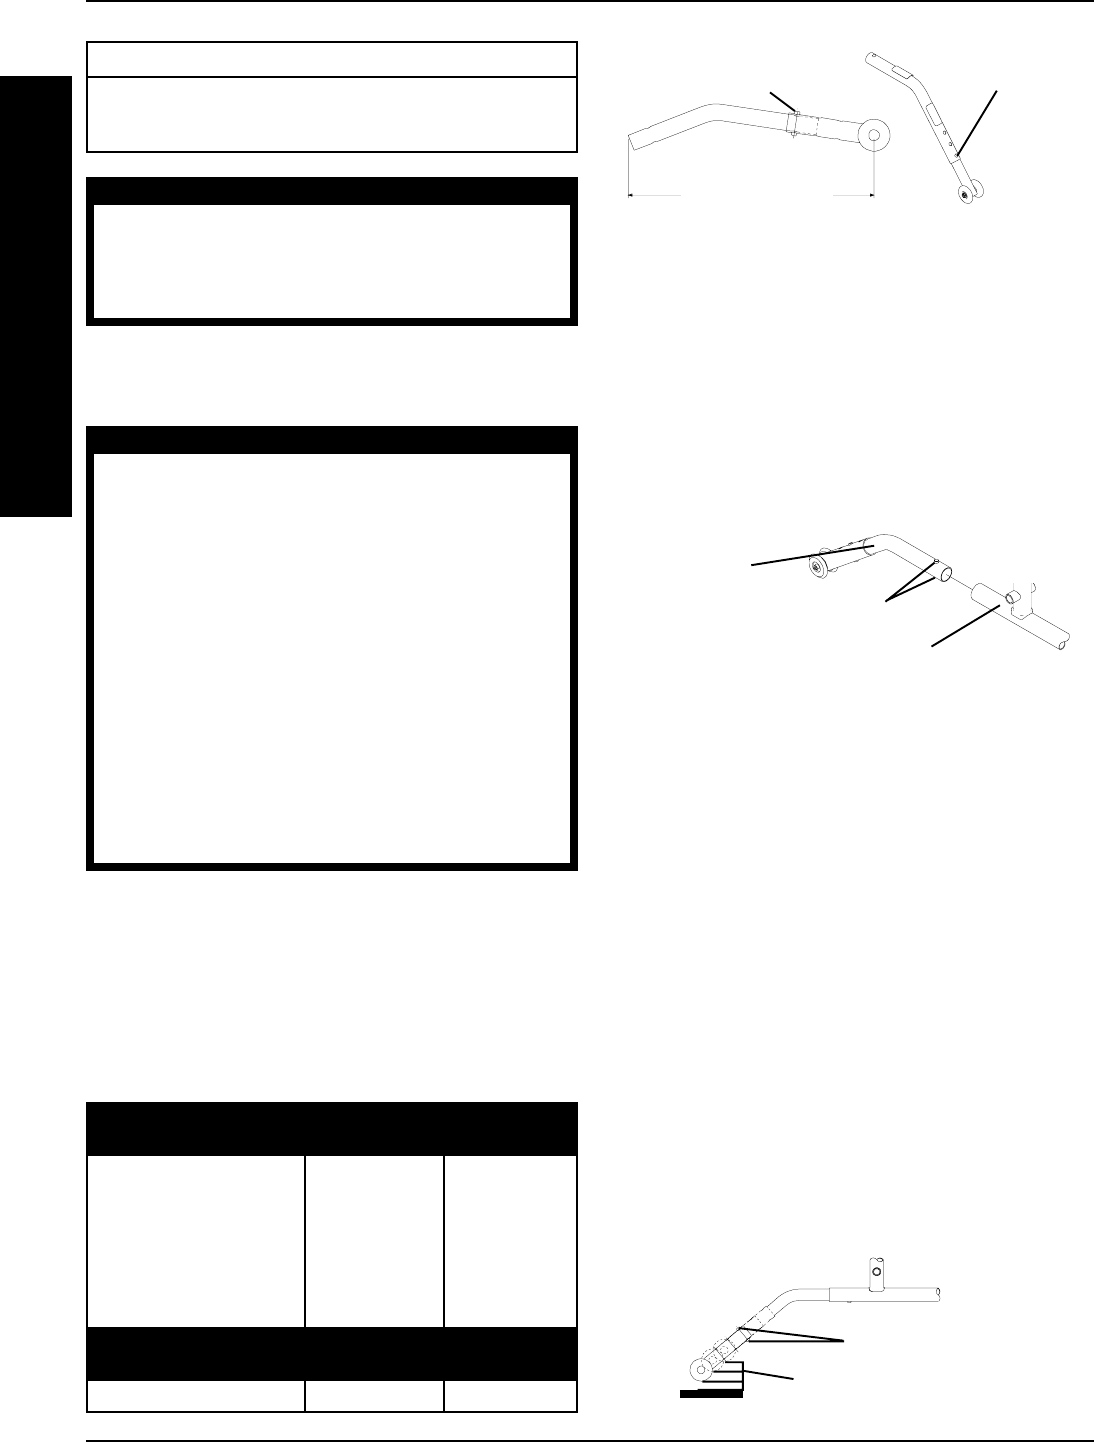
Installing The Anti-tippers (FIGURES 1 & 2)
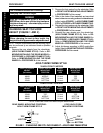
NOTE: To ensure the correct model anti-tipper is used
refer to FIGURE 1. Measurements for NON-RECLINER
anti-tippers are approximate and are taken with exten-
sion tube in TOP hole position. Measurements for RE-
CLINER anti-tippers are approximate and are taken with
extension tube in BOTTOM hole position.
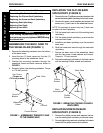
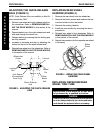
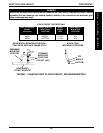
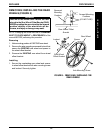
FIGURE 3 - ADJUSTING THE ANTI-TIPPERS
Adjusting The Anti-tippers (FIGURE 3)
NOTE: A 1-1/2 to 2-inch clearance between the bottom
of the anti-tipper wheels and the ground/floor MUST be
maintained at all times.
1. Place wheelchair on a flat, level surface.
NOTE: If adjusting anti-tippers on recliner models, en-
sure back cains are in the upright position before making
adjustments.
2. Press the release buttons near the wheeled portion
of the anti-tipper and slide it up or down to achieve
the 1-1/2 to 2-inch clearance (FIGURE 3).
3. Check to make sure that the release buttons are
fully engaged in adjustment holes, and ensure both
anti-tippers are adjusted to the same height.
4. Check to make sure that a 1-1/2 to 2-inch clearance
between the bottom of the anti-tipper wheels and
the ground/floor has been achieved BEFORE using
the
wheelchair.
5. Repeat STEPS 1-3 until 1-1/2-2-inch clearance is
achieved.
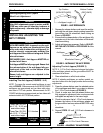
INSTALLING/ADJUSTING THE
ANTI-TIPPERS
WARNING
NON-RECLINERS ONLY: Inasmuch as the anti-
tippers are an option on this wheelchair (You
may order with or without the anti-tippers), In-
vacare strongly recommends ordering the
anti-tippers as an additional safeguard for the
wheelchair user.
RECLINERS ONLY: Anti-tippers MUST BE at-
tached at all times.
Anti-tippers MUST be fully engaged. Ensure that
the release button of the anti-tipper fully pro-
trudes out of the hole on the bottom of the
wheelchair frame.
Ensure both anti-tippers are adjusted to the
same height.
This Procedure Includes the Following:
Installing/Adjusting Anti-Tippers
Wheel Lock Adjustment
WARNING
After ANY adjustments, repair or service and BE-
FORE use, make sure all attaching hardware is
tightened securely - otherwise injury or damage
may result.
Anti-tipper
Model
9758
9859
Chair
Tracer Titan, SX, DLX
with 17 1/2 - 19 1/2 inch
seat-to-floor height
Tracer Titan, SX, DLX
with 15 1/2 - 17 1/2 inch
seat-to-floor height
Anti-tipper
Length
12-inches
11 1/4-inches
Chair
Anti-tipper
Length
Anti-tipper
Part Number
SX Recliner 1088242
FIGURE 1 - ANTI-TIPPER LENGTH
W
H
E
E
L
L
O
C
K
S
13-1/2-inches
Top Position
(NON-RECLINER)
Anti-tipper Length
Bottom Position
(RECLINER)
Anti-tipper
Release Buttons
Wheelchair Frame
1-1/2 to 2-inch Clearance
Release Buttons