


22
S
E
A
T
A
N
D
B
A
C
K
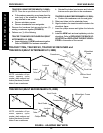
b. Reinstall the button head screws and locknuts
that secure the pivot links to the crossbraces.
TRACER DLX (BUILT BEFORE MARCH 13, 2000) -
a. Position the crossbraces onto the seat guide.
5. Slide insert tubes into the wheelchair frame.
6. Align the holes in the insert tube with the holes in the
wheelchair frame.
7. Insert the phillips screws and tighten the locknuts
securely.
8. Install the NEW back and seat upholstery onto the
wheelchair. Refer to REPLACING THE BACK UP-
HOLSTERY and REPLACING THE SEAT UPHOL-
STERY in this section of the manual.
PROCEDURE 3 SEAT AND BACK
TRACER DLX (BUILT BEFORE MARCH 13, 2000) -
NOTE: There are no pivot links on the Tracer DLX.
a. Pull crossbrace assembly up and away from the
main body of the wheelchair. Seat guides will
stay attached to rear canes.
b. Remove upholstery screws.
c. Remove crossbraces from seat guides.
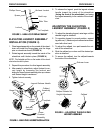
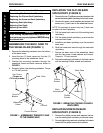
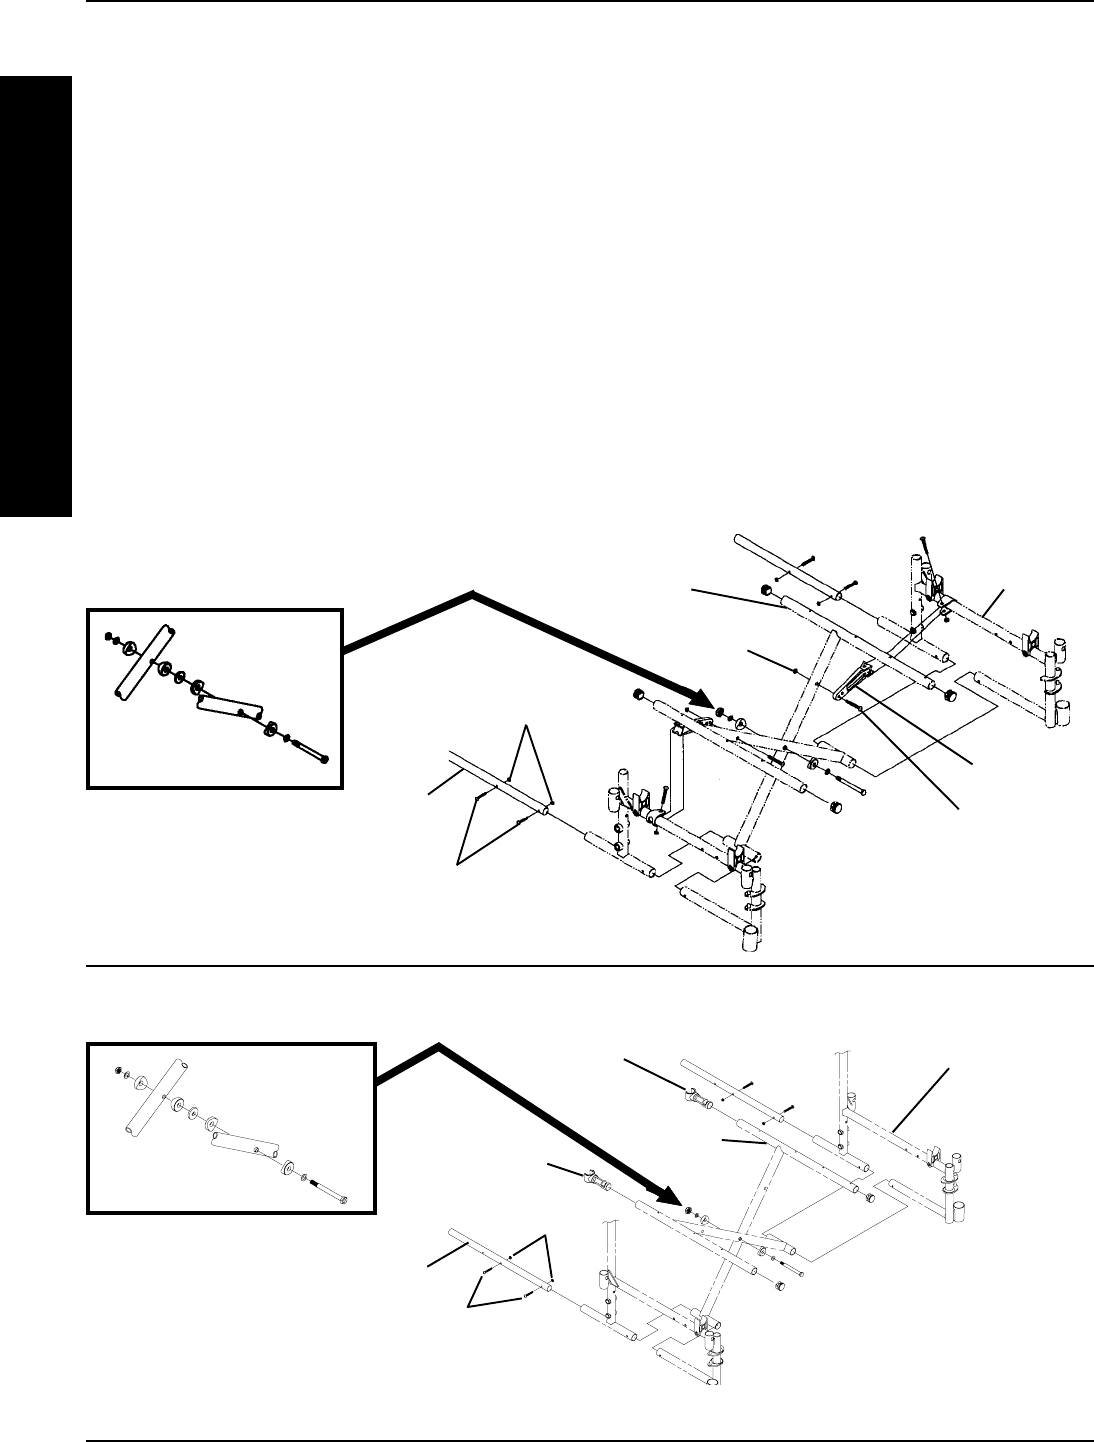
3. Remove the hardware that secures the two (2)
existing crossbraces together (FIGURE 6).
4. Perform one (1) of the following:
TRACER TITAN/SX/SX RECLINER/DLX (BUILT
AFTER MARCH 13, 2000) -
a. Assemble the two (2) NEW crossbraces together.
Refer to FIGURE 6 for hardware orientation.
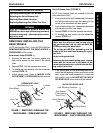
Crossbrace
Wheelchair Frame
Phillips Screw
Locknut
Insert
Tube
Seat Guide
Seat Guide
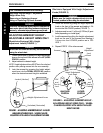
TRACER DLX (BUILT BEFORE MARCH 13, 2000)
NOTE: orientation of hex
screw, spacers, nylon
washer, steel washers and
locknut (hardware) for instal-
lation of new crossbraces.
FIGURE 6 - ADJUSTING SEAT WIDTH
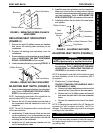
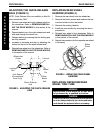
Pivot Link
Button Head
Screw
Crossbrace
Wheelchair
Frame
Locknut
Phillips Screw
Locknut
Insert
Tube
TRACER TITAN, TRACER SX, TRACER SX RECLINER and
TRACER DLX (BUILT AFTER MARCH 13, 2000)
NOTE: orientation of hex
screw, spacers, nylon
washer, steel washers and
locknut (hardware) for instal-
lation of new crossbraces.