


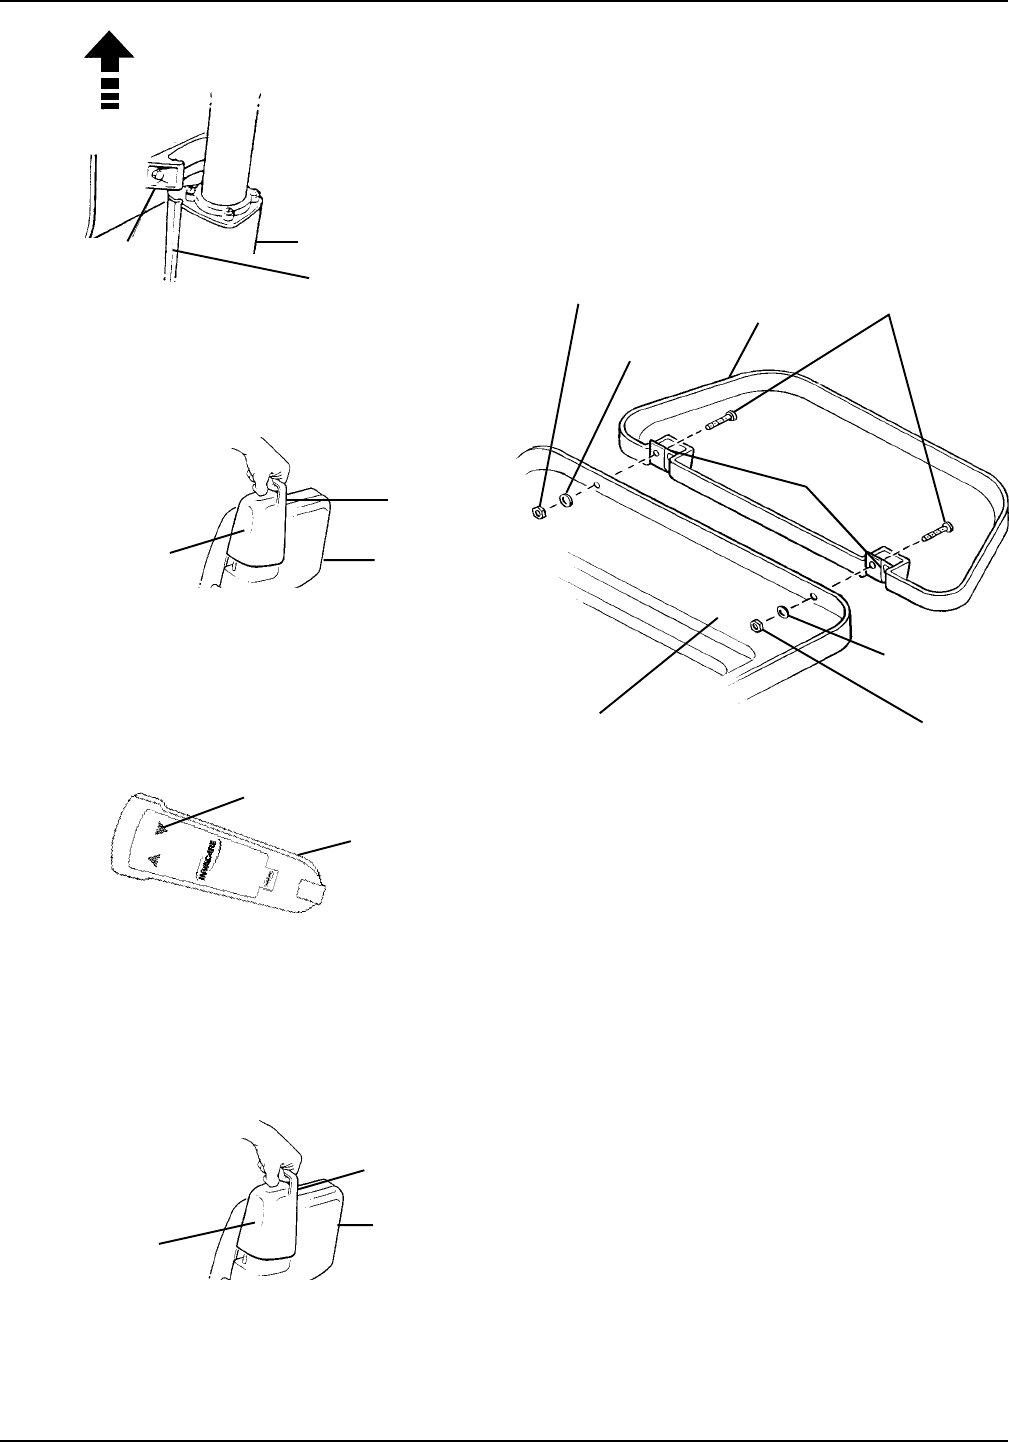
2
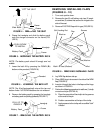
REMOVING/INSTALLING FLAPS
(FIGURES 8 - 10)
1. Turn seat upside down.
2. Remove the two (2) self locking nuts, two (2) wash-
ers and two (2) screws that secure the hinges to the
side of the seat.
3. Remove EXISTING flap with hinges (FIGURE 8).
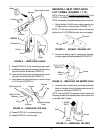
4. Lay NEW flap bottom side up.
5. Place NEW hinge into recess in the side of the NEW
flap (FIGURE 9).
6. Insert pin through the holes in the flap and the hinge
as shown in FIGURE 9.
7. Perform the following procedure to install one (1) circlip
on each end of pin (DETAIL A):
A. Place the open side of the circlip into the grooves
at the ends of the pin.
B. Position a screwdriver at the top of the circlip.
C. Apply pressure to the circlip until an audible "click"
is heard.
FIGURE 8 - REMOVING/INSTALLING FLAPS
Groove
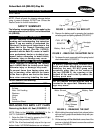
FIGURE 4 - REMOVING THE SEAT
LIFT THE SEAT
Frame
Slide Block
6. Grasp the handgrip and slide the battery pack
onto the charger connector on the frame (FIG-
URE 5).
NOTE: The battery pack should fit snugly and not
wobble.
7. Lower the bath lift by pressing the DOWN (ê)
button on the pendant (FIGURE 6).
NOTE: The lift will automatically stop at the top and
bottom limits if UP/DOWN buttons are not released.
8. Remove the battery pack by grasping the handgrip
on battery pack and pulling upwards (FIGURE 7).
FIGURE 7 - REMOVING THE BATTERY PACK
PULL UP TO
REMOVE
é
Battery Pack
Frame
handgrip
FIGURE 5 - INSTALLING THE BATTERY PACK
PUSH DOWN
TO INSTALL
ê
Battery Pack
Frame
Handgrip
FIGURE 6 - LOWERING THE BATH LIFT
Down
Pendant
Flap
Screws
Self Locking Nut
Washer
Bath Lift Seat (Bottom)
Hinges
Nut
Washer