USING THE SCALE
Part No. 1150696 23 Traverse Lift/Transporter
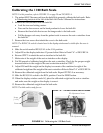
Calibrating the 1100 Bath Scale
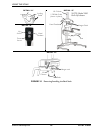
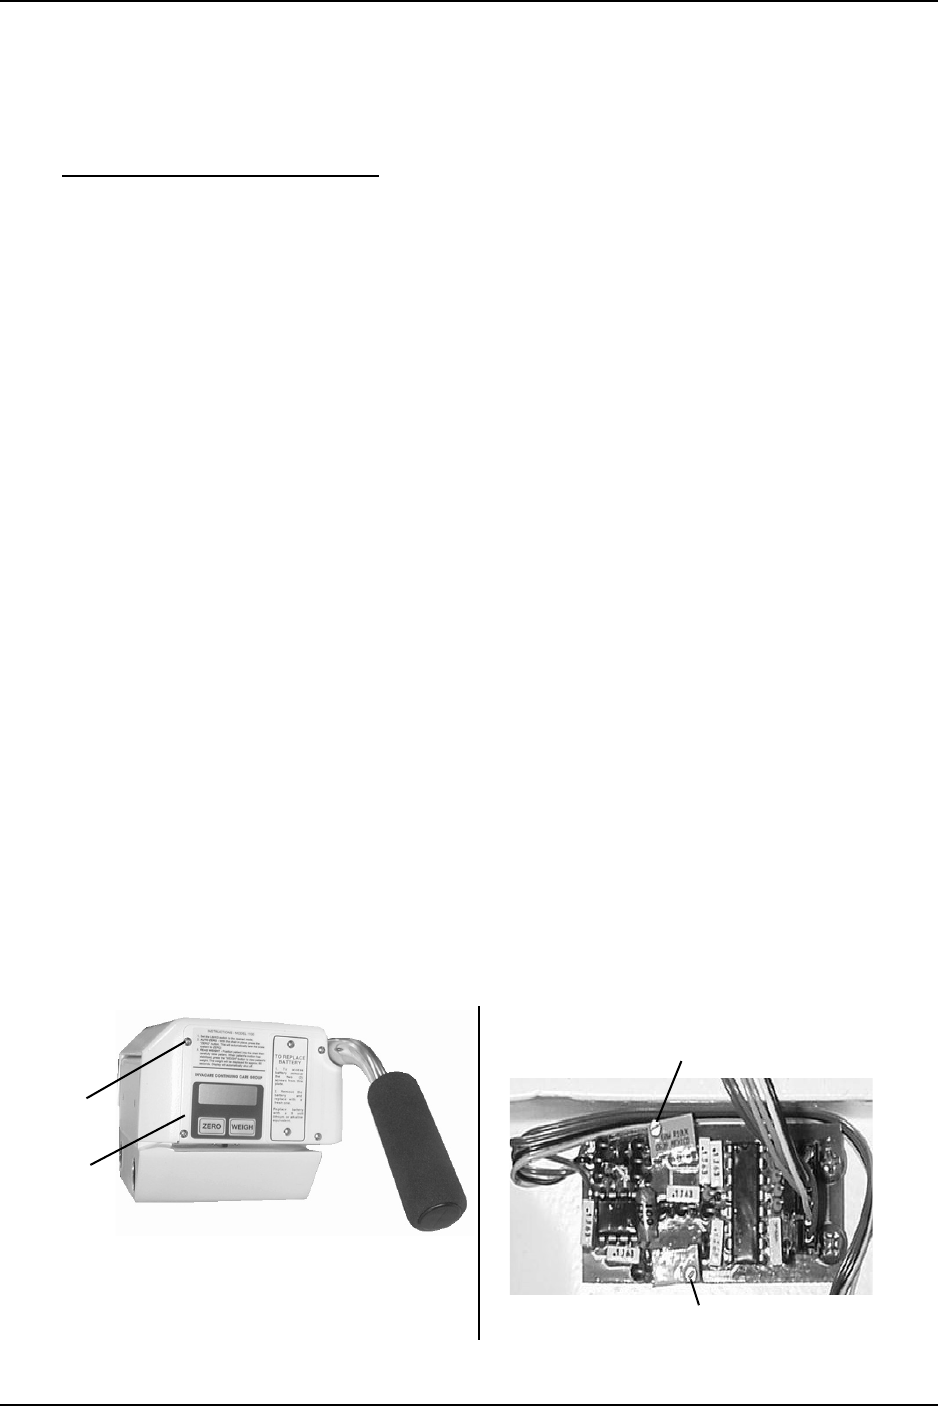
NOTE:Forthispr ocedur e, refertoFIGURE 3.1onpage20andFIGURE 3.4.
1. ThepatientMU STberemovedfromthebathlifttoproperlycalibratethebathscale.Refer
toTransferringin to/outoftheLiftoftheBathLi ftOw ner’s Manualforinstructions.
2. Removethe seat/stretcherfromthebathlift.
•Lockthetw orear lockingcasters.
•Presson thedown arrowonthehandpendanttolow erthebathlift.
•Removethe threeboltsthatsecurethehangerrodstothebathscale.
•Pullthehangerrodsaway fromthepatientscaletoremov etheseatorstre tcherfrom
thebathlift.
3. Removethe fourscrewsthatattachthecov ertotheba thscale.
NOTE:TheRUN/CALswitchislocat ednexttothedisplaywindowandis visibleafterthecover is
removed.
4. SlidetheswitchmarkedRUN/CALtotheCALposition.
5. AdjustR9sothe displayindicates+15poundoffset.Re fertoDetail“A ”ofFIGURE3.4.
6. ReverseSTEP2toattachthese atorstretchertothebathlift.
7. Makenoteoftheweightoftheseatorstretcheronthedisplay.
8. Put200poundsof calibratedweightontheseatorstretcher.Checkfor theproperweight
increaserelativetotheweightoftheseatorstretchernotedinSTEP7.
9. AdjustR18untilth eweightonthedisplayisaccurateofthecombinedweightofthe
calibratedweightandtheweightoftheseatorstretcher.Refer toDetail“A ”ofFIGURE 3.4.
10. Removethe calibratedweightfromthebathscale.RepeatSTEPS5‐9asnecessary.
11. SlidetheRUN/CALswitchtotheRUNposition.PresstheZERObutton.
12. Whenthedispl aywindowreads0.0,placethecalibratedweightontheseatorstretcher
andmakesuretheweightonthe displ ayiscorrect.
13. Removethe calibratedweightfromthebathscale.
NOTE:Thebathscaleisreadyforuse.
FIGURE 3.4 Calibrating the 1100 Bath Scale
Screw
(1 of 4)
Cover
R9 Adjustment Screw
R18 Adjustment Screw
DETAIL “A” - 1100 BATH SCALE CIRCUIT BOARD


