5. Tighten the two screws H in the end stop I.
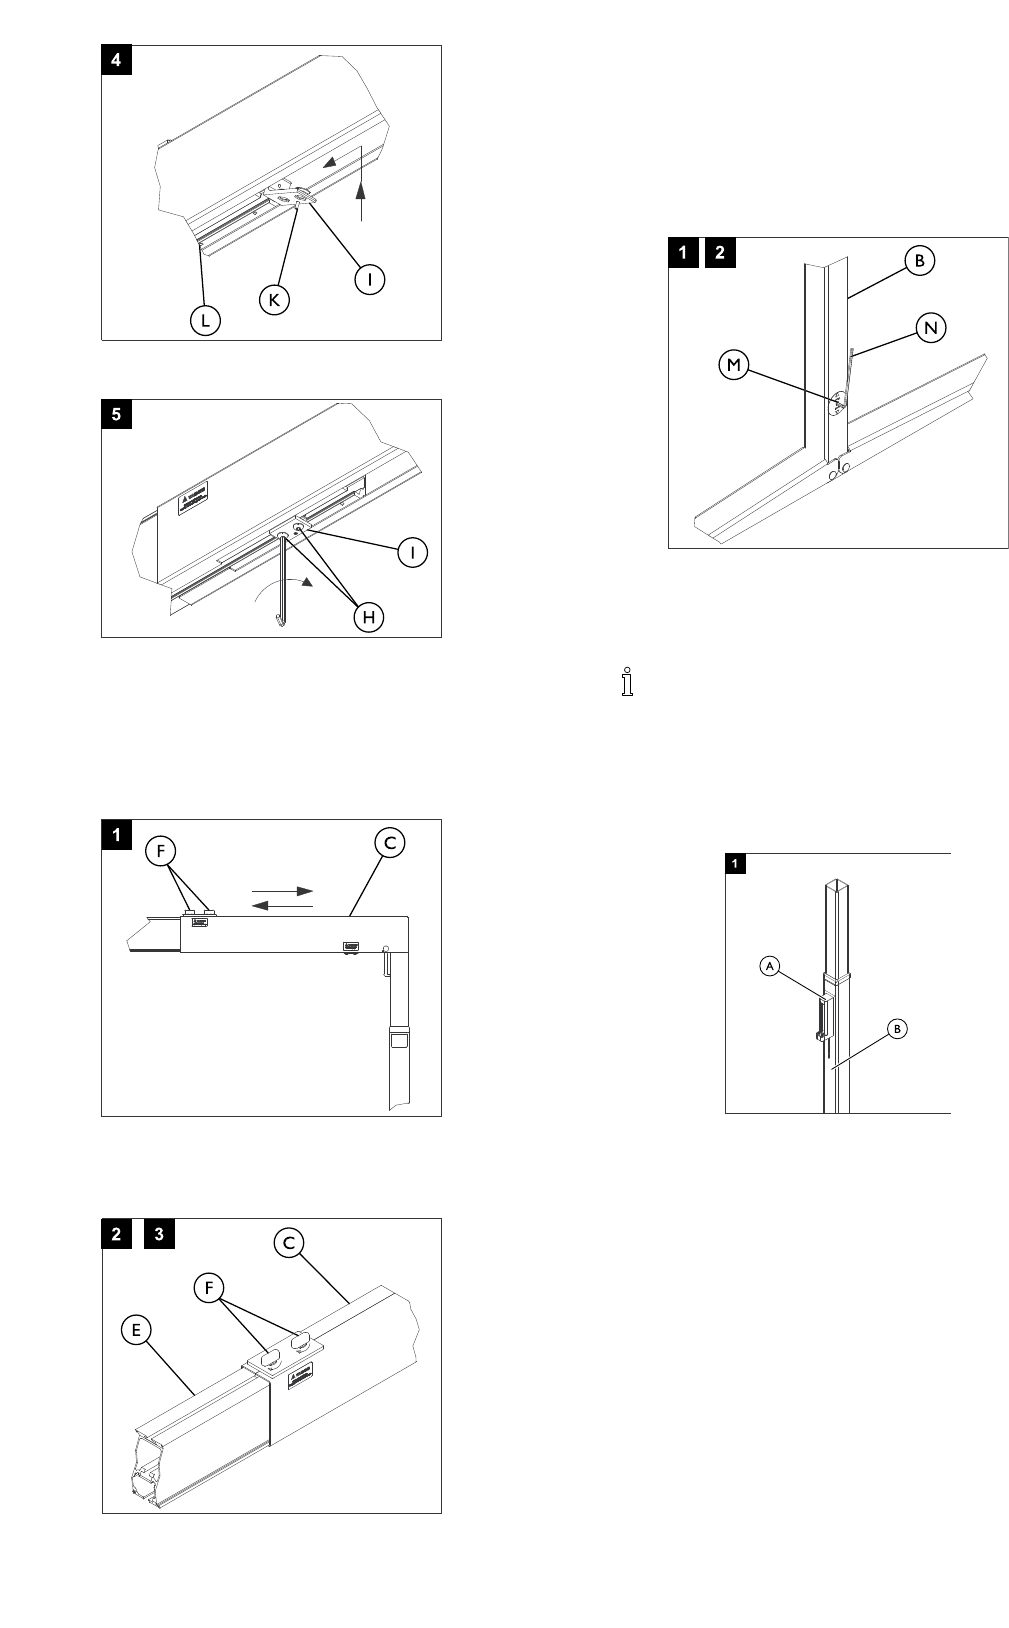
3.5 Adjusting the Width
Follow this procedure to adjust the freestanding rail system to the
room size.
1. Loosen the two yellow thumb screws F on the top the bracket
C.
2. Push or pull the top bracket C to adjust the width of the system.
3. Tighten the thumb screws F to secure the top bracket C to
the rail E.
4. Repeat STEPS 1–3 for the other side of the freestanding rail
system.
3.6 Adjusting the Height
Follow this procedure to adjust the height of the rail.
1. Locate the height adjustment socket M at the side of the vertical
pole B.
2. Insert the provided 5 mm Allen key N in the height adjustment
socket at the side of the vertical pole.
3. Turn the Allen key to adjust the height of the freestanding rail
system.
4. Repeat STEPS 1–3 for the opposite vertical pole.
5. Make sure the top bracket and rail are level.
Use a spirit level to ensure the top bracket and rail are
level.
3.7 Installing the Charging Dock
1. Use the enclosed hook and loop fastening strips (not shown)
to secure the recharging dock A to the lower portion of the
vertical pole B.
4 After Use
4.1 Disassembly
1. Lower the vertical poles to the lowest position. 3.6 Adjusting
the Height, page 5
.
2. Performing one of the following:
• Reverse the hoist installation steps to remove the hoist.
Refer to 3.4 Installing the Hoist, page 4 .
• Loosen the screws H in the end stops I and move the
end stops on either side of the hoist to secure the hoist in
position.
1183379A 5


