Anti-tippers 2 Part No 1086188
ƽ INSTALLATION WARNINGS (CONTINUED)
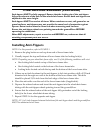
Anti-tippers MUST be fully engaged. Ensure that the locking pin of the anti-tipper
fully protrudes out of the hole on the wheelchair frame. Ensure both anti-tippers are
adjusted to the same height.
Anti-tippers MUST be used at all times. When outdoors on wet, soft ground or on
gravel surfaces, anti-tippers may not provide the same level of protection against
tipover. Extra caution must be observed when traversing such surfaces.
Ensure the anti-tipper wheels are pointing towards the ground/floor BEFORE
operating the wheelchair.
After ANY adjustments, repair or service and BEFORE use, make sure that all
attaching component parts are secure.
Installing Anti-Tippers
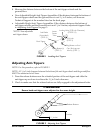
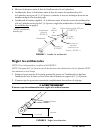
NOTE:Forthisprocedure,refertoFIGURE 1.
1. Removetheplugbuttonorendcapfromendoflowerframetube.
2. Visuallyinspectthetopandbottomoflowerframetubeforlockinghole(s).
NOTE:Dependingonyourwheelchairframestyle,one(1)ofthefollowingconditionswillexist:
•Onelockingholelocatedontopofthelowerframetube.
•Onelockingholelocatedonthebottomofthelowerframetube.
•Lockingholeslocatedonboththetopandthebottomofthelowerframetube.
3. Iftherearenoholelocationsfortheanti‐tipperstolockintoposition,drilla9/32‐inch
diameterholethroughonewallatthebottomofthelowerframetube.Thishole
shouldbeplaced15/16‐inchfromthebackedgeofthelowerframetube.
4. Placetheanti‐rattleovertheendofthelowerframetube(ifapplicable).
5. Depressthereleasebuttonsandinserttheanti‐tippers
intothewheelchairframe
tubingwiththeanti‐tipperwheelspointingtowardtheground/floor.
6. Ensurethatthereleasebuttonoftheanti‐tipperfullyprotrudesoutofthelocking
hole(s)inthelowerwheelchairframetubing.
7. RepeatSTEPS1‐6fortheoppositeanti‐tipper.
NOTE:A1½to2‐inchclearance
betweenthebottomoftheanti‐tipperwheelsandtheground/floor
MUSTbemaintainedatalltimes.


