2
Groove
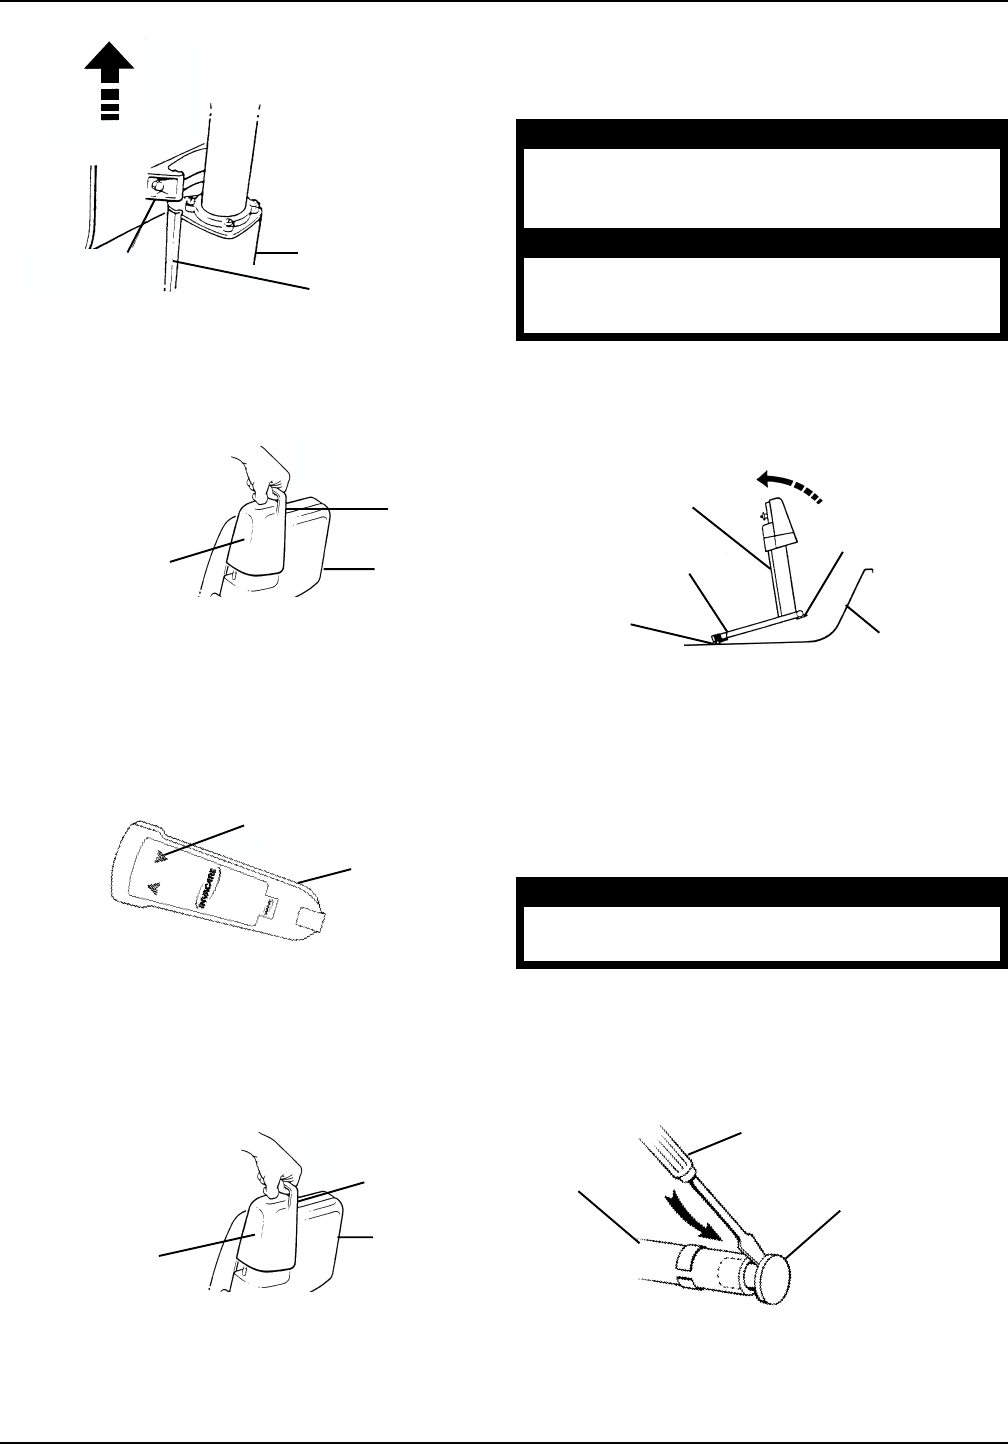
FIGURE 4 - REMOVING THE SEAT
LIFT THE SEAT
Frame
Slide Block
6. Install the battery pack by grasping the handgrip
and sliding the battery pack onto the charger con-
nector on the frame (FIGURE 5).
NOTE: The battery pack should fit snugly and not
wobble.
7. Lower the Bath Lift by pressing the DOWN (ê)
button on the pendant (FIGURE 6).
FIGURE 6 - LOWERING THE BATH LIFT
Down
Pendant
NOTE: The lift will automatically stop at the top and
bottom limits if UP/DOWN buttons are not released.
REMOVING THE BATH LIFT FROM
THE BATHTUB (FIGURE 8)
WARNING
Use proper lifting techniques to avoid in-
jury. Keep back straight and bend knees
when lifting components of the Bath Lift.
CAUTION
ALWAYS release suction cups from bathtub
bottom BEFORE removing frame to prevent
damage to the frame or bathtub.
REPLACING SUCTION CUPS
(FIGURES 9-12)
1. Lean Bath Lift backwards so that the back of the frame
is resting on the floor.
8. Remove the battery pack by grasping the handgrip
on battery pack and pulling upwards (FIGURE 7).
WARNING
Always point the screwdriver away from
your body. Otherwise injury may occur.
2. Place screwdriver behind the lip of the EXISTING end
plug (FIGURE 9).
3. Use a hammer to gently tap the back of the screw-
driver until the EXISTING end plug comes free.
FIGURE 5 - INSTALLING THE BATTERY PACK
PUSH DOWN
TO INSTALL
ê
Battery Pack
Frame
Handgrip
FIGURE 7 - REMOVING THE BATTERY PACK
PULL UP TO
REMOVE
é
Battery Pack
Frame
handgrip
1. Tilt the frame forward towards the drain or gently pull up
on the suction cup loops to release the suction cups.
2. Remove frame from bathtub (FIGURE 8).
FIGURE 8 - REMOVING THE BATH LIFT FROM
THE BATHTUB
TILT FRAME
FORWARDS
Frame
Bathtub
Suction Cup
Rubber Pad
Suction Cup Loop
Base Frame
NOTE: Suction Cup
removed for clarity.
Screwdriver
FIGURE 9 - REMOVING THE EXISTING END
PLUG
End Plug


